Just released in a new version, in Italian, BlueStacks allows you to start one or more Android virtual machines in Windows. The software (basic is completely free) allows you to run apps and video games at maximum power, much faster than the top of the Android range such as Galaxy S9 + and Oneplus 6. Integrated and available to everyone including the Google Play Store.
If you work regularly or at least occasionally with hypervisors and virtual machines, you already know its usefulness. Using a software solution for virtualization, it is possible to load completely different operating systems compared to the one installed on the host machine (called “host”). So, if you used to work with Windows, you can still install and use Linux at the same time or use another version of the Microsoft operating system (for example to install and run legacy programs that are no longer compatible with the most modern versions of Windows): Virtual machines and containers: what’s the difference .
Those who use at least Virtualbox or VMware Player know very well how difficult it is to install and run Android on a PC inside a virtual machine . Until some time ago Remix OS existed but from the middle of last year the project has been abandoned: Remix OS at the end of the line, will no longer allow you to install Android on PC .
BlueStacks: the platform that allows you to run Android on a PC without compromising on performance
BlueStacks wipes out the need to configure a virtualization solution yourself in order to install Android. At the end of the installation of BlueStacks you will find yourself with an environment perfectly optimized for running Android, in one of the most updated versions .
The developers of BlueStacks have focused a lot on performance, managing to create a virtualized Android environment that ensures performance from 6 to 8 times better than top-of-the-range smartphones such as Galaxy S9 + and Oneplus 6 when running the same Android applications and video games .
BlueStacks changes the rules of the game by revolutionizing the paradigm according to which, until yesterday, it was impossible to run video games and Android apps on PCs, enjoying better performance than those obtainable on mobile devices.
Thanks also to investments by partners Intel, AMD, Samsung and Qualcomm and to an important partnership with MSI that led to the development of a special ” MSI app player “, BlueStacks has reached a level of maturity never seen before.
The installation of BlueStacks is really simple (the developer company requires you to disable Hyper-V to avoid conflicts) and ends in a few minutes. To install, run and use BlueStacks without problems, it is essential to have at least 2 GB of free memory: we tested the software on a machine with 8 GB of RAM with about 2.5 GB of free memory; we did not detect the slightest problem.
By examining the processes in memory after starting BlueStacks and its virtualized Android environment, we found four elements running with a total weight of about 260 MB in memory ( BlueStacks, HD-Agent and HD-Player). Nothing if you consider that it is enough to keep a few Chrome tabs open to occupy a larger amount of RAM.
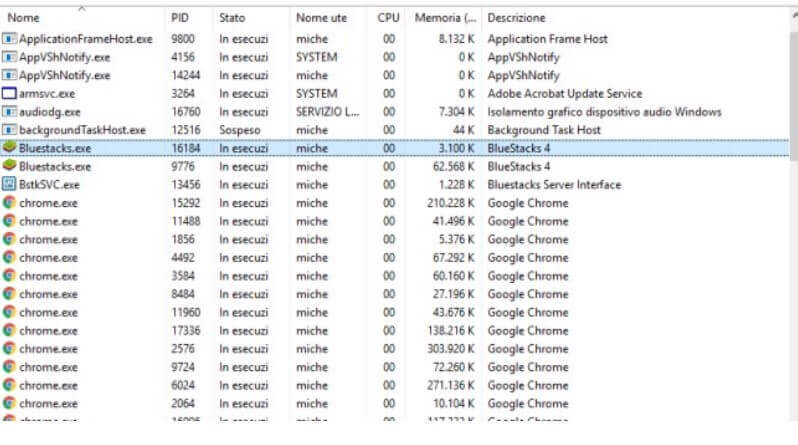
BlueStacks configuration
By installing BlueStacks in a Windows environment, all program files are usually stored in a subfolder of \ Program files . “The bulk”, including images of Android virtual machines (saved in VDI format), is instead stored in the % programdata% \ BlueStacks folder .
The installation is concluded by applying the default settings but at the end of the procedure you can press the small button at the top right, depicting a gear, to define the behavior of BlueStacks.
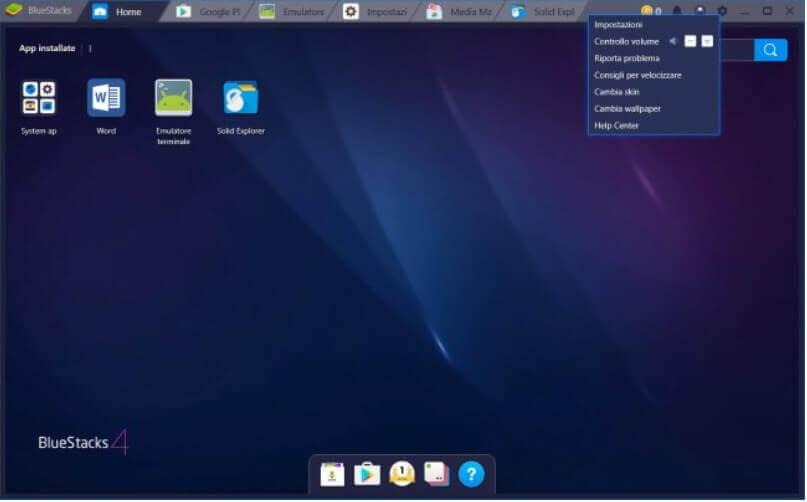
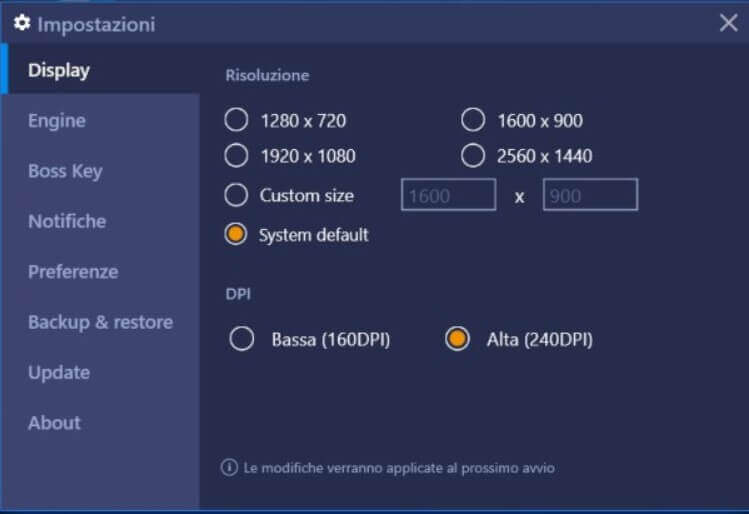
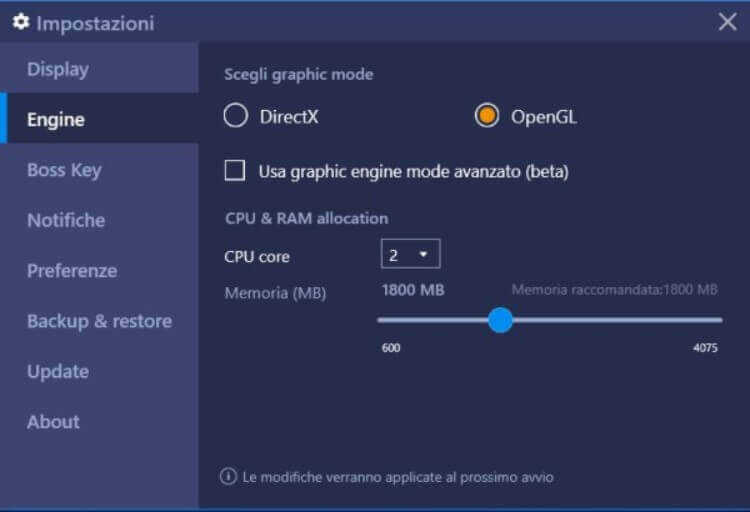
By clicking on Settings you can adjust the video resolution, the graphics libraries to be used (OpenGL or DirectX), the DPI, the number of processor cores of the host machine to be used, the memory to be allocated to the Android virtual machine and much more. .
Usually 1.8 GB temporarily reserved for BlueStacks and Android are more than enough but in special cases it is still possible to act on the appropriate setting to increase this value.
One of the aspects we appreciated most about BlueStacks is that the Android virtual machine integrates perfectly with Windows: by default, in fact, the notifications produced by the apps installed in BlueStacks appear in the lower right corner of the Microsoft operating system. So, if you were doing other activities you will always be informed of what is happening in the Android virtual machine.
By clicking on Notifications , in the BlueStacks settings, you can change the way Android notifications are handled.
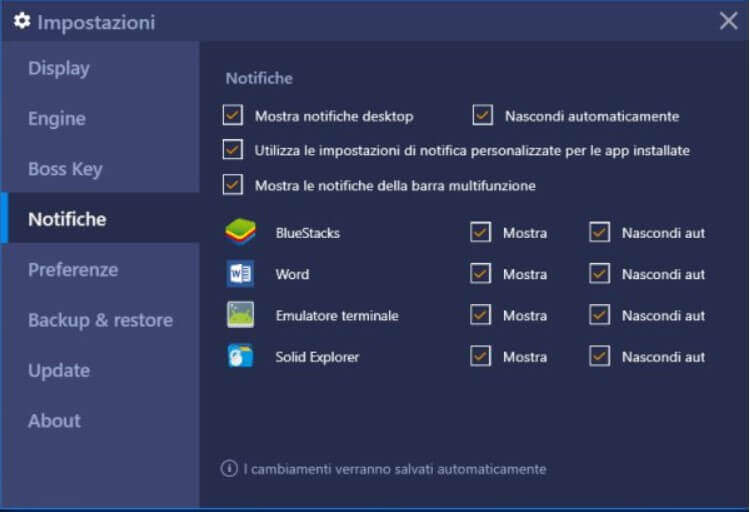
Also, by default, a new icon is automatically added to the Windows desktop for all apps you add in BlueStacks. In this way, even when BlueStacks is closed, it is possible to request the launch of that Android application.
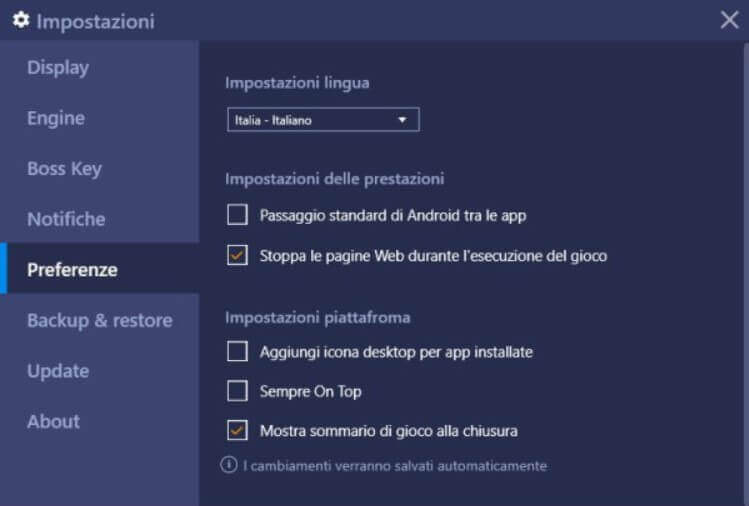
To avoid having a quickly crowded Windows desktop, just click on the Preferences item and then remove the check mark from the Add desktop icon for installed apps box .
The apps install from the Play Store and BlueStacks supports the user’s Google accounts
One of the flagships of BlueStacks is that Android apps and games can be installed from the Google Play Store and at the first start it is required (as happens on any Android tablet or smartphone) to enter the credentials associated with your user account.
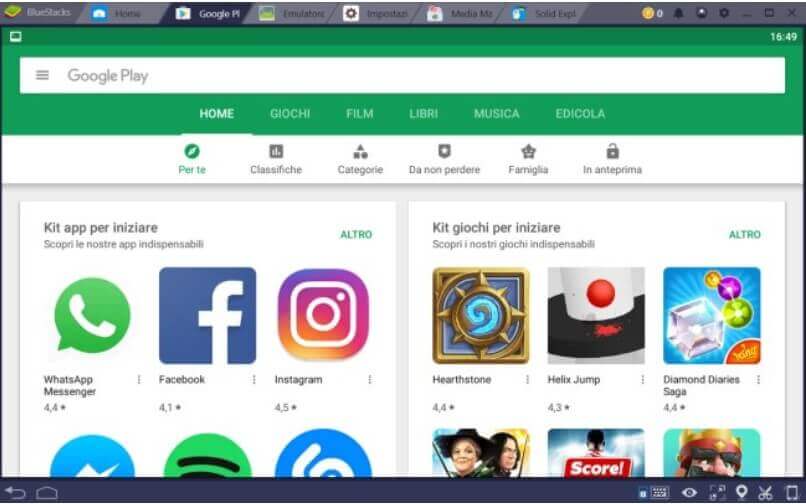
The advantages are obviously infinite : in BlueStacks it is possible to install all the Android apps published on the Google Play Store and, where necessary, also to load and run single APK packages.
Using the same Google user account that you use on mobile devices, you can start synchronization activities and immediately access data created on other devices and saved in the cloud.
The network and integration with Windows in BlueStacks
BlueStacks can be thought of as a safe and isolated environment, as is any virtual machine.
The Android environment of BlueStacks, however, is by no means a “sealed chamber”: first of all the network interfaces (Ethernet or WiFi) present on the host system are automatically detected and used.
BlueStacks, from the first start, is capable not only of communicating on the Internet but also of accessing all systems connected to the local network.
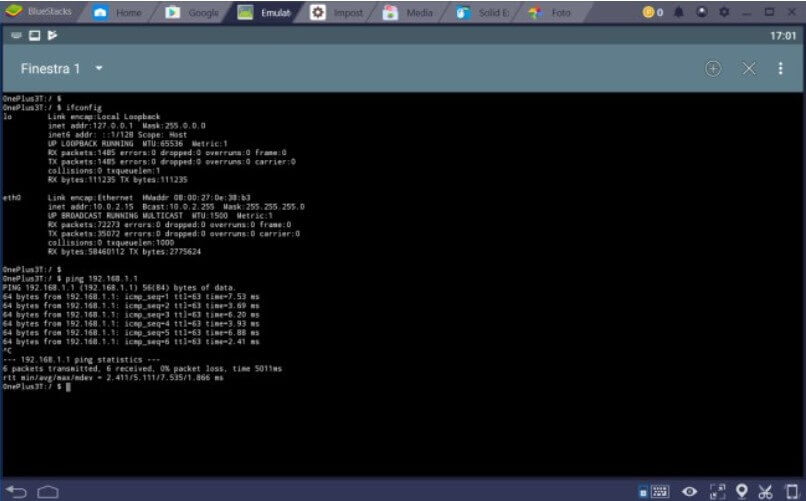
Although BlueStacks uses the 10.0.2.1/24 subnet (the subnet mask is 255.255.255.0; see Subnet mask, what it is and what it is for ), the LAN network to which the host system is connected is visible without problems (see the ping command 192.168.1.1 in the figure).
A further proof is obtained by installing the excellent Solid Explorer file manager ( File manager , the best apps to use on Android ): if you try to click on the “+” icon at the bottom right then configure access for example to a shared folder (via SMB / Samba for example) you can immediately use the shared resources within the local network.
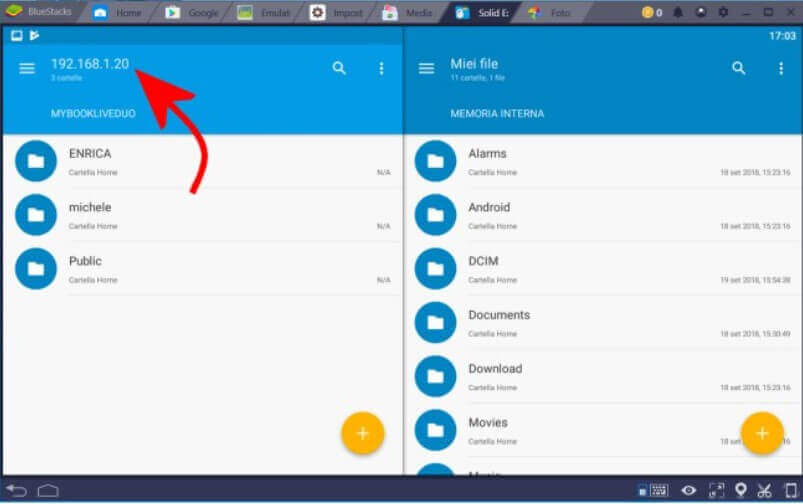
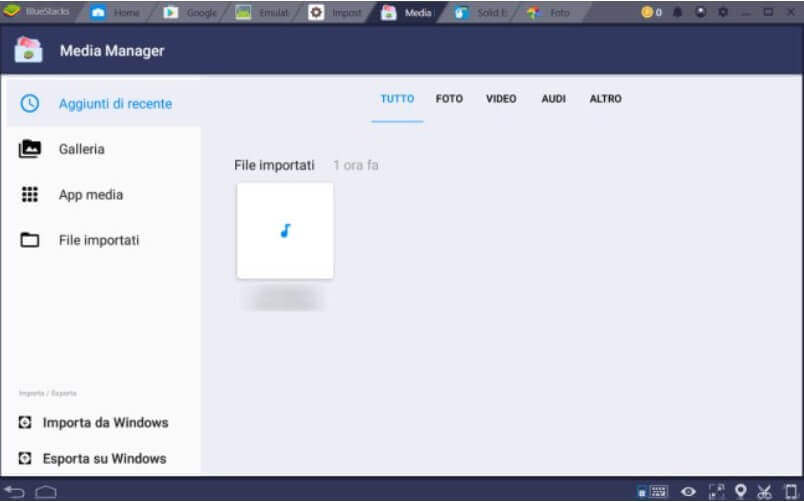
Not only. For the less experienced, BlueStacks software engineers have established a two-way link between the host PC and the Android virtual machine. To use it, just go to the BlueStacks Home screen , click on System app then on Media Manager .
Here, using the Import from Windows and Export to Windows buttons, you can open any folder stored on the host PC drives from BlueStacks and copy files; you can also save the files stored in Android by copying them to the “underlying” Windows machine.
A PC gaming platform that outclasses any top-of-the-line Android device
As we mentioned in the introduction, BlueStacks was born with a primary objective, that is to offer the user performances never seen with Android video games, not even on top of the range devices .
By clicking on the App center icon , you can find all Play Store games that owners of an Android device know, along with some tips from BlueStacks.
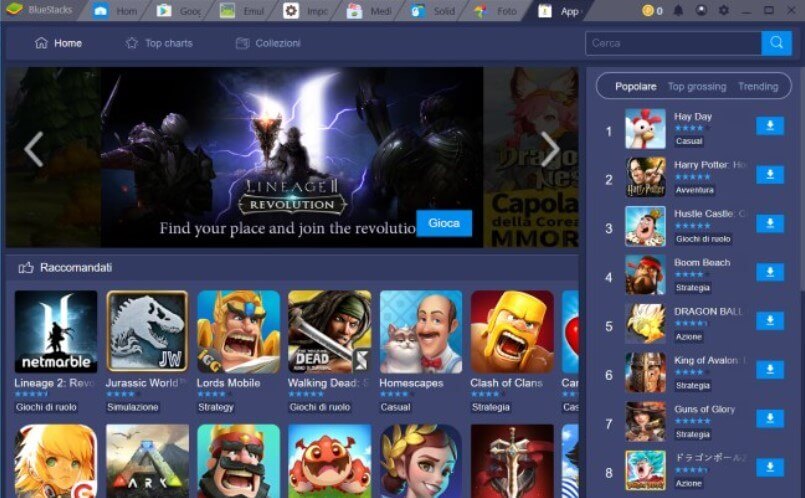
BlueStacks engineers looked at a wide range of data and used machine learning to automate keymapping management in most Android video games. Those who install BlueStacks will therefore be able to enjoy unparalleled performance on PCs even in videogames with the possibility of using keyboard, mouse, gamepad and other input devices.
BlueStacks: Free or Paid
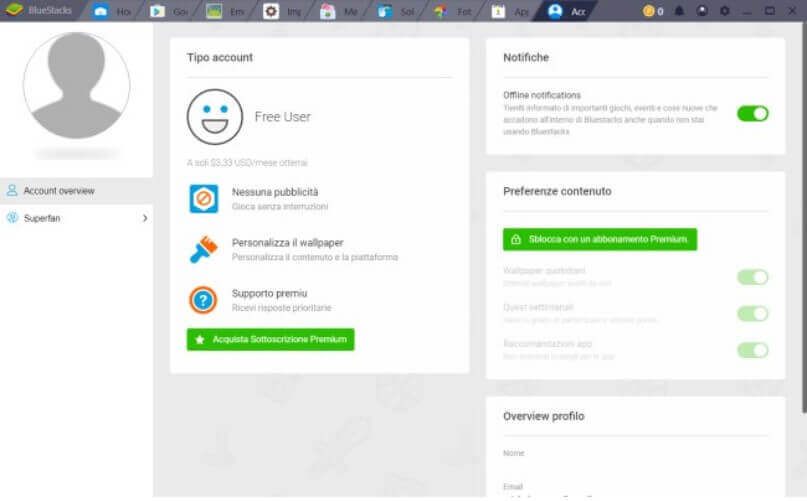
BlueStacks uses the classic freemium approach : the vast majority of features are usable without paying a cent. By purchasing the Premium version of BlueStacks you will completely eliminate the appearance of advertisements.
In addition, the new BlueStacks World offers gamers the opportunity to accumulate points for free (simply by playing) and with them redeem the Premium version without putting their “wallet”.
The latest version of BlueStacks can be downloaded for free by referring to the official website .
—
Some notes : the version of Android used in BlueStacks can be verified by installing for example the Terminal Emulator app then typing getprop ro.build.version.release at the command line.
The ifconfig command allows you to verify the configuration of the virtual network interface used by the BlueStacks virtual machine.
BlueStacks also allows you to create multiple instances so use more than one Android virtual machine: just click on the Instance Manager icon at the bottom.
All running applications are collected in the convenient bar at the top and are presented there in the form of a tab (each tab can be closed by clicking on the corresponding “X”).

A tech-savvy writer with a knack for finding the latest technology in the market, this is what describes John Carter. With more than 8 years of experience as a journalist, John graduated as an engineer and ventured soon into the world of online journalism. His interest includes gadget reviews, decoding OS errors, hunting information on the latest technology, and so on.


