We are going to explain how to record the screen of your Mac using the native recorder of macOS, similar to when we told you how to record your Windows screen. It is a somewhat hidden tool, but when you know how to launch it, it will allow you to take screenshots or record the screen in several different ways. It is very easy to use, and you do not need to install anything.
But just in case things are not clear to you, we are not only going to explain how to do it, but we are going to guide you step by step through the process so that you do not have any doubts. It will all start with a keyboard shortcut to launch the recorder, and then we’ll tell you how to use it once you’ve launched it.
Record your Mac screen

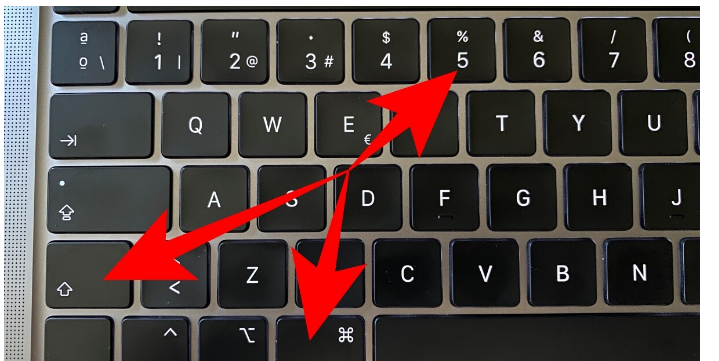
The first thing you have to do is press the Shift + Command (⌘) + 5 keys at the same time. This is the specific shortcut to launch the screen recorder. The screen recorder will also allow you to take image captures, although if you want to take a screenshot of the entire screen, just press Shift + Command (⌘) + 3.
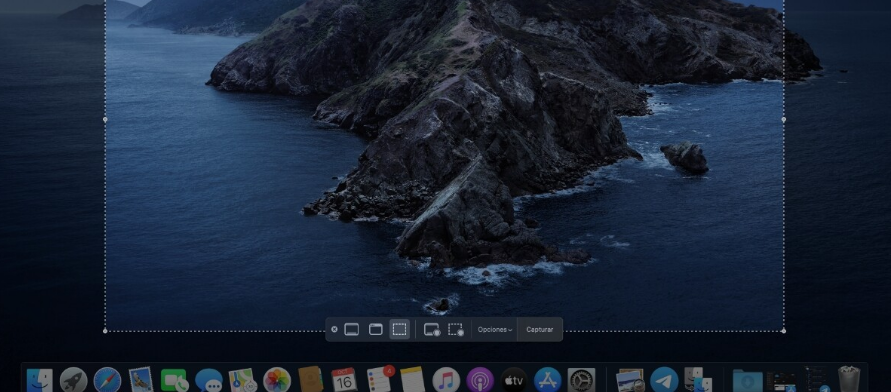
Once you press that key combination, you will see that a selection box appears on the screen, and below, you have an options bar. The box marks the selection if you only want to record a specific area, while in the small bar below, you will find the recording options.
The capture options bar is divided into several parts. The first three icons are for screenshots, and the next two are for recording the screen of your Mac. In the first icon, you can choose the option to record the entire screen (1), while in the second, you will record only the part of the screen that you have selected (2) with the crop box that you have above. Just click on one of these icons to start recording.
To the right of those two buttons, you have a button to display the recording options. In them, you can choose where you want to save the screen recording or choose a timer so that there is a countdown before starting to record. Here, you have to set this up before tapping on one of the two recording options.
When you start recording, in the top bar of macOS, you will see a circular icon with a square inside. This icon indicates that it is recording, and you have to click on it when you want to stop the screen recording. It’s like a stop button. And that’s it. When you finish recording, the video will go to the desktop or the folder you selected in the options.


