Today we will explain how to make an automatic index in Word, a system with which you can quickly organize the different chapters of a text with just a couple of buttons. Of course, for everything to work correctly you will have to have given the correct format to these titles, so you will have to be proactive beforehand.
It is an option of Microsoft’s word processor, which is a bit hidden. But when you find it, it can be beneficial, and that is why we will explain step by step how to locate and use it.
Create an automatic index in Word
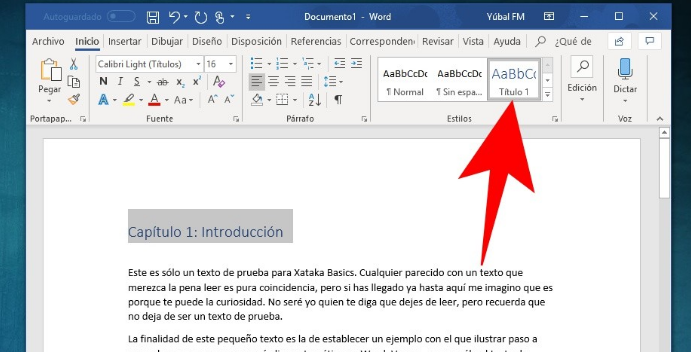
The first thing you have to do is organize your text. For the automatic indexes to be generated correctly, you have to put the titles you want to appear in Heading 1 or Heading 2 formats. If you want them all to be the same, but Heading 1 on all of them, but if you want some chapters to be integrated into others, use Heading 2 on them so that they are inside the Heading 1 they had before.
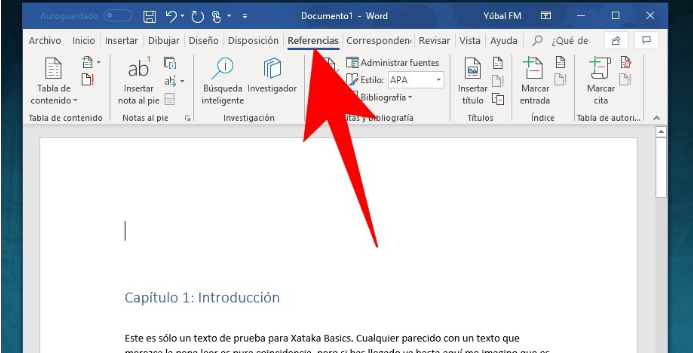
Next, select within Word the exact place where you want the table of contents to be inserted. When you have it, click on the References option from the top menu of options.
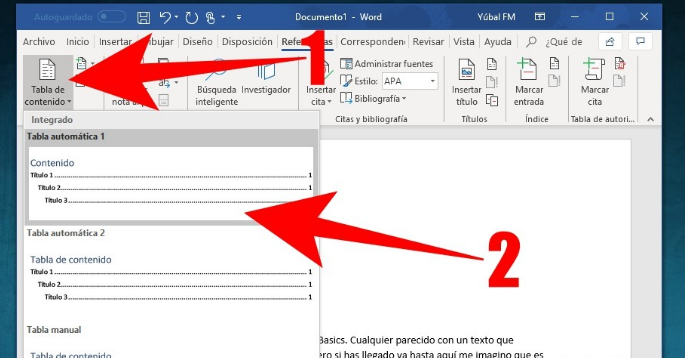
Once you are inside the References section, click on the Table of Contents option (1) to display a pop-up menu. In this menu, click on the automatic table format you want to use (2), and it will be inserted automatically in the place where you were writing. You will not have to do anything, since Word will use the titles that you had assigned.
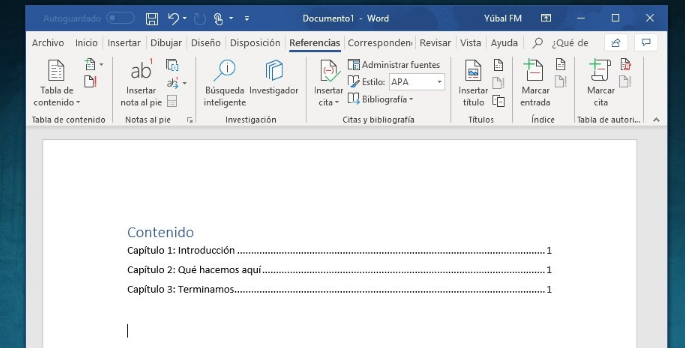
If all the titles are in the same title format, the table will be like the one you see in the screenshot above, and all the chapters or titles will appear at the same level within the table of contents.
If you have been alternating between the Heading 1 and Heading 2 formats, the table will be like the one in this other screenshot that you see on the screen. In it, the titles that you put in Title 2 format are within those of Title 1, which will allow you to organize the texts when there are different sections with several sections in each one.
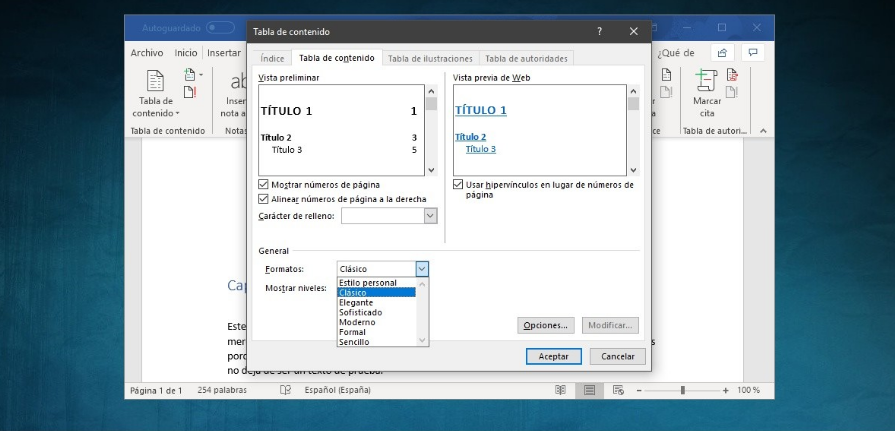
By default, Word uses a specific font and periods to join titles with the page number. But you can change all of this if you click on Custom Table of Contents, which will allow you to create a table by controlling various settings for its appearance.
If you choose this option, a window will open in which you can see the different options that you have of your choice. You can choose, for example, if you want to show the page numbers where the titles are, or if you want to put a line between the title and the page number. You can also choose the character with which to fill that line, and even choose a format or font. You will always see the result in two previews.
Finally, you also have to know that if you keep the Control key pressed while you press one of the titles of the table you will go directly to it in the text. This will allow you to easily navigate between long content that you are creating, although as long as you are being organized when it comes to using the appropriate formats.

Sharlene Meriel is an avid gamer with a knack for technology. He has been writing about the latest technologies for the past 5 years. His contribution in technology journalism has been noteworthy. He is also a day trader with interest in the Forex market.


![How to Watch UFC 303 Live Stream Free [Updated 2024] UFC 259 Live Stream Free](https://techsmartest.com/wp-content/uploads/2022/03/UFC-259-Live-Stream-Free-100x70.jpg)