We explain what it means if the credentials for accessing the various online services (email and password) were present in the Have I been pwned databases, therefore known to cybercriminals. How to behave to verify the security of passwords.
There is a network service, known for years and very much appreciated, which allows you to understand if your user accounts were involved in any attack. It’s called Have I been pwned, were pwned in English is short for ” perfectly owned ” or “perfectly / completely owned”.
Why this language? Why Have I been pwned is a database that contains information on all user accounts worldwide that have been involved in the theft of data by cybercriminals on different websites that are completely different from each other. Other.
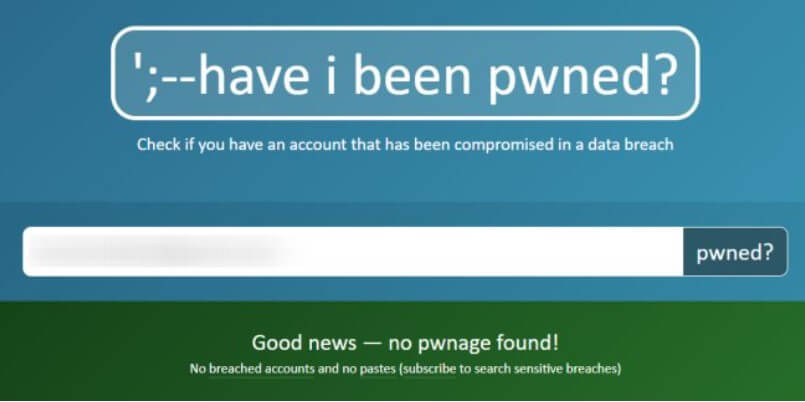
Try visiting the Have I been pwned home page and type your email address in the search box ( email address ): rest assured the site is safe, and nobody will use your email account to send you spam.
The service will respond immediately with the phrase Good news – no pwnage found! On a green background or with the formula Oh no – pwned! On a red background.
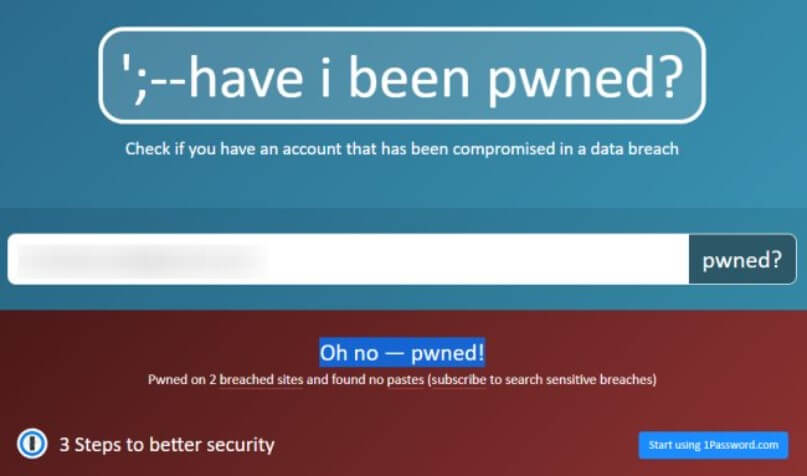
The first case means that no account where the specified email address was used was involved in any attack.
In the second case (message Oh no – pwned! ), We suggest you scroll the page to the paragraph Breaches you were pwned in.
Here are data thefts in which accounts belonging to the email address entered above were involved.
Let’s take the example of an @ gmail.com account which, when entered in Have I been pwned, is indicated as Oh no – pwned! .The appearance of the message – and this should be noted – does not mean that the Gmail account itself has been hacked along with the contents it contains; instead, it means that your account – in which you used the @ gmail.com account as your username – was involved in the theft of data by groups of cybercriminals.
In other words, if you had registered for the online service Y by indicating the email address @ gmail.com as your username and the Y service had been the subject of a cyberattack that had led to the theft of data by third parties (e.g., example, the login credentials of Y users), the @ gmail.com address will be pwned and Have I been pwned will show the warning Oh no – pwned!. It is not certain that the account’s password is known to cybercriminals because, in many cases, the operators of online services protect it using a hashing algorithm.
In short, the password is not stored in clear text but is saved in an encrypted format that works in a single direction. It allows the user’s password to generate a corresponding encrypted version but does not allow the encrypted version to trace the password in cleartext.
The choice of the best and safest hashing algorithm plays a fundamental role: in some cases, cybercriminals, using brute force attacks and/or so-called rainbow tables, can try to reverse the function of hash and trace users’ real passwords.
Besides, users who are careless about the security of their data and their online identity can make life easier for attackers by reusing the same passwords on several different services: a practice, this one to be avoided like the plague.
We said that Have I been pwned, corresponding to Breaches you were pwned in, indicates where the user’s login credentials (corresponding to the email address typed in the search box) have been stolen.
The author of Have I been pwned, Troy Hunt, obviously has no connection with the attacks that have been launched on the various online services over time: Hunt does, however, a thorough job that is really precious and often poorly understood by users.
The creator of Have I been pwned constantly checks the activity carried out on the forums dedicated to hacking and cracking, what is uploaded on sites for sharing content (such as Pastebin ), probes the dark web to identify the publication of data and user credentials attributable to old and new cyber attacks.
Just in these days, Hunt has added the data contained in a vast archive that contains millions of usernames and passwords.
How to check if your passwords are known to cybercriminals
The fact that some of your credentials have been an integral part of cyberattacks over the years shouldn’t leave you astonished. At the end of each page posted on Have, I have been pwned is a long list of services that have been targeted by cybercriminals and have reported data-stealing from their servers.
When these situations arise, the important thing is immediately to change your passwords starting obviously from the services that have suffered a cyber attack and possibly activate two-factor authentication, too often “snubbed”.
And once again, one of the best tips is to make sure you never use the same password on multiple online services.
For those wishing to investigate better, Troy Hunt has also made the Pwned Passwords additional service available for some time now. By typing in your password, you can know if it is present in the site archives and therefore involved in stealing data at some provider.
Hunt has repeatedly clarified that he does not keep the plaintext passwords involved in the various attacks for security reasons but only the corresponding hashes.
Typing a password, therefore, Have I been pwned immediately calculates the SHA-1 hash and verifies the presence of the same hash in its database ( SHA-1 is one of the most famous and used hashing algorithms ).
If you don’t like writing your passwords on a web page like this, although protected thanks to the use of HTTPS, a secure protocol such as TLS 1.3, a reliable algorithm for key exchange (X25519), and an equally secure cipher (AES_128_GCM), there is a way to check passwords offline without exchanging any data via the Internet.
The first fundamental step is to point the browser at this page and then scroll down to the Downloading the Pwned Passwords list paragraph.
You will have to click on the Cloudflare button corresponding to the SHA-1 line, ordered by hash.
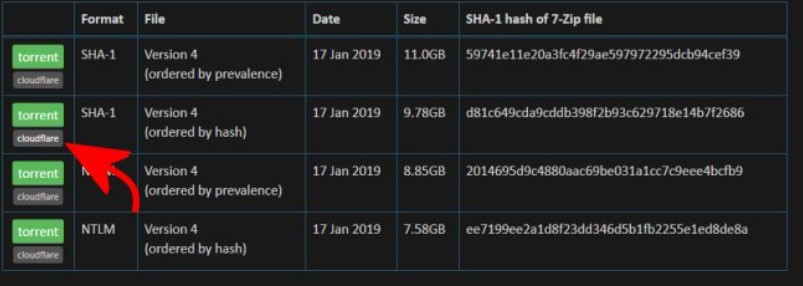
This is the continuously updated file by Hunt, which contains the hashes of all the passwords “leaked” by cybercriminals in the course of known attacks carried out to date over the years.
The file is very heavy (it is on the order of 10 GB), and once the archive has been decompressed, the text file it contains ( pwned-passwords-sha1-ordered-by-hash-v4.txt ) weighs about 23 GB (so make sure you have enough free space).
Once the text file has been unzipped, we suggest you simply rename it to pwned-passwords.txt .
Do not try to open it because, in most cases, given its considerable size, this will not be possible.
These are the first 10 rows that now contains the file:
000000005AD76BD555C1D6D771DE417A4B87E4B4: 4
00000000A8DAE4228F821FB418F59826079BF368: 2
00000000DD7F2A1C68A35673713783CA390C9E93: 630
00000001E225B908BAC31C56DB04D892E47536E0: 5
00000006BAB7FC3113AA73DE3589630FC08218E7: 2
00000008CD1806EB7B9B46A8F87690B2AC16F617: 3
0000000A0E3B9F25FF41DE4B5AC238C2D545C7A8: 15
0000000A1D4B746FAA3FD526FF6D5BC8052FDB38: 16
0000000CAEF405439D57847A8657218C618160B2: 15
0000000FC1C08E6454BED24F463EA2129E254D43: 40
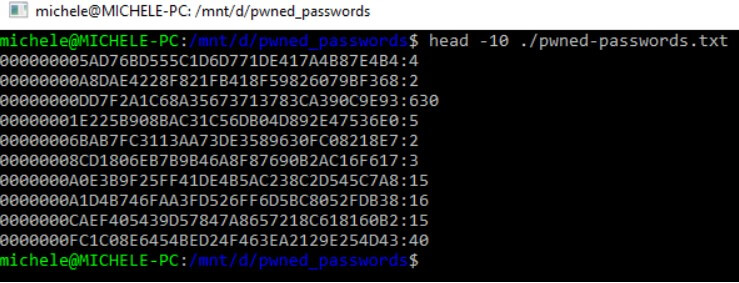
As you can see, the first part of the line, before the symbol: is the hash of the single password; the second (the numerical reference) indicates how many times Hunt detected the same password in the various attacks’ files. The hashes with many occurrences are those corresponding to passwords that are widely used by users.
If you try to write test123 on Pwned Passwords, you will get more than 96,000 occurrences.
Use a handful of Linux commands to check the reliability of passwords.
Even those who do not have a Linux system but use a Windows 10 machine can carry out the test quickly. By installing the Linux bash in Windows 10 (see Linux in Windows: how, when, and why to use it ), you will be able to issue all the commands necessary for the command line checks.
Let’s see how to check the presence of your passwords in the Have I been pwned list from Windows 10 without sending any data over the network:
1) Assuming Linux bash installation in Windows 10, just type bash in the search box of the operating system.
2) Go to the folder containing the pwned-passwords.txt file . In our case we typedcd / mnt / d / pwned_passwords because the file is located in the D: \ pwned_passwords folder.
3) Type the command echo -n ‘ test123 ‘ OpenSSL dgst -sha1 -hex to find the SHA-1 hash of your password. The password to be transformed with the hashing algorithm must be appropriately replaced with test123 .

4) Select the password SHA-1 hash and press Enter to copy the string to the Windows clipboard. In the example, the hash 7288edd0fc3ffcbe93a0cf06e3568e28521687bc must be selected and copied .
5) Type y = “7288edd0fc3ffcbe93a0cf06e3568e28521687bc” obviously substituting the correct hash value for your password and press Enter.
6) Finally type grep “$ {y ^^}” ./pwned-passwords.txt and press Enter. In this way, the password hash will be converted into uppercase alphanumeric characters (this is how the file downloaded from Have I been pwned is structured ) and searched in the local file pwned-passwords.txt .

7) The search will last several minutes but Windows will continue to be usable: you will only see a rather marked use of the hard disk by the Linux grep command .

8) At the end of the analysis of the entire pwned-passwords.txt file , if the password corresponding to the SHA-1 hash indicated should be detected, an output similar to the one in the figure will be obtained.

As you can see, the number of occurrences indicated (in the example of the test123 password ) is the same as that reported on the Have I been pwned site.
Perform a password check with Keepass
The popular password manager Keepass, a free and open-source software.
As an alternative to the procedure described above, if you were a Keepass user and used this program to manage your credentials, simply download and install the HIPB Offline Check plugin.
As the name suggests, HIPB Offline Check allows you to check the Have I been pwned password database always in offline mode, without sending any data over the network.
After copying the HIPB Offline Check in the Keepass plugins folder, just start the password manager, go to the Tools menu, HIPB Offline Check and select the pwned-passwords.txt file previously extracted to disk.
At this point, to check the presence of a single password in the Have I been pwned database, just double click on the corresponding Password column.
Alternatively, you can make multiple selections, again from the Keepass interface, then click on Selected items, Have I Been Pwned database.
In the new Have I been pwned column, the HIPB Offline Check plugin will indicate whether or not the corresponding password is known to cybercriminals.

I’m Mr.Love . I’m admin of Techsmartest.com


