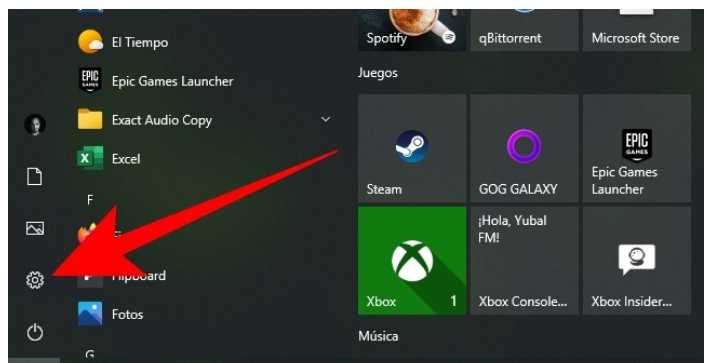
We are going to explain how to format Windows 10 step by step, an extremely simple process. Formatting a hard drive means erasing all the data on it to start from scratch. In Windows, it is not necessary to format the hard drive, it will be enough to restore Windows to be able to leave it as if you had just installed it.
And this is the process that we are going to explain to you step by step. There is a way to do it without losing your files, but we are going to show you the way to restore it by deleting everything as if you were to format the disk. Therefore, it is essential that you keep a copy of your files or those that you do not want to lose on an external hard drive, or simply that you make a backup copy of Windows just in case.
Reset Windows 10 from scratch

The first thing you have to do is enter Windows Settings. To do this, you have to click on the gear button that you will see both in the left column of the start menu and in the Action Center where Windows notifications are displayed.
Once you enter Windows Configuration, you have to go to the end of everything and click on the Update and Security section, which is the last one that appears in the main configuration menu.
Once you are in the Update and Security section in Windows settings, click on the Recovery section (1) in the left column. When you are there, click on the Start button of the Reset this PC (2) option that will appear in the first place.
Next, you will come to the most important decision you must make in this process. You can choose to reset only Windows settings while keeping your files, but if you want the closest thing to a clean format, you should choose the Remove All option to erase all data on the hard drive. Remember that in order not to lose them, you must have copied them to an external hard drive or another site before.
Next, you must choose whether you want to download the latest version of Windows from the cloud to install it or use the version you currently have. If you don’t mind that the process takes a little longer, choose the option to download from the cloud, which ensures you have the latest update. If you use the local reinstallation, it will look for the copy of Windows on your computer, and if it is not there, it will be downloaded from the cloud anyway.
You will now reach the Additional Settings step, where you will simply be shown what you have chosen in the previous steps for you to review. Here, all you have to do is click on the Next option to continue with the process.
And after you have gone through your options, you will go to the last screen, which is where you must decide whether to go ahead with the Windows format or cancel it. If you go ahead there will be no going back, and you will lose the data while the computer is left unusable for a few minutes, or even just over an hour. If you are satisfied, click on the Reset button to start the Windows formatting process.
And that’s it. Doing this will start the process to reset Windows by erasing all your data, just as if you were formatting it. This can take up to an hour, and the computer will automatically reboot several times, showing you different screens at different points in the process as you progress. Now, patient, get away from the computer for a while, and let it work.
When everything is finished you will have to start configuring Windows as if you had just bought the computer and were configuring it for the first time. Here, you can make changes that help maintain your privacy, although the most important thing is that you sign in with the same Microsoft account that you had, yours unless you want to start using another. You will only have to follow the steps, which are quite simple.

Sharlene Meriel is an avid gamer with a knack for technology. He has been writing about the latest technologies for the past 5 years. His contribution in technology journalism has been noteworthy. He is also a day trader with interest in the Forex market.


![How to Watch UFC 303 Live Stream Free [Updated 2024] UFC 259 Live Stream Free](https://techsmartest.com/wp-content/uploads/2022/03/UFC-259-Live-Stream-Free-100x70.jpg)

