Creating a proper ID picture has always been a pain in the neck – that is just the sad truth of life. It‘s always the same – whenever you need a passport or visa photo, you have to trudge to some crowded photo studio or scout for a photo booth at a local Walmart or Walgreens. And your troubles don’t just end there. First off, you need to pay a considerable $15 to get your photo taken. And what if you don’t quite like the way you look in it? Well, you have to pay all over again and pray that this time you come out looking like your normal self.
That all sounds quite uninspiring and can easily kill all the buzz you might be feeling, for instance in advance of your trip. Could there be a better and easier way to make your ID photos? The way that wouldn’t rob you of time, money, and give you the result you’d be satisfied with? Luckily, there is! All you need is your trusty iPhone and a convenient specialized app. It’s time we looked up how to take a passport photo on iPhone with Passport Photo & ID Maker.
Perfect Tool for ID Photo Making
This nifty application was created for those people who value their time and money. The app lets you create 100% approvable passport and visa photos in a few taps. It is equipped with all the latest requirements for IDs for 130+ countries. Besides, it is really intuitive to use, so it will only take you a couple of minutes to create an ID image that will comply with all the standards. Let’s have a closer look at the process, shall we?

Tips for a Proper Photo
Before you actually start preparing your passport or visa photo, there are a few ground rules that you need to know. First, you need to prepare the perfect background. Make sure that you don’t shoot against some patterned or way too dark backdrop. Take away all the things that might get into the frame – lighting fixtures, house plants, you name it.

Practice your pose. First of all, you need to place yourself 5 feet ( approx. 1.5 meters) away from the camera. Sit straight and look directly into your iPhone camera. It’s better to have an assistant for them to snap the picture when you are ready. Refrain from smiling, frowning or making any facial expression that is not neutral and relaxed. Opt to wearing formal clothing with no headwear (unless your religion demands it).
Snap and Crop Right Away
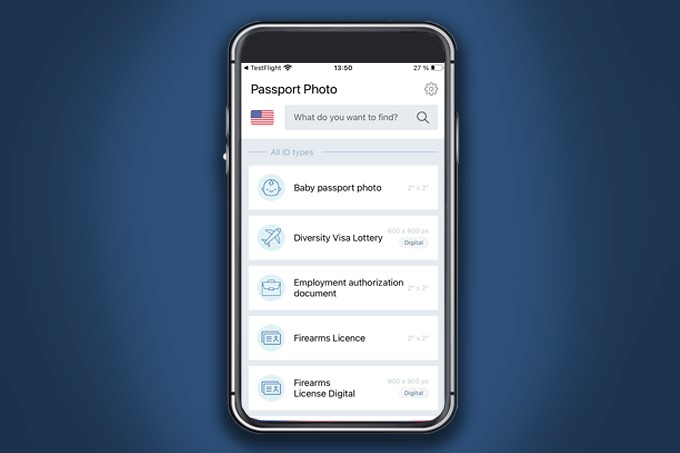
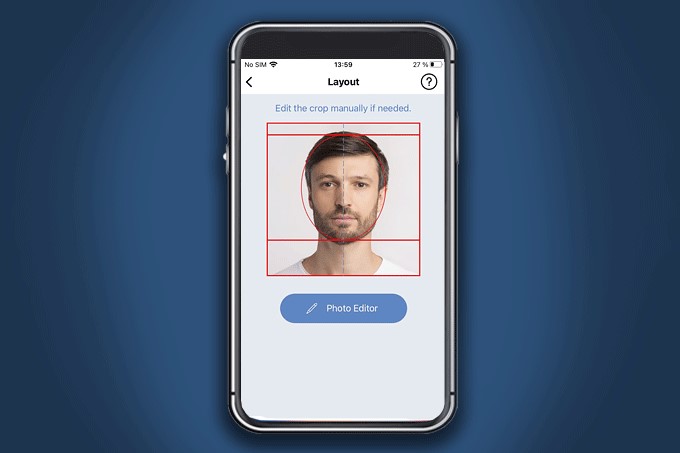
Now you are all set. Let’s snap the picture and crop photos on your iPhone. Open Passport Photo & ID Maker, pick the country and the ID. Next, snap the picture. The application provides easy guidelines for you to take the perfectly proportioned shot. Just place your head inside the oval and snap the shot. If you are not happy with your initial attempt, try as many times as you want till you like the picture you’ve taken. Then, with a single tap you can crop your picture according to the chosen ID standards. Love to have complete control? Then do it manually.

Edit and Print Like a Pro
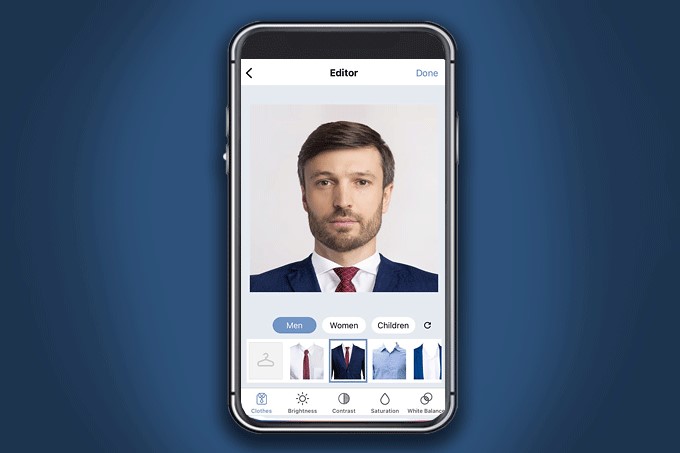
In case you ended up looking way too informal for your picture, Passport Photo and ID Maker allows you to try on more formal attire. The app comes with a digital wardrobe of various outfits that will make you look sharp in a few taps.

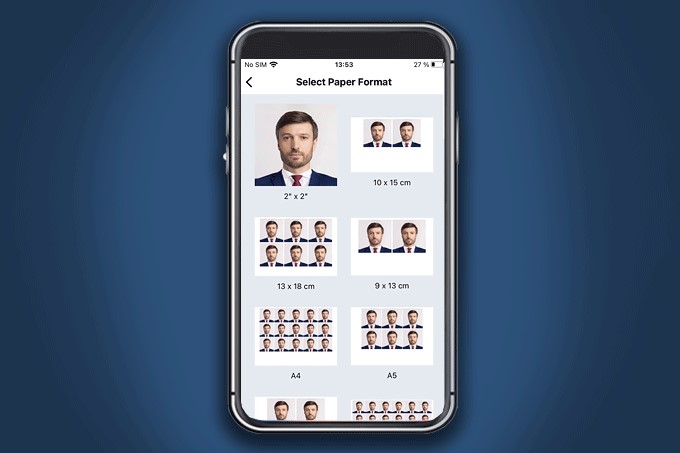
The final step is to save your ID pic. If you are allowed to apply a soft copy of your image, then simply save your photo. Alternatively, print your photos from your iPhone right away.

Well, now that you know how to take passport size photos from your mobile, there is no longer any need for you to wait for your turn at a photo studio or cram yourself into a stuffy photo booth. Now all the money and time you save on making a perfect ID photo can be spent more wisely – on your upcoming trip for instance.

Taylor is a freelance SEO copywriter and blogger. His areas of expertise include technology, pop culture, and marketing.


![How to Watch UFC 303 Live Stream Free [Updated 2024] UFC 259 Live Stream Free](https://techsmartest.com/wp-content/uploads/2022/03/UFC-259-Live-Stream-Free-100x70.jpg)

