Windows 10 integrates the system utility already known to owners of previous versions of the operating system that allows you to create a backup system without turning to third-party software. Here’s how to use it.
Over time, we have reviewed many software types that allow you to create backup images of the content of individual partitions or entire hard drives and SSDs.
Third-party software offers many advanced features such as the ability to create a recovery disk that can be used to transfer the operating system to other devices, even with a completely different hardware configuration, allow you to clone a system, to make a backup data using an incremental or differential approach, to generate the system image periodically, to “mount” the contents of the image files to extract files, and folders as needed (it will be shown inside a Windows).
However, it should not be underestimated that Windows 10 also integrates a feature for creating a system image: it can be used to backup and restore Windows when needed.
Windows 10 backup and restore with functionality built into the operating system
By typing Backup Settings in the Windows 10 search box, the operating system will show the Backup window and offer File History. It has replaced Previous Versions and allows you to create periodic backups, such as network drives or when connecting external storage drives.
But how to prepare Windows 10 backup and restore without resorting to utilities developed by third parties?
Let’s say, first of all, that the System Restore feature is also present in Windows 10 even if it is often disabled by default. However, it does not create an image of the system but merely creates a backup of the files essential for Windows and the registry configuration.
For example, for problems that prevent Windows 10 from starting, the System Restore utility continues to prove decisive (it is, therefore, better to activate it as a precaution).
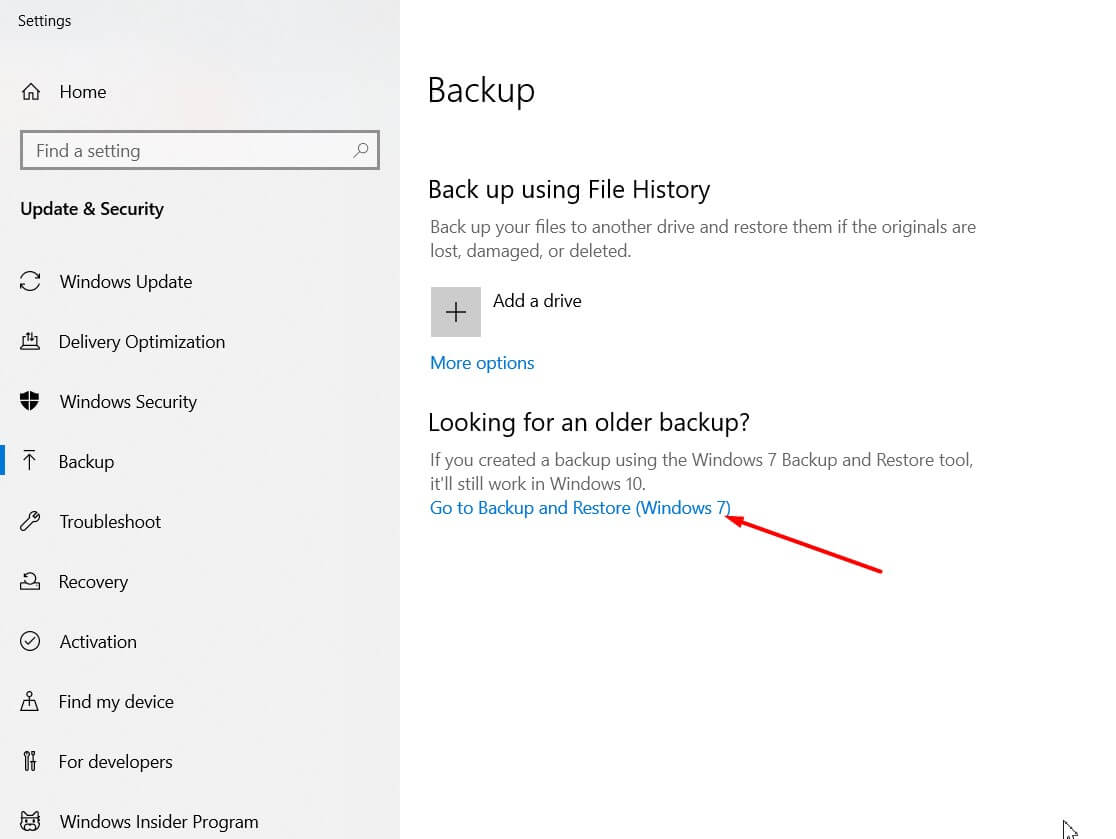
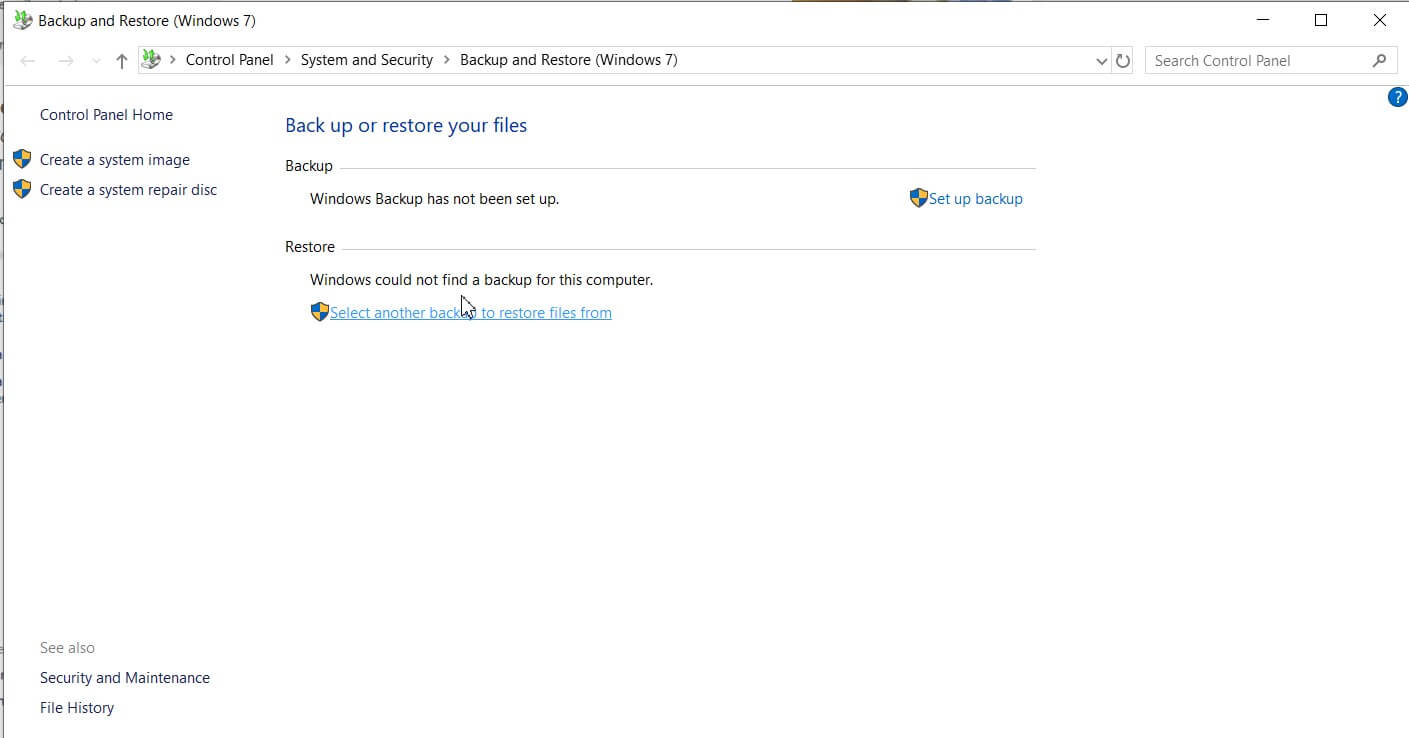
To create a system image, on the other hand, you can click on the Go to Backup and restore item in the Backup screen and then click on the Create system image in the left column.
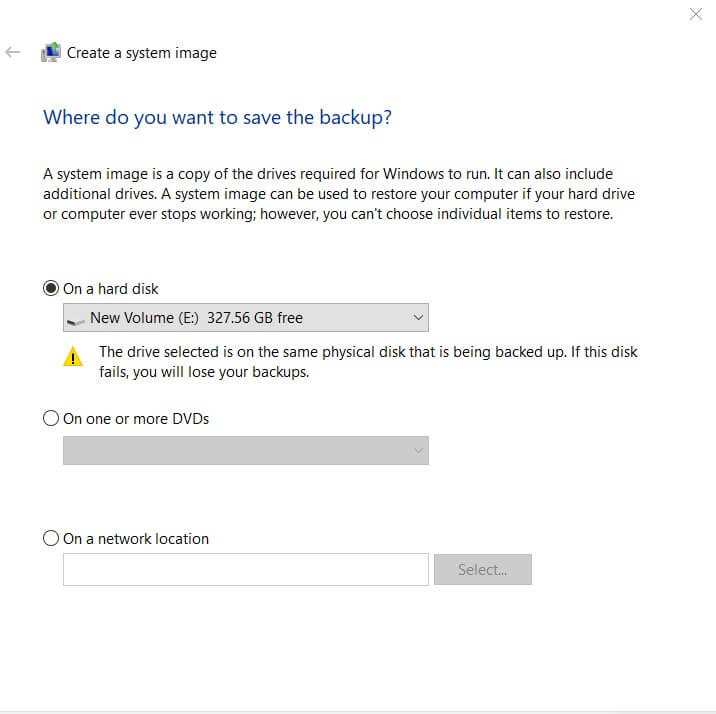
The next step is to select the drive for storing the backup image (you can also select a network path).
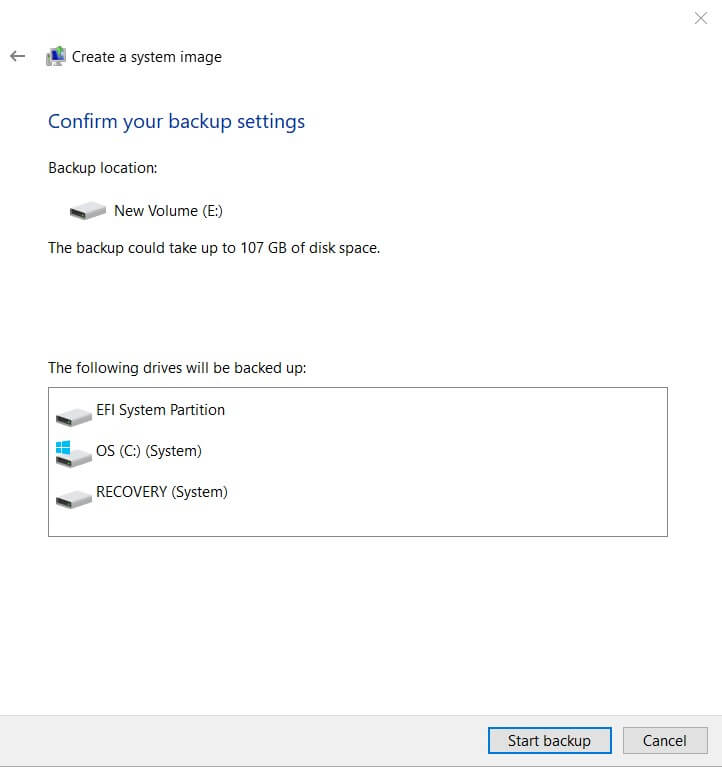
By default, Windows 10 will back up the contents of the system partition and other partitions essential for the correct loading of the operating system.
After the backup operation is complete and only on systems with a burner, Windows 10 will offer the opportunity to create a recovery disc.
This step is not essential also because DVDs are no longer used: much better to use, for example, the Media Creation Tool to create a USB stick containing the Windows 10 installation media (see Download Windows 10 ISO: here’s how to proceed ).
Once the system has booted from the USB key thus created, just press Next when the window shown in the figure appears (choice of language and keyboard layout).

When the following screen appears, instead, you will have to click on Restore your computer.

As soon as the Choose an option screen appears, you will need to select Troubleshoot, connect the external disk on which you have previously saved the Windows backup, then click System Image Recovery.
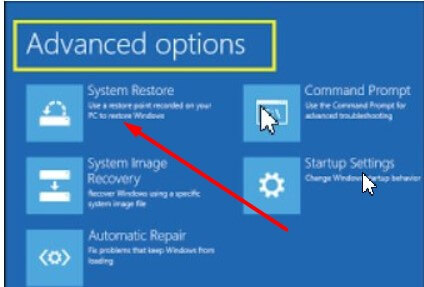
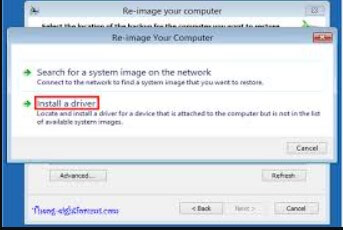
If you have saved the backup archive on the local network, click Cancel, Next, Advanced, Search for a system image on the network and then connect to the network by clicking Yes.
Instead of using the USB key generated with the Media Creation Tool, you can also use the Windows 10 emergency console that appears when the operating system fails to boot correctly twice in a row.

A tech-savvy writer with a knack for finding the latest technology in the market, this is what describes John Carter. With more than 8 years of experience as a journalist, John graduated as an engineer and ventured soon into the world of online journalism. His interest includes gadget reviews, decoding OS errors, hunting information on the latest technology, and so on.


