In Windows 10, the Microsoft Defender antivirus can be disabled from the classic interface or using a specific policy. Hence, the possibility to use the registry disappears.
Windows 10 integrates a version of Windows Defender that is closely tied to the operating system.
Windows Defender is activated by default when the operating system is installed and if a Windows 10 update is carried out. In some cases, the third-party antivirus installed is disabled so much that at the time, Kaspersky went on all furious with the response from Microsoft that came close.
By default, Windows Defender is automatically reactivated when another installed antivirus no longer offers adequate real-time protection: for example, when the subscription period expires in the case of paid anti-malware.
Windows Defender also remains partially active even after installing a third-party antivirus. This is easy to check by pressing the CTRL + SHIFT + ESC key combination – in the Details tab you will notice the processes that Windows Defender uses.
Microsoft does not allow you to disable Windows Defender from the registry. But there is one important exception that we discovered.
With a decision that has caused discussion, Microsoft has decided to prevent the deactivation of Windows Defender through a simple modification of the registry.
According to Microsoft spokespersons, the ability to use the HKLM \ SOFTWARE \ Policies \ Microsoft \ Windows Defender \ DisableAntiSpyware ( HKLM is a perfectly valid abbreviation of the HKEY_LOCAL_MACHINE branch ) registry key to disable Windows Defender completely was reserved for manufacturers only of PCs and administrators who wanted to install another antivirus during the installation of the operating system.
Since Windows Defender can deactivate itself when installing a third-party antivirus, starting from version 4.18.2007.8 any use of the DisableAntiSpyware key is completely ignored on Windows 10 Pro and Home.
While Microsoft indicates on this support page that the change is for Windows 10 1903 and earlier, the DisableAntiSpyware value is actually removed when the system restarts.
What have we discovered? By setting the DisableAntiSpyware value in the registry before booting the PC (for example from the Windows 10 installation media), Windows Defender respects the directive and is disabled, as long as you deactivate the anti-tampering protection – always before entering Windows. The procedure is explained in the article Forgot password Windows 10: exclusive, access the system.
However, this is a rather complex intervention, not within everyone’s reach. What systems are left, then, to disable Windows Defender?
First of all, it must be said that Windows Defender should not be disabled except in case of strict necessity. Windows Defender allows you to set exceptions to ignore specific software or individual folders; There is also a rule to reduce CPU usage by Microsoft anti-malware software.
If the problem was incompatible with specific software or Windows Defender was deemed too heavy, then know that there are easily applicable solutions.

Disable Windows Defender from the operating system interface
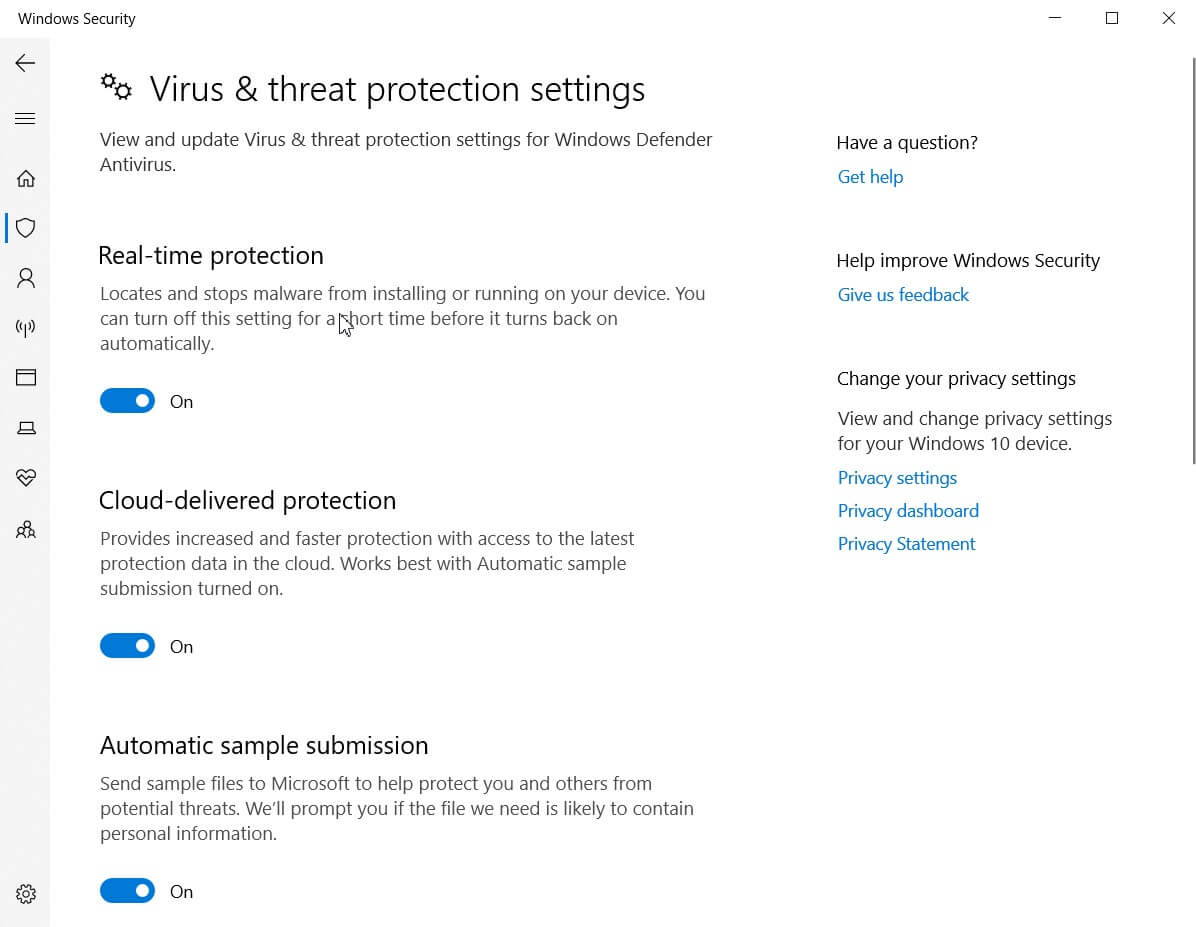
To disable Windows Defender you can type Windows Security in the search box, choose Virus & threat protection then click Manage settings just below Virus & threat protection settings.
At this point, you can disable the Real-time protection option.

Disable Windows Defender with Group Policy Editor
Users of the Pro and Enterprise editions of Windows 10 can completely disable Windows Defender with the Local Group Policy Editor.
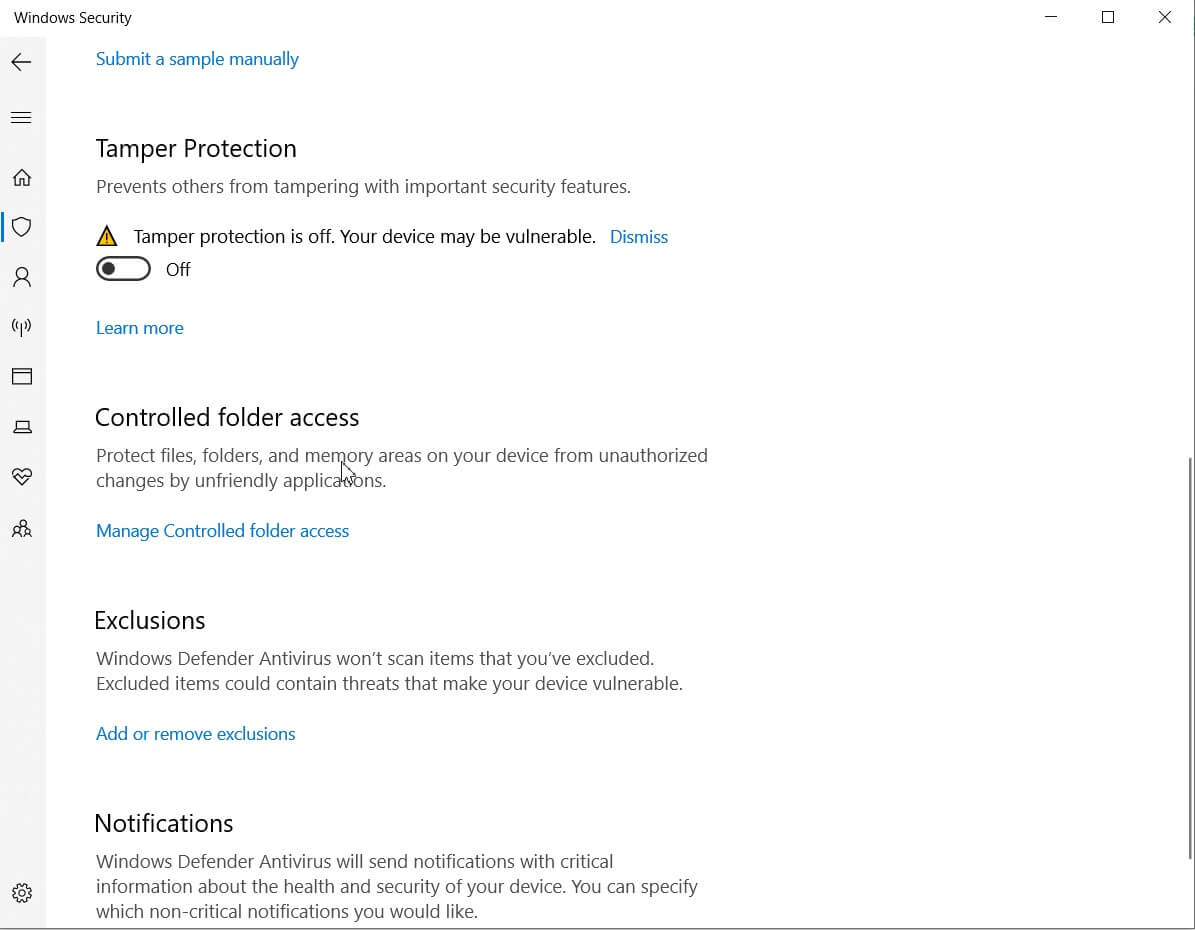
Before starting the Group Policy Editor, however, you must type Windows Security in the search box, choose Virus and threat protection then click Manage settings.
In the Windows Defender protection list, you will need to disable the tamper protection otherwise the policy you create will not be effective.
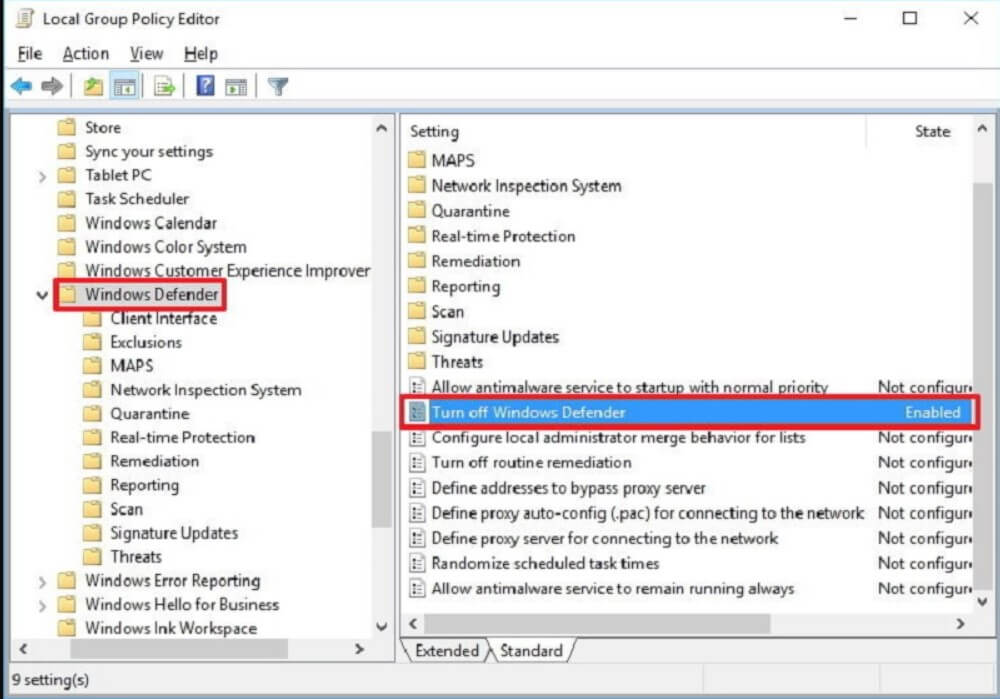
By pressing the Windows + R key combination and then typing gpedit.msc, you will have to go to Local Computer Policy, Computer Configuration, Administrative Templates, Windows Components, Microsoft Defender Antivirus.

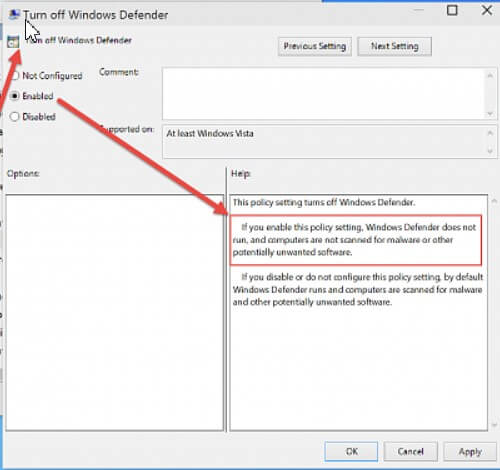
In the right panel, you will need to double-click on Disable Microsoft Defender Antivirus then activate the rule by selecting the Enabled option.

After the policy is activated, Windows Defender will be immediately deactivated. Any attempt to change its settings from the Windows 10 interface will result in an error message being displayed.
To hide the Windows Defender icon from the traybar, you can access the Task Manager window ( CTRL + SHIFT + ESC ), click on the Startup tab, right-click on Windows Defender notification icon then click Disable.
Going to the Processes tab and selecting the same item with the right button, then choosing End task, you can “make disappear” the icon without even restarting the machine or disconnecting the user account in use.

A tech-savvy writer with a knack for finding the latest technology in the market, this is what describes John Carter. With more than 8 years of experience as a journalist, John graduated as an engineer and ventured soon into the world of online journalism. His interest includes gadget reviews, decoding OS errors, hunting information on the latest technology, and so on.


