Windows 10 integrates a feature that allows you to assign each application a specific graphics card to use. Useful for PCs that are equipped with both an integrated and a dedicated card.
Most systems use a processor with an integrated graphics section. In some cases, a dedicated video card is installed or is already mounted.
Many systems are equipped with more than one video card: often, next to the integrated GPU at the processor level, a dedicated graphics card is installed, much more complete in functionality and much more performing.
The NVidia and AMD, driver management panels allow you to define which GPU to use for each kind of need (the integrated one or the discrete one, much more powerful).
Windows 10, however, starting from version 1803 (April 2018 Update), allows you to choose the graphics card to use with each program, be it a traditional Win32 program or an application downloaded from the Microsoft Store (“universal” or UWP).
In this way, it is possible to establish which applications can use the dedicated video card and settle for the less performing one.
Thus, it is possible to speed up the operation of those programs that require greater computational power on the graphics side.
How to choose the video card to use with each application in Windows 10
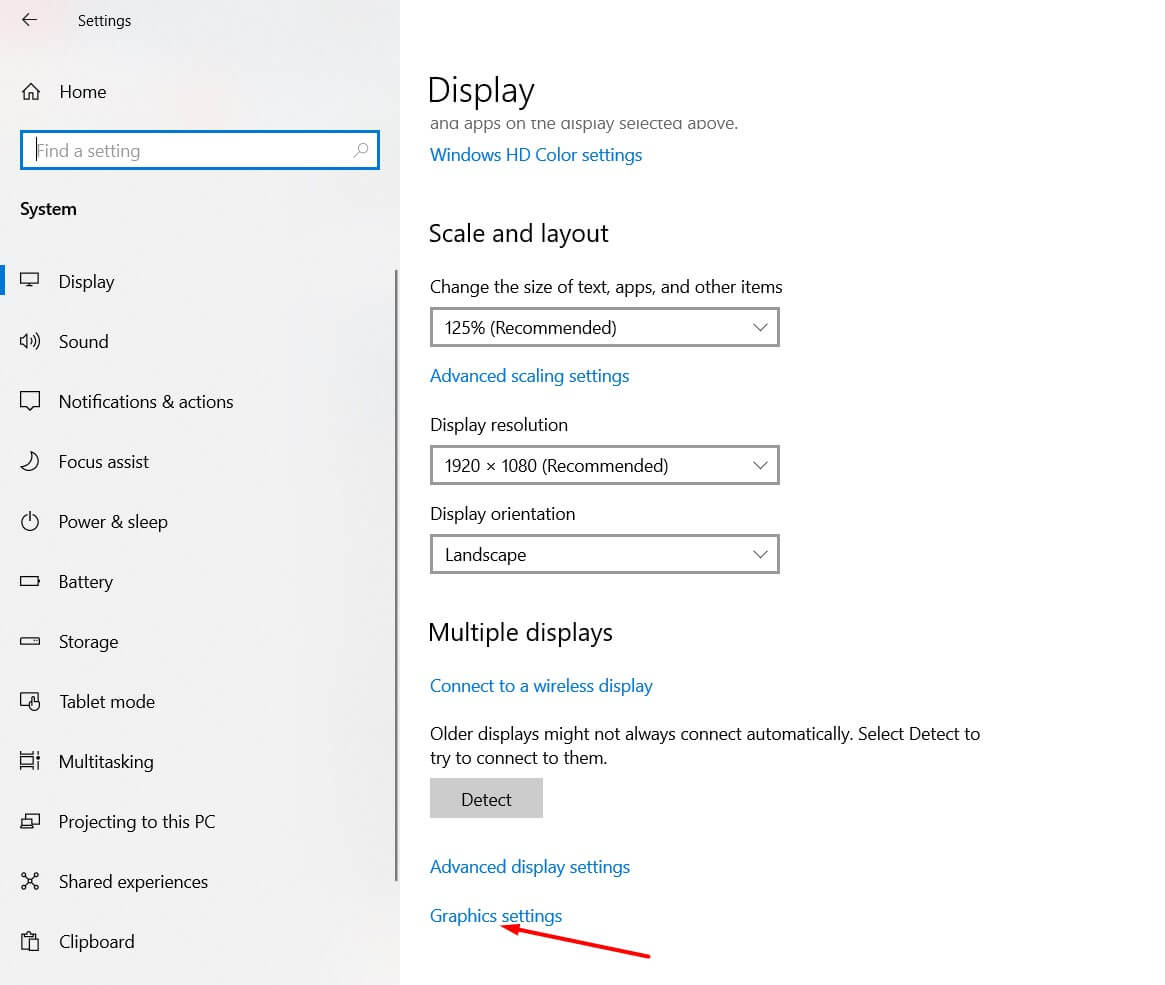
To configure the functionality and decide which programs can use the dedicated video card or have to settle for the integrated one, just press the Windows + I key combination, click on System, then on Display, and finally on Graphics settings (the item is placed immediately below Multiple screens ). Alternatively, you can simply type Display Settings in the Windows 10 search box, press Enter and select Graphics Settings at the bottom of the window.

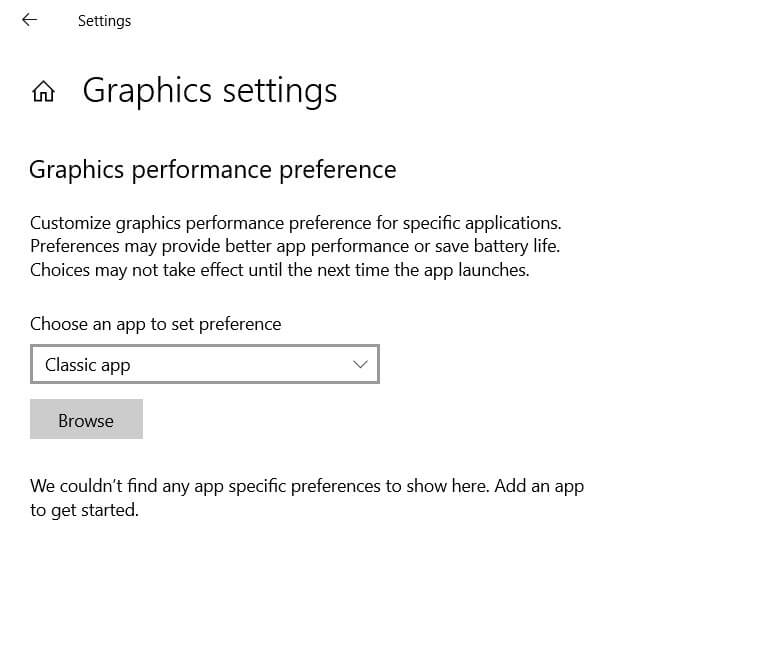
At this point, by clicking on Browse, you can select the Win32 application of interest.

Choose an app to set the preference; you can choose which program to configure: classic Windows applications or an application downloaded and installed through the Microsoft Store.

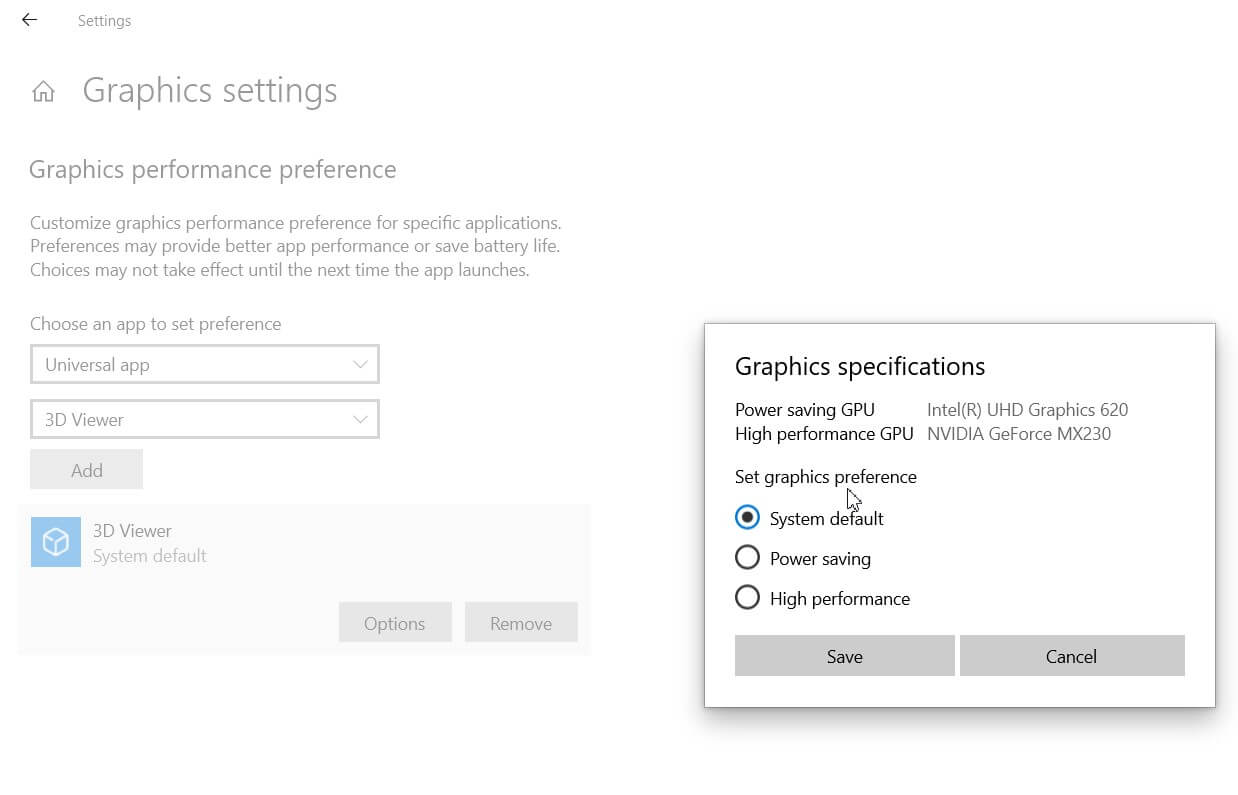
By selecting a program (the full path of its executable must be indicated) and then clicking on Options, you can choose whether to associate the selected program with the less performing graphics card ( GPU with energy saving ) or with the dedicated, more performing one ( GPU with high performance ).
In case the processor does not have an integrated GPU, Windows 10 will show the name of the same video card for both Power Saving and High Performance: in these cases, the changes made will not affect.
The various adjustments can be removed if necessary by clicking on the Remove button.
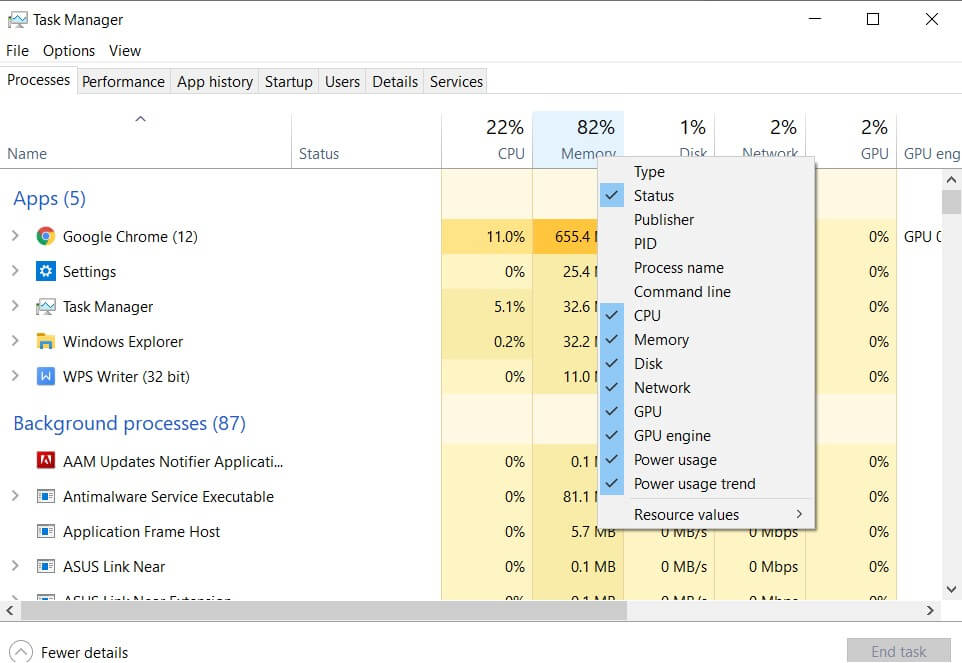
By pressing the key combination CTRL + SHIFT + ESC, the Windows 10 Task Manager will open.
By clicking on More details, then with the right mouse button on the column header ( Processes tab ) and activating the GPU Engine, you can check which graphics card is used by each running application.


A tech-savvy writer with a knack for finding the latest technology in the market, this is what describes John Carter. With more than 8 years of experience as a journalist, John graduated as an engineer and ventured soon into the world of online journalism. His interest includes gadget reviews, decoding OS errors, hunting information on the latest technology, and so on.


