The Windows file search works fine and is highly customizable: here’s how to set it up and use it to the fullest.
We greatly appreciated the search functionality of Windows 7. If correctly configured, it allowed you to search for a file of interest starting from its name and allowed you to search for files by analyzing their contents.
With the advent of Windows 10, this functionality has been a bit lost initially, and the search box has been closely linked with the digital assistant Cortana.
With the Windows 10 update 1903 dating back to May 2019, Microsoft has set things right: as we saw in the article What’s new in Windows 10 May 2019 Update, with the latest Plus, feature updates for Windows 10, the operation box of research was separate from that of Cortana.
You can search for files on your Windows 10 PC without the search being limited to the contents of a handful of system folders.
To check the Windows 10 you are using; we suggest you press the Windows + R key combination then type winver. Make sure you are using at least version 1903: if you are using previous versions of the operating system, update with Media Creation Tool or with the Update Assistant, both of which can be downloaded from Microsoft servers.
Normally, the search for Windows 10 – even with Microsoft’s update in May 2019 – is limited only to searching for the files contained in the “collections” ( Documents, Downloads ) and on the desktop.
Typing Windows Search Settings in Windows 10 May 2019 Update and later versions, a window similar to the one shown in the figure will appear.
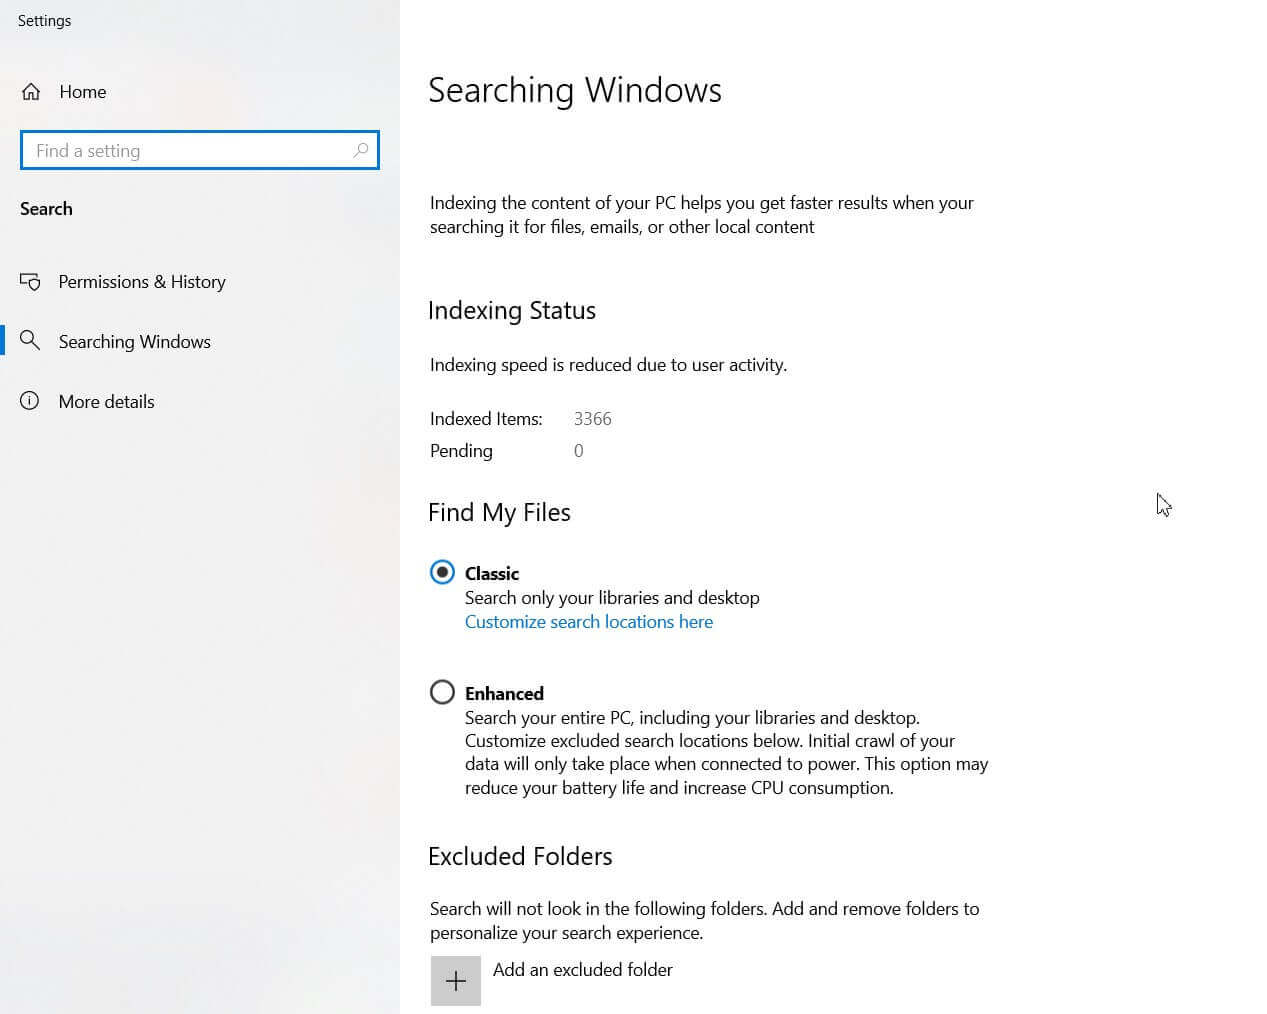
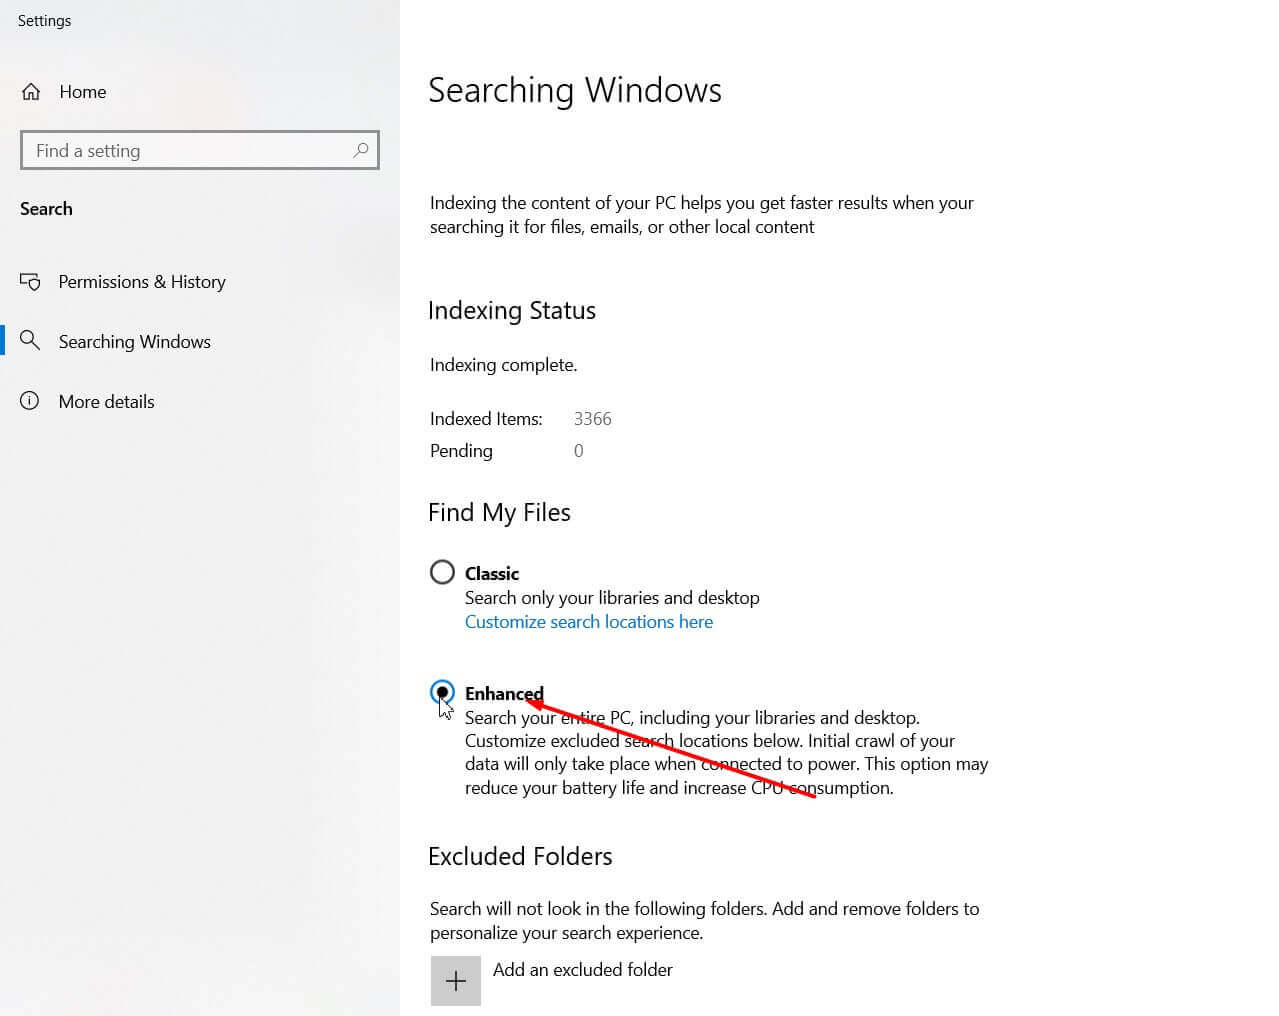
By default, under Find my files, the Classic option will be selected, and by clicking on Customize search paths here, you will get the list of folders taken into consideration.
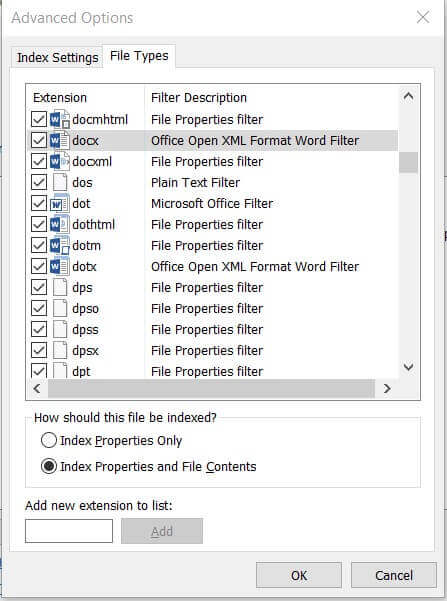
With a click on the Advanced button and then on File Types, you can check the file types that are currently indexed. In some cases, the search does not consider the content of the files: for items saved on hard drives or SSD drives with extensions PDF, DOC, DOCX, XLS, etc., however, the option Index properties and content is selected of the file. If you do not remember a file’s name but one or more phrases contained in a document, Windows 10 will be of great help and will allow you to find documents without using third-party programs to search.
The search results are provided in real-time, directly in the Windows 10 Start menu. If no results are found, the search will be passed to the Microsoft Bing engine.
To disable search with Microsoft Bing, you can follow the instructions in the article How to delete Bing from the Windows 10 Start menu or use the script presented here: Optimize and speed up Windows 10: how to do it automatically.
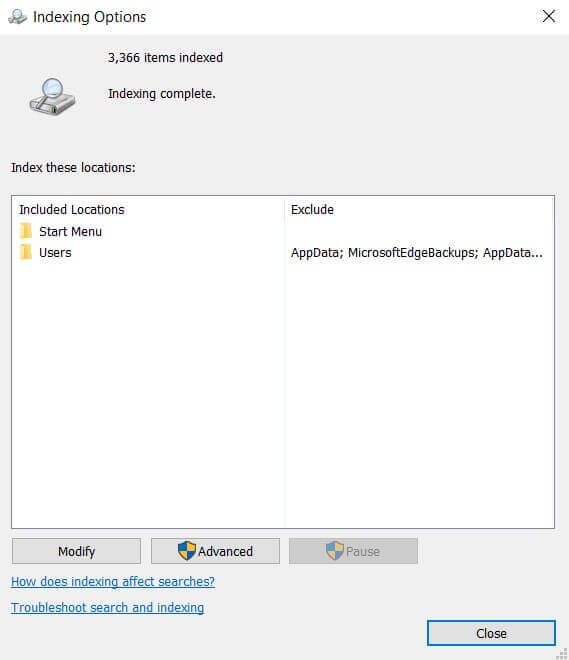
By choosing Advanced in the main Windows Search window, the search feature will allow you to index and subsequently search the contents of any folder on your system.
Under Indexing Status, the number of files indexed by Windows 10 will grow rapidly (slower when the user uses the system; in this case, the message ” Indexing speed decreased by user activity ” will appear ).
By default, as you can see by scrolling the window’s contents until you find Excluded folders, the feature will refrain from indexing Windows folders and other system directories.
If you had saved the data in a drive other than the one on which Windows is installed (more than reasonable choice), we suggest checking that the drives containing the data are not excluded.
If Windows 10 Search finds no
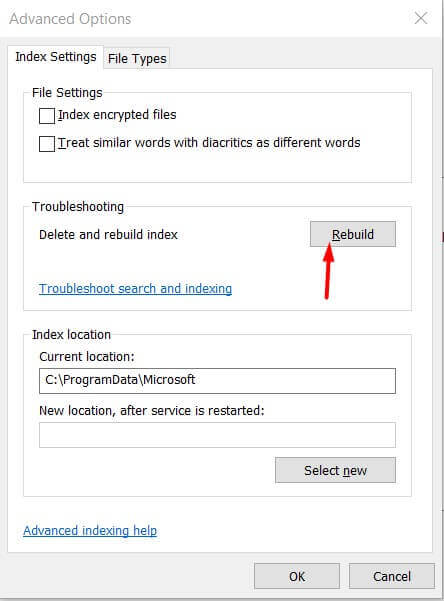
If even the new search function does not find the elements you are looking for (switching from one mode to another it happened to us …), we suggest you click on Advanced settings of the search indexer then on Advanced.
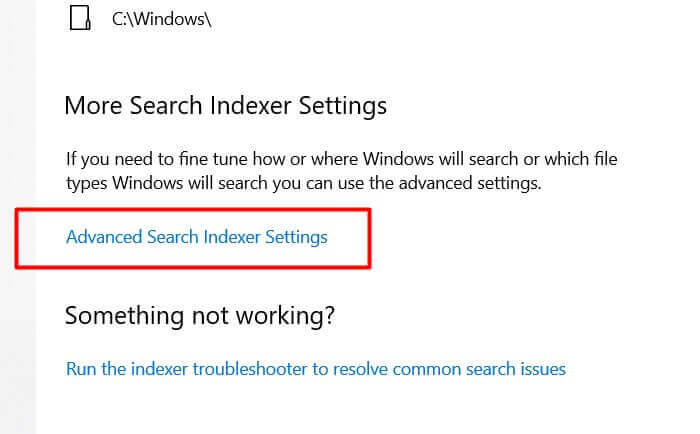
When the indexing options window in the figure appears, you will have to click on the New index button to request to recreate the contents of the file index from scratch.
Windows 10 Search negatively impacts system performance. How to speed up indexing
The indexing activities performed by the Windows Search feature are minimized when the system is busy with some other operation (” Indexing speed decreased by user activity ” message seen above). This is a choice that aims to prevent the work carried out by Windows Search from impacting too strongly on the machine’s performance.
This behavior has been further improved in Windows 10 version 2004 (May 2020 update) to minimize the CPU’s impact, especially on systems that use traditional hard drives (not SSDs): Windows 10, lower CPU, and faster system thanks to improved indexing.
In Windows 10 May 2020 Update (version 2004) and later, you can type Windows Search Settings in the operating system’s search box and then set the Indexer Performance option to Enabled.
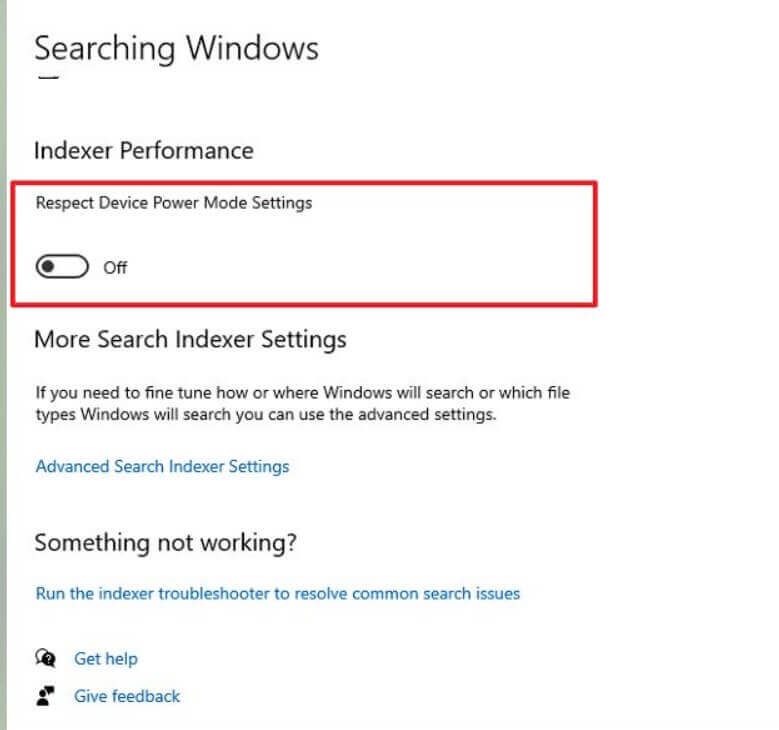
Once the Indexer performance option is activated, the Windows 10 feature that indexes files and folders in the background will stop its activity, including updating the database, at certain times, for example, when the device is in power saving mode, low consumption, or in-game mode.
The same behavior, aimed at optimizing system performance and reducing energy consumption, is maintained when the processor is stressed over 80% or when the disk usage goes up over 70%.
If, on the other hand, you are in a hurry to index all files, you can download this compressed file, then double click on the one called Deactivate_Indexer_Backoff.regby agreeing to enter information in the Windows registry.
You will then have to press the Windows + X key combination, choose Windows PowerShell (administrator), and type the following:
sc stop WSearch
sc start WSearch
In the Windows Search screen, you will now see the phrase ” Indexing in progress. The search results may not be complete during this operation .” However, overall system performance will be degraded until file indexing is complete.
To reactivate automatic indexing with reduced consumption of machine resources (default behavior), just double-click on the
Activate_Indexer_Backoff.reg file, then open PowerShell again with administrator rights and type the usual commands to restart the Windows Search service:
sc stop WSearch
sc start WSearch
If you were looking in the files’ contents, we suggest clicking on the Windows 10 Start button and starting to type or clicking on the icon depicting a small magnifying glass.
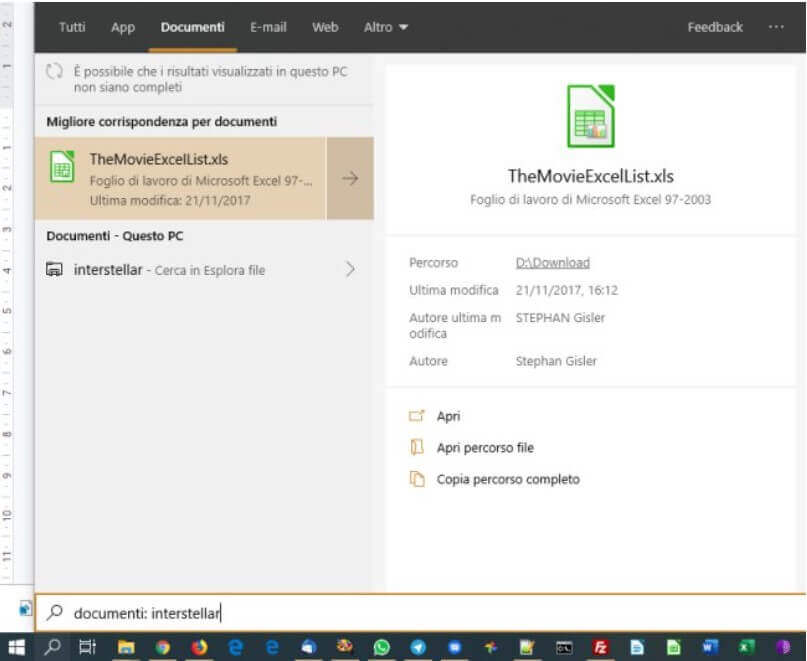
For documents, including PDF files, we recommend clicking on the Documents tab at the top – you’ll see the results start appearing right away.
As you can see in the image, after typing interstellar, an Excel file appeared in the Documents tab containing the list of the best movies of all time. The term interstellar, in this case, is contained within that file.
Check the Windows 10 search status and troubleshoot with the Microsoft Indexer Diagnostics Tool
By referring to the Microsoft Indexer Diagnostics Tool page on the Windows Store, you can download and install a utility that helps you test Windows Search “behind the scenes” and troubleshoot any problems.
To install it, just click Get then Install.
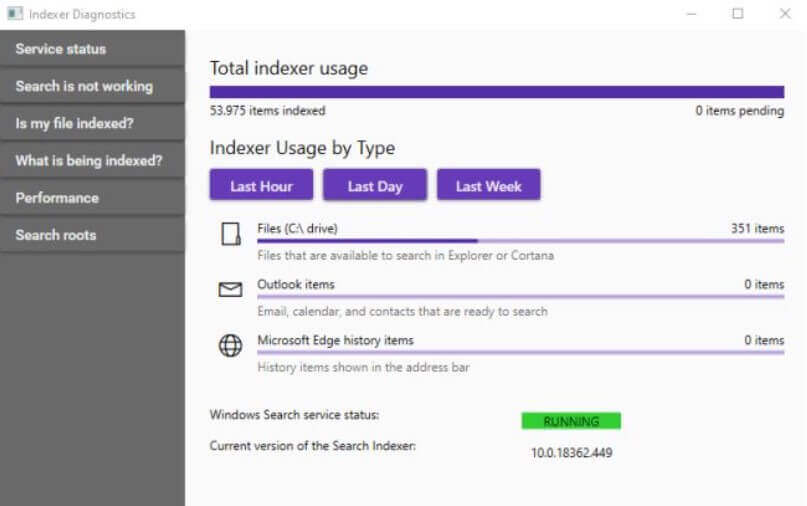
The main screen shows the status of the Windows 10 search service, the number of items indexed, and those still to be added to the database.
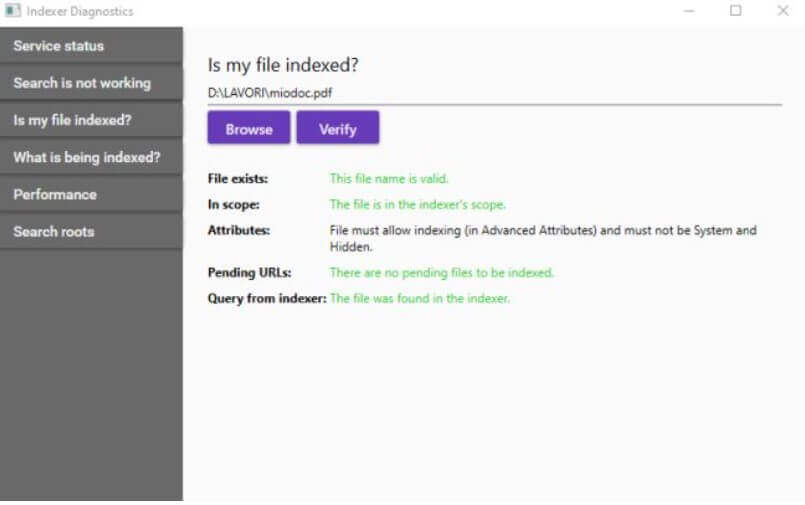
With a click on Is my file indexed? , you can check if one of your files is correctly present in the Windows 10 search index: it must appear ” In scope, the file is in the indexer’s scope “.
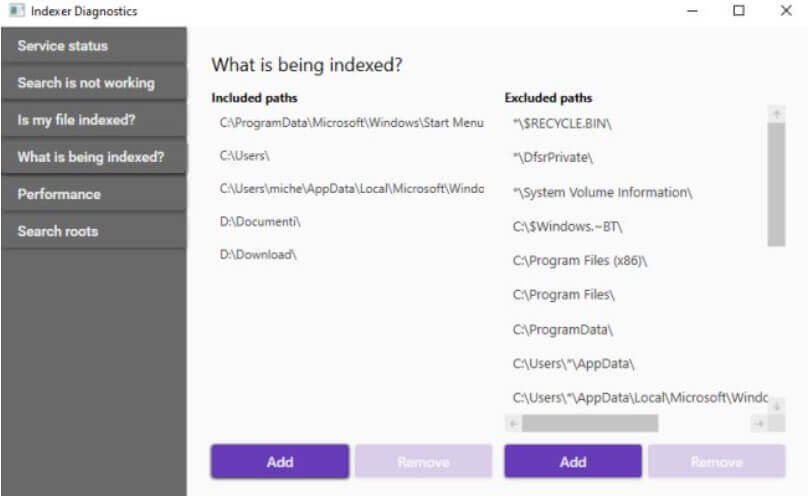
By accessing the What is being indexed? , the Microsoft utility shows the list of resources whose content is constantly monitored and indexed.
You can optionally add or exclude new paths using the Add buttons below.
By acting on the Search is not working and Performance sections, you can restart the service and solve problems related to the Windows 10 search service’s abnormal functioning.
How to start an advanced search from Windows Explorer
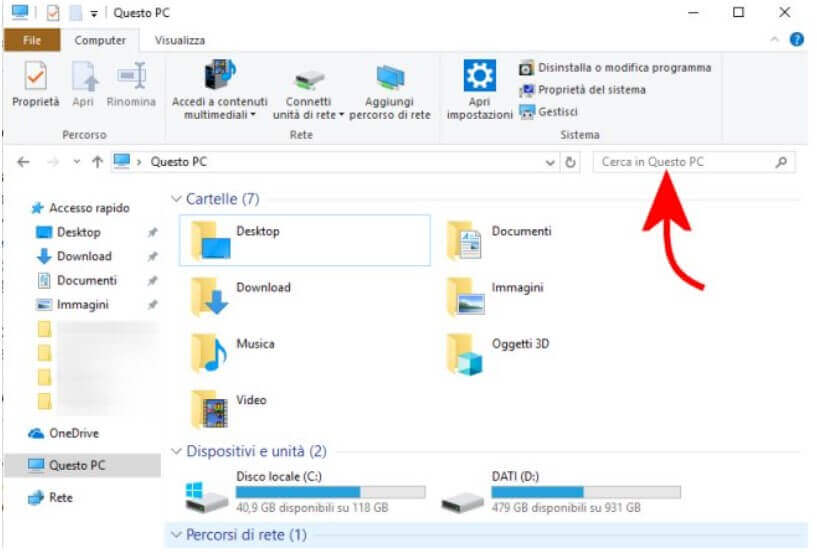
After Windows 10 has created the new index containing all the information on the files stored in the various drives, you will be able to search for files and folders from the taskbar and the search bar, which is shown at the top of any window. Windows Explorer (press the key combination Windows + E ).
To start an advanced search in Windows 10, just click on the Search this PC box in the box on the right.
By typing the name of the file of interest in the search box, you can locate the single file.
However, more complex searches can also be performed, for example, by creation date or modification date. For example, inserting last modification: this month or adding the string to the search term’s right, it is possible to locate the files with the indicated name created or modified during the current month.
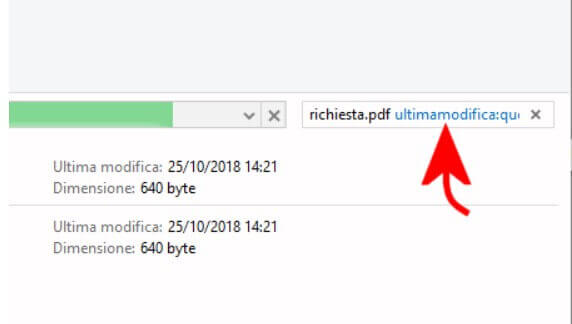
The same result can be obtained by clicking the Last Modified button in the File Explorer toolbar in Windows 10.
The Windows shell search box supports multiple filters and operators: we talked about this in the article How to find recently modified files.
With Windows 10 version 1909, the File Explorer search box supports the same functionality as the Start menu box – the results appear immediately below the search box as soon as you start typing in Search This PC.
The search box integrated with File Explorer therefore increasingly looks to a “universal search” that searches for the strings indicated within the user’s OneDrive account’s contents: see How to edit OneDrive files from your Windows PC.
Delete your search history in File Explorer
By default, when you click the Search This PC box, any File Explorer window displays a list of the latest searches made previously.
If you want to remove the search history, click on the Search tab (appears by typing any term in Search This PC ), click on the Recent searches button in the toolbar and then on the item Clear search history.

Alternatively, by opening the command prompt ( cmd ) with administrator rights, you can simply type the following to get rid of the entire search history displayed in File Explorer :
reg delete HKCU \ Software \ Microsoft \ Windows \ CurrentVersion \ Explorer \ WordWheelQuery / f
If you want to completely disable the search history (Windows 10 will no longer offer any indication of previous searches), just type:
reg add HKCU \ Software \ Policies \ Microsoft \ Windows \ Explorer / v DisableSearchBoxSuggestions / t REG_DWORD / d 1 / f
To possibly restore the default configuration (the search history will be managed again in File Explorer ), just use the following instruction:
reg delete HKCU \ Software \ Policies \ Microsoft \ Windows \ Explorer / v DisableSearchBoxSuggestions / f
Start a file and folder search from the command prompt
By pressing the Windows + R key combination , typing cmd then pressing the Enter key, you can also start a search from the command prompt.
The where command is in fact little known but allows you to locate files and folders matching the search criteria in a simple and fast way .
For example, by typing the following, Windows will return all items that in drive D: contain the word relationship in the file name:
where / rd: “* relationship *”
Also adding / t , you will also get the date and time of the last modification for each element:
where / rd: “* relationship *” / t
To copy the list of results to the Windows clipboard, just add | clip :
where / rd: “* relationship *” | clip
At this point, for processing the command occurred, it is sufficient to bring it into a text editor (such as Notepad ++ or the same Notepad) and press the key combination CTRL + V .

A tech-savvy writer with a knack for finding the latest technology in the market, this is what describes John Carter. With more than 8 years of experience as a journalist, John graduated as an engineer and ventured soon into the world of online journalism. His interest includes gadget reviews, decoding OS errors, hunting information on the latest technology, and so on.


. What are the news of the new format for images")


. What are the news of the new format for images")

