Replacing the old hard disk with an SSD is one of the best things that can be done to speed up a machine that is now starting to feel the weight of time.
The most obvious obstacle is to move the
operating system to SSD.
It is often necessary to transfer the operating system from HD to SSD on a solid-state drive that has typically less capacity than the hard disk on which Windows is installed.
To move Windows to SSD, it is necessary to follow these three steps:
1) Prepare the hard disk so that the overall space occupied by the operating system and data is less than the new SSD’s maximum capacity.
2) Move operating system to SSD using special software (we will present the use of EaseUS Todo Backup in the completely free version, but it is possible to use other similar specialized utilities).
3) Connect the SSD as the primary drive, fix any Windows startup problems, and restore the hard drive as a secondary drive or as an external drive.
How to connect the SSD to the system
Before starting to move the operating system to SSD, it is worth thinking on how you can connect the new SSD drive to the machine in use.
The operating system currently installed on the old hard disk must be copied to the SSD.
The SSD can then be connected as a secondary on desktop systems (see Install a second hard drive: why and how ) and on notebooks with a second slot.
You will necessarily have to equip yourself with an adapter on notebooks that allow you to install a single hard disk or a single SSD.
This is an example of a SATA to USB adapter that will allow you to connect a SATA III SSD to a USB port on your computer. The adapter is available in various versions, which differsBy in the type of interfaces used.
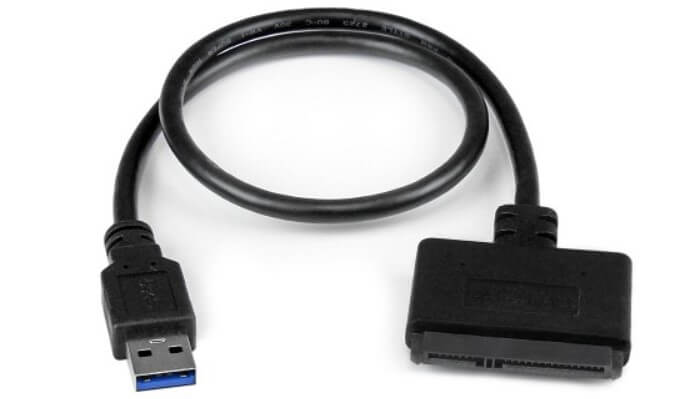
For example, the version with a USB 3.0 interface on the PC side, the one with USB 3.1 (up to 10 Gbps), and USB Type-C (smaller connector).
However, on the SSD side, the version for 2.5-inch drives (those for notebooks) and the version for connecting 3.5-inch SATA SSDs (or old IDE hard drives) is available. In the latter case, on the PC side, the only available interface is USB 3.0.

Interestingly, this universal adapter is also available on Amazon, which allows you to connect both 2.5 and 3.5-inch drives and is equipped with a power supply for those hard drives that need to be connected to the wall socket (power supply from Insufficient USB).
Several alternatives are proposed at this address.
Equip yourself with the recovery disc or Windows installation media
If, for any reason, the copy of Windows transferred to the SSD does not start, it is good to have the recovery disk or the operating system installation media available to solve the problem.
Windows installation media can essentially be created in two ways:
- By using the Media Creation Tool, in the case of Windows 10.
- Download the ISO file from Microsoft servers, then burn it to DVD media or save it to a bootable USB key.
Both alternatives are covered in the articles Download Windows 7, Windows 8.1, and Windows 10 from Microsoft servers and Download Windows 10 ISO – here’s how.
Alternatively, to create the Windows recovery disc, just type Create a recovery drive in the operating system’s search box and follow the step-by-step procedure presented.
Prepare the hard drive to move the operating system to SSD.
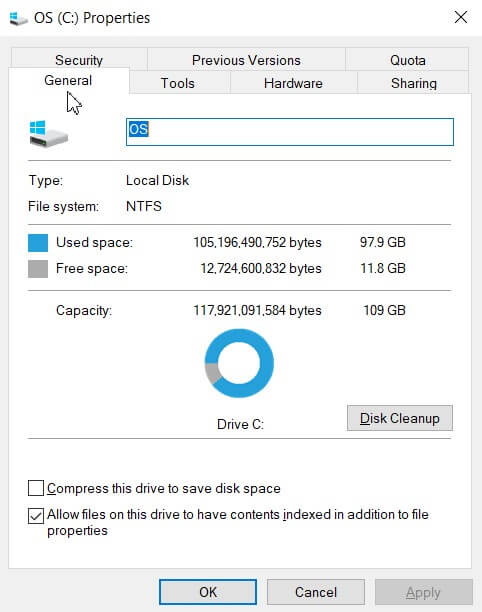
Before transferring the operating system from HD to SSD, it is always a good idea to first check the Windows partition’s overall space.
Referring to the This PC or My Computer window, you can examine what is reported under the C: drive.
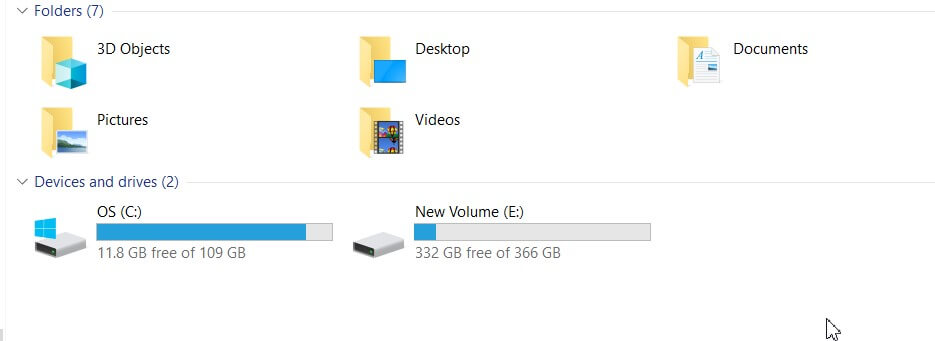
In the example, the space occupied is around 115 GB. Without making any changes to the hard disk contents, you can transfer all the contents of the system partition to an SSD – for example – of 256 GB. On the other hand, it is not recommended to choose a 128 GB SSD, if it does not significantly reduce the space occupied on the C: disk (bringing the occupied space to about 60-70 GB).
Usually, it is user data that takes up the most space.
Therefore, we recommend logging into Windows with an administrator account, access drive C: from File Explorer, right-click on the Users folder, and choose ‘Properties’. In this way, after a few minutes of waiting, it is possible to establish the space occupied by the files saved in the various user accounts.
By copying the entire C: \ Users or C: \ Users folder to an external storage drive, you can then make room on the hard disk.
Once you have copied the C: \ Users or C: \ Users folder, together with all the sub folders and their contents, you will need to check that you can access all the directories backed up on the external drive.
When the message ‘You do not have the necessary permissions to access the folder’ appears, just click on the Continue button (we also talked about it in the article Recovering data from an old hard disk, here’s how to do it). But make sure you always use an administrative user account.
Once the backup procedure of the C: \ Users or C: \ Users folder on the external drive is completed (you can use the Robocopy utility : Robocopy: how to quickly copy files and folders on the local network ), you can delete the contents of the various folders on the hard disk.
In this regard, however, it should be noted that neither the Users folder nor the subfolders is deleted entirely, but only the users’ files.
You can also take the opportunity to uninstall unnecessary applications or locate folders containing completely unnecessary files.
Finally, the Disk Cleanup utility – still integrated into Windows (in future versions of Windows 10, it may be removed and replaced by the tools inserted in the operating system’s Storage Settings window ) which allows you to recover several gigabytes of data. If Windows is running smoothly, deleting the update installation files helps recover a lot of space (often up to 30 GB).
To learn more, we suggest reading the article Disk cleaning. Can you delete everything that is proposed?
Move the operating system to SSD automatically.
After connecting the new SSD to the system, possibly using the adapter (the latter connected to the PC using the supplied USB cable), you will have to download and install the EaseUS Todo Backup software, it provides valuable help in moving the operating system on SSD. The program can be downloaded for free by referring to this page.
It should be borne in mind that, as indicated in this comparison, the Free edition of EaseUS Todo Backup does not allow you to clone dynamic disks (we talked about it in the article Convert dynamic disk to base without losing data ).
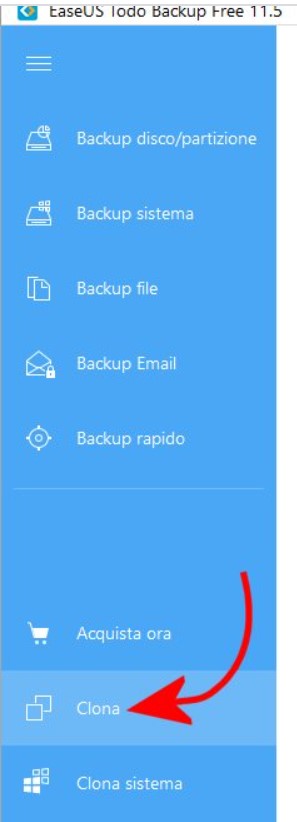
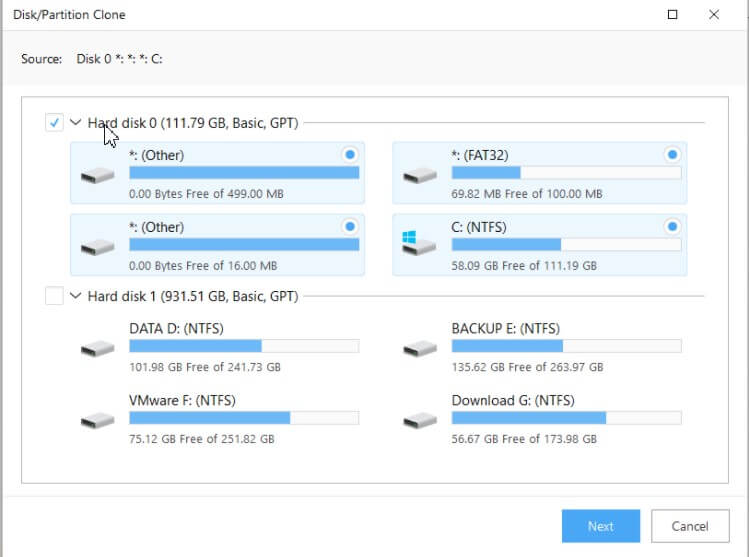
When starting EaseUS Todo Backup, you will need to choose the Clone item from the left column and then select the drive corresponding to the hard disk to be cloned, currently installed on the system. It is important not to select individual partitions but to check the box, usually to the left of Hard Drive 0.
 The next step is to indicate the target SSD. If there is no partition on the solid-state drive, it will read Unallocated.
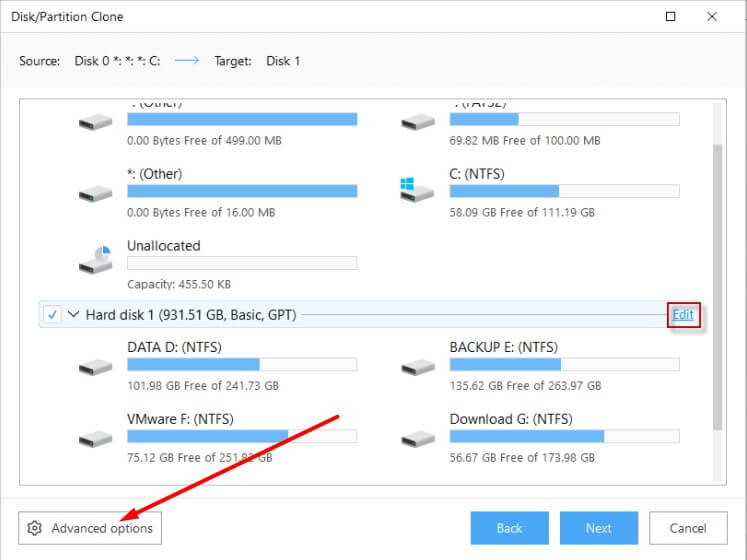
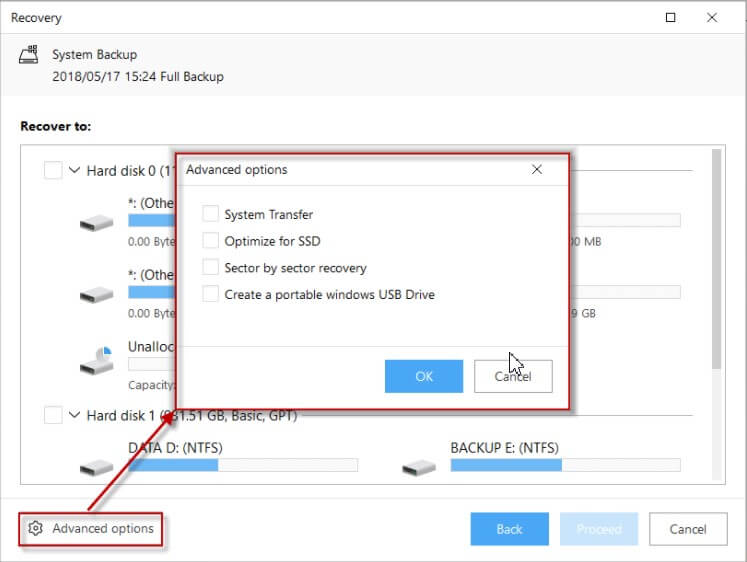
By clicking on the Advanced Options button at the bottom left, you will have to check the Optimize for SSD box. In this way, EaseUS Todo Backup will also take care of the alignment.
The alignment of an SSD is an important operation that must be performed only once while installing the operating system or, as in our case, when cloning an existing partition.
The SSD alignment procedure ensures that a logical sector begins exactly at the beginning of a “physical page” of the solid-state drive. By avoiding alignment, the sector can overstep the page boundaries implying, in the case of write operations, an additional write reducing the SSD’s performance.
In the article SSD alignment, what it is and how to verify it, we have explained, in detail, what it means to align the partition in an SSD and how to verify that everything is okay.
As the last step, EaseUS Todo Backup will show a report of the selected settings and start cloning data from the old hard drive to the new SSD.
Boot the system from the SSD and troubleshoot Windows startup problems
By turning off the system, disconnecting the hard disk, and connecting the main one to SSD, you can try to start Windows from the new storage medium.
As explained in the article Computer does not turn on, or Windows does not start, how to solve, in case Windows does not boot from the SSD on which the operating system was previously cloned, you will have to use the Windows installation media or the recovery disc to fix the problem.
By choosing the Advanced Options, Troubleshooting, Advanced Options, and Startup Repair items, you can solve the problems that prevent the operating system from starting correctly.
Optimize the configuration of the new SSD
Once the cloning is complete, you will end up with the System Reserved partition visible in the This PC or Computer window.
To hide it as it is, usually hidden in all Windows installations, just open the Disk Management window (press the Windows + R key combination, type diskmgmt.msc ).
Right-click on the block corresponding to the system partition at the bottom of the window, choose Change drive letter and path, then click the Remove button.
As for the activation of the TRIM functionality on the SSD, Windows should have already done so automatically by recognizing the type of storage in use.
To verify that TRIM is enabled, just open the command prompt ( Windows + R then type cmd ) and issue the following command:
fsutil behavior query DisableDeleteNotify
Obtaining, as an answer, at least NTFS DisableDeleteNotify = 0 (Disabled), it means that TRIM is properly enabled.
In case you get an answer, you will have to type fsutil behavior set DisableDeleteNotify 0 at the command prompt opened with administrator rights (type cmd in the Windows search box and press the key combination CTRL + SHIFT + ENTER ).
Further optimizations applicable on the SSD drive (we wanted to dispel many “myths”…) are illustrated in our article How to optimize SSD in Windows.
Restore the old hard drive as a secondary drive or external drive
By making sure that Windows is correctly started from the new SSD, you can reconnect the old hard disk and then delete its partitions from Windows Disk Management.
To start the Disk Management utility, just press the Windows + R key combination, type diskmgmt.msc, and press Enter.
At this point, you can delete the Windows system partition on the old hard disk (right-click Delete volume ) and proceed with its new creation and formatting (always using the commands accessible from the right-click).
The old hard disk can thus be used as a secondary drive to which, for example, the folder can be copied users, previously backed up to an external drive.
To make Windows installed on the SSD drive, refer from now on to the Documents, Pictures, Downloads, Music, Videos folders stored in the old hard drive; you can apply the simple procedure described in the article Increase space on disk, how to do? Paragraph Move the My Documents, Downloads, Pictures, … in the second hard drive.
In the case of laptops that do not provide a second slot for connecting the old hard disk, it is possible to transform this unit into an external disk.
Further reading and insights:
– Replace hard disk with SSD, how to do it without reinstalling everything

A tech-savvy writer with a knack for finding the latest technology in the market, this is what describes John Carter. With more than 8 years of experience as a journalist, John graduated as an engineer and ventured soon into the world of online journalism. His interest includes gadget reviews, decoding OS errors, hunting information on the latest technology, and so on.


. What are the news of the new format for images")


. What are the news of the new format for images")


