When working with Windows 10, it is good to be clear about the difference between public and private networks. Unlike, for example, what happened in Windows 7, by clicking on the traybar icon that indicates the network connection in use, Windows 10 does not inform – explicitly – about the type of connection you are using.
In Windows 7, clicking on the icon displayed in the traybar displayed an icon indicating the type of connection ( corporate network, home network, or public network ) for each of the active network interfaces.
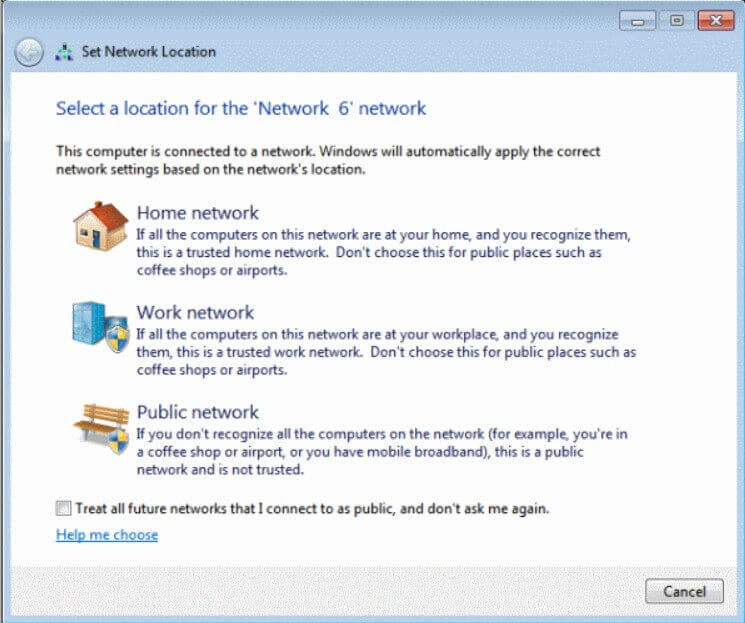
In the example in the figure, one network interface is a corporate network, and the other is a public network.
In Windows 10, this differentiation no longer exists, and we are only talking about private and public networks.
Indeed, until Windows 10 Creators Update, there was only the indication Make this PC discoverable: by activating this option, Windows 10 considered the network connection as a private network; deactivating it, however, set the connection as a public network. Let’s clarify the differences.
When to set up the connection as a public network
A network connection must always be configured as a public network when connecting to other people’s networks, also accessible by other people: think, for example, of the WiFi hot spots of the hotel, airport, or various commercial establishments.
By setting a network connection as a public network, as was the case in Windows 7, the system in use will no longer respond to PING requests from other machines connected to the same network (display of the Request expired message ) and will not expose any of the resources and shared folders (not even if protected with username and password). At least with the default operating system settings.
In Windows 10, just typeChange the proxy settings in the Start menu search box and disable the Automatically detect settings option.
By setting a network in Windows 10 as a private network, however, the system in use will become pingable (i.e. it will respond to any PING requests from other clients connected to the same network, wireless and/or wired), and the shared folders will be viewable by others users connected to the LAN wirelessly or via Ethernet cable.
We clarified this in the article Sharing files and folders on the local network with Windows.
When to use the private network
By default, if a system is connected to the local network (wireless or Ethernet) and this connection is configured, in Windows 10, as a private network, any user who from the same LAN tries to access the Network Neighborhood window (Windows XP), Network (Windows 7, Windows 8.1 and Windows 10) or any similar functionality present in Linux, macOS or on iOS, Windows Phone or Android mobile devices, the name of the system of others will appear (in this case the Windows 10 machine).
The name displayed in the operating system’s Network window is Windows 10 indicates by typing about PC o Display your PC name in the search box.
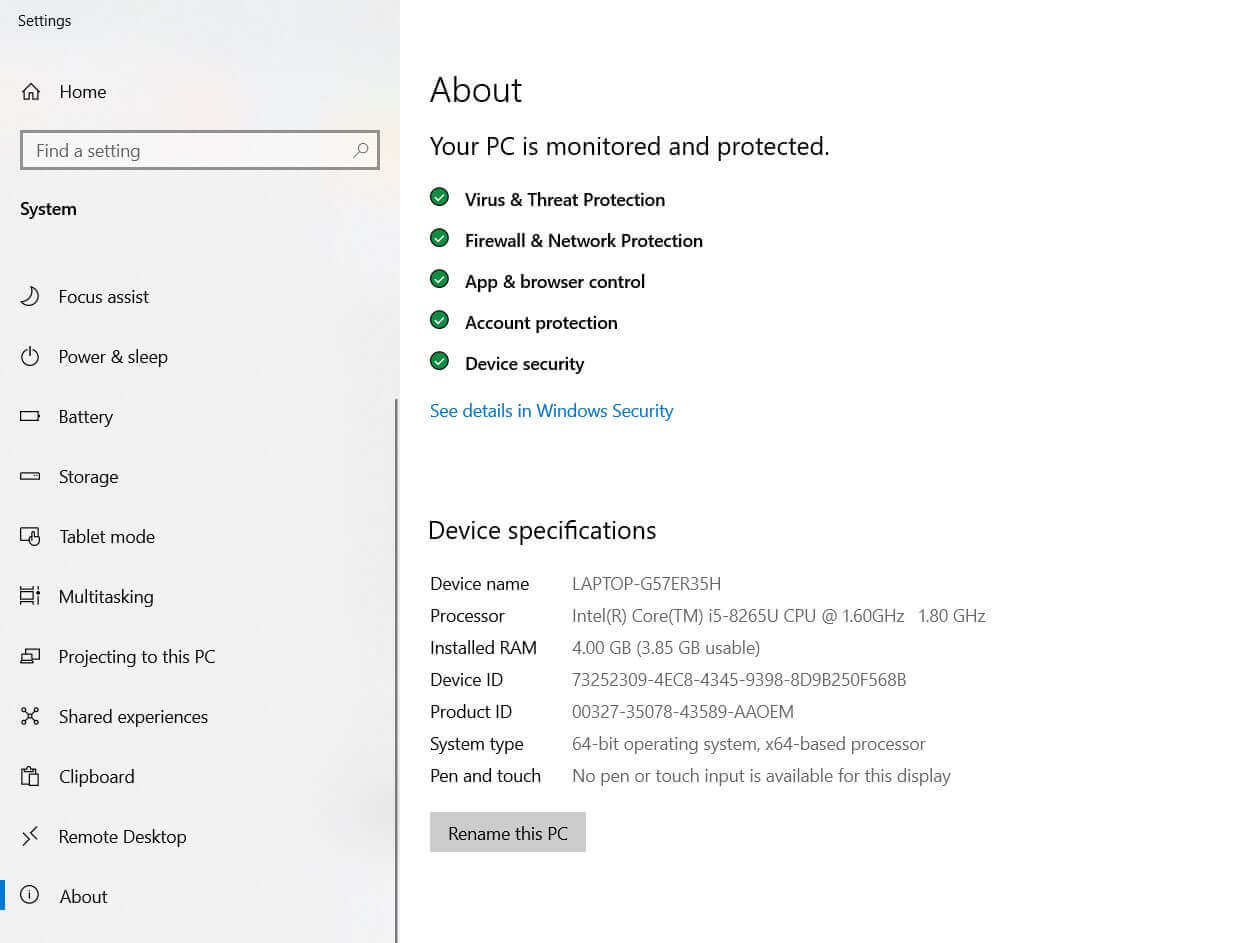
The name assigned to the Windows 10 system is clearly shown next to the Device Name item.
The PC’s name can be changed by clicking on the Rename this PC button, but, as in the case of previous versions of Windows, the system must then be restarted for the intervention to take effect.
The same result can be achieved by pressing the Windows + R key combination, typing sysdm.cpl, and then click the Change button.
Whether the two systems belong to the same network or a temporary WiFi hotspot is set up on one of the two, the network must be configured as a private network.
How to check if the network is public or private in Windows 10
The latest Windows 10 indicate whether the network connection is configured as public or private by simply clicking on it in the traybar and then clicking on Properties.
Alternatively, just type Network Status in the Windows 10 search box and check what appears at the top of the window corresponding to the Internet connection diagram.
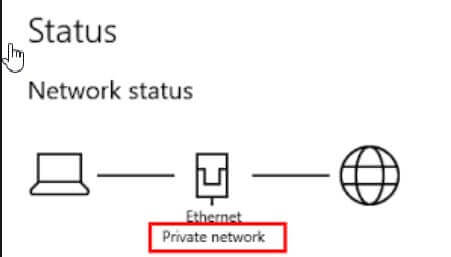
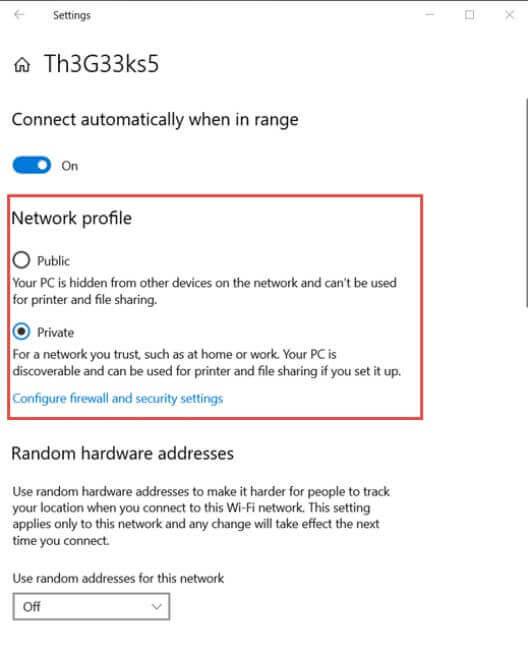
Here you can click on Edit connection properties or on the Properties button (in the case of Windows 10 May 2020 Update, version 2004) to access the window seen above, which allows you to choose Public or Private.
In previous versions of Windows 10 (Windows 10 Creators Update and earlier), you had to click on the WiFi or Ethernet network name. If the Make this PC discoverable “switch” was set to Enabled, it meant that your network connection was set as a private network.
Check if the network connection is set as public or private via PowerShell
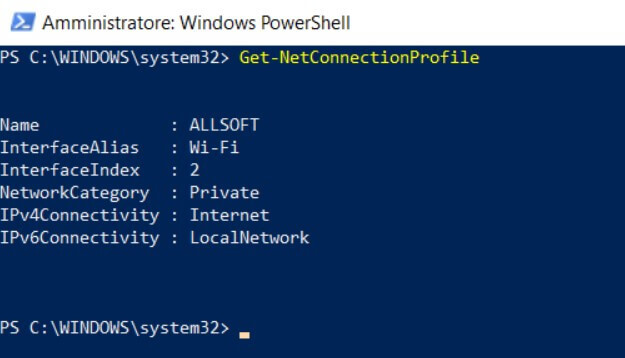
By accessing Windows PowerShell (press Windows + X then choose Windows PowerShell ) and typing Get-NetConnectionProfile you can know if the connection in use is public or private.
Using the following syntax (PowerShell will be opened with administrator rights), it will be possible to modify the network connection making it public or private (just replace Private with Public or vice versa):
Set-NetConnectionProfile -InterfaceIndex INDEX -NetworkCategory Private
Instead of INDEX, it will be necessary to specify the numerical identifier assigned to the network interface (obtained using the Get-NetConnectionProfile command seen previously).
Check what resources are exposed on the network
We suggest not limiting yourself to the checks described in the previous paragraphs.
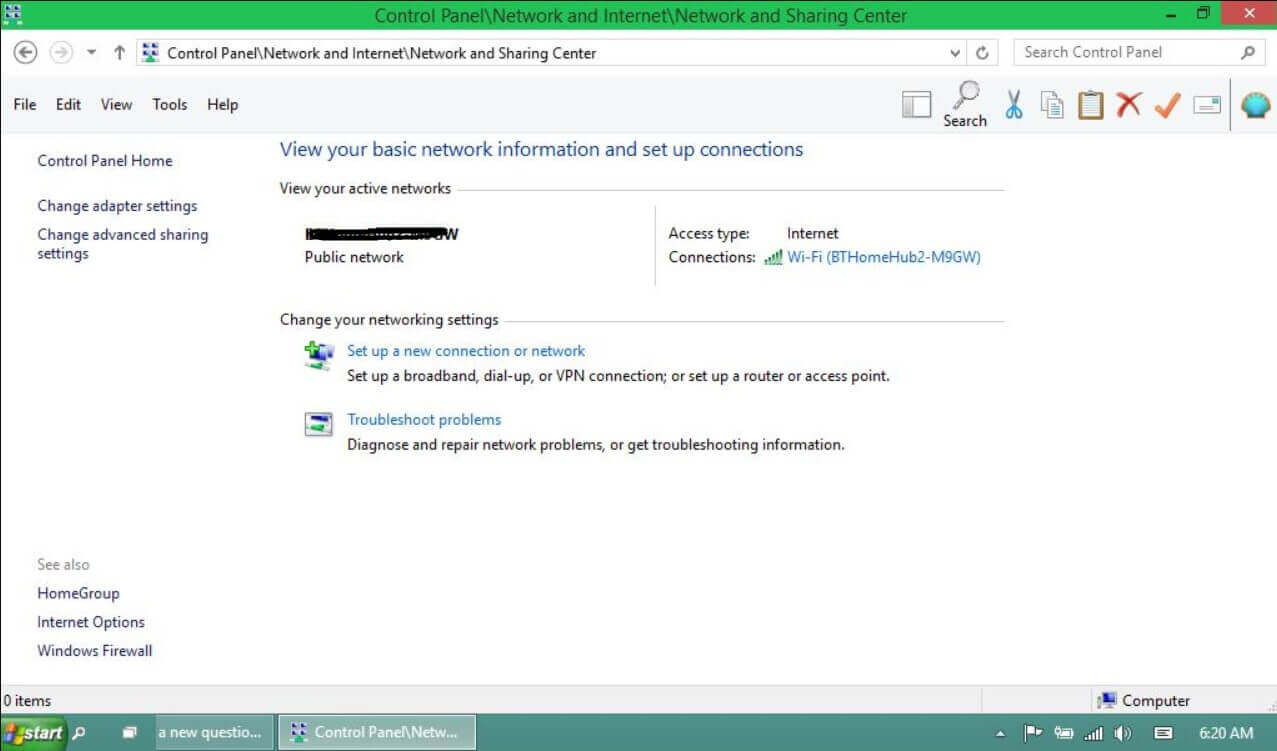
Even in Windows 10, the old Network and Sharing Center is still present: to open it, just click on the same name’s link at the bottom of the Network Status screen.
In the Network and Sharing Center, the type of network – public or private – is highlighted.
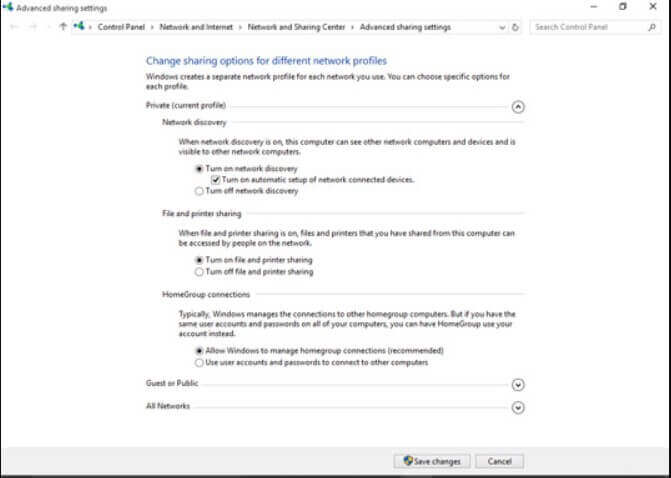
By clicking on the link Change advanced sharing settings or, in the Windows 10 network settings window on the link of the same name, a screen similar to the one below will open:
To share folders, files, and resources within a private network with Windows 10, the following options must be selected and active:
– Enable network discovery
– Enable automatic configuration of devices connected to the network
– Enable file and printer sharing
However, these three choices must only and exclusively concern the profile indicated as “private” (a private network).
For the profile to be used for public networks ( Guest or public ), it is necessary to check that only the following two options are selected:
– Disable network discovery
– Disable file and printer sharing
Otherwise, the resources shared locally will be available to other users even if the network connection should be configured as a public network (undesirable behavior).
In the All networks section, you can decide whether or not to enable public folder sharing (to know what they are, refer to the article Sharing files and folders on a local network with Windows ).
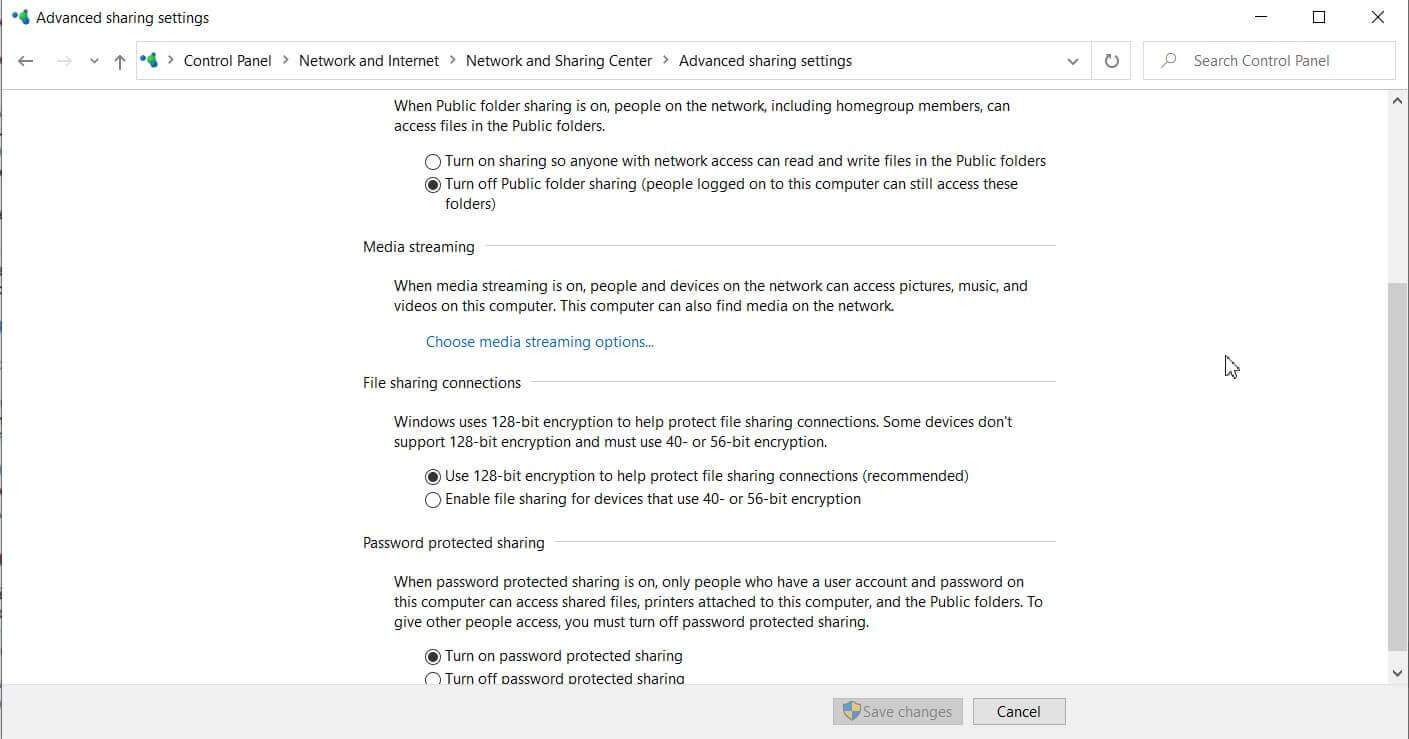
Our advice is to disable public folder sharing and ensure the Enable password protected sharing option is enabled.
Finally, if you decide to configure the connection as a Private network, it is always good to check how many and which folders you share on the local network.

A tech-savvy writer with a knack for finding the latest technology in the market, this is what describes John Carter. With more than 8 years of experience as a journalist, John graduated as an engineer and ventured soon into the world of online journalism. His interest includes gadget reviews, decoding OS errors, hunting information on the latest technology, and so on.


. What are the news of the new format for images")


. What are the news of the new format for images")

