Finding free DDNS that is supported by a good number of hardware devices isn’t super easy. No-IP is a good choice for those who receive a dynamic IP address from the provider and want to remotely access their infrastructure.
While arguably the most famous, DynDNS isn’t the only DDNS ( Dynamic DNS ) service.
Not only does DynDNS offer a mnemonic address (which never changes) that can be dynamically associated with a public IP address. While DynDNS has become a paid service, No-IP is, for example, a great free DDNS.
The basic No-IP profile allows you to use the free DDNS service and ensure that whenever your router connects to the Internet, the public IP address automatically assigned by the provider is matched to the mnemonic address provided by No-IP.
For example, suppose you register for free, with No-IP, the mnemonic address casarossi.ddns.net . The free DDNS service will allow you to associate the public IP dynamically assigned by the telecommunications operator with casarossi.ddns.net .
Result? By activating a server software on a system connected to a local network or installing, for example, surveillance cameras, it will not be necessary – every time – to know the public IP assigned by the Internet provider to the router but just type the address casarossi.ddns.net followed by the number of the port on which you want to connect to instantly reach your router wherever you are (regardless, therefore, of your geographical position).
For all the details, we suggest reading the article DDNS: what it is, how it works, and how to use it.
Free DDNS: this is how No-IP is used
Setting up and using a free DDNS like No-IP is very simple.
To proceed and get your mnemonic address, just follow a few easy steps:
1) Go to this page and type in the Hostname box named the third level chosen (example: casarossi ).
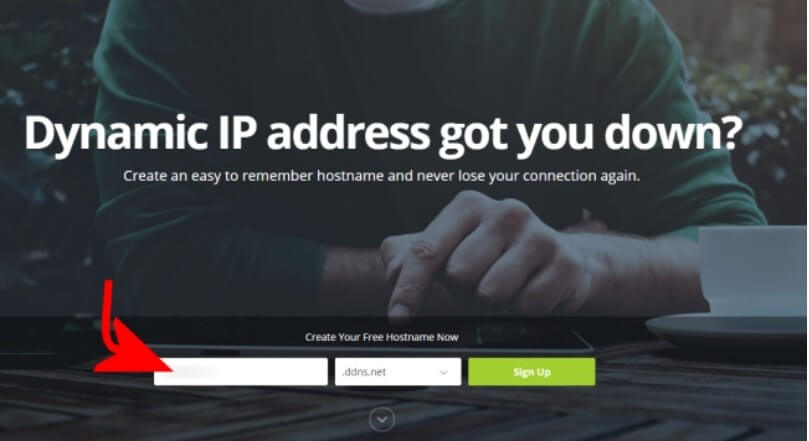
2) Choose, from the drop-down menu just on the right, the domain on which you want the third level to be created (example: ddns.net or hopto.org, zapto.org , sytes.net ).
3) Press the Sign up button and complete the form that will appear.
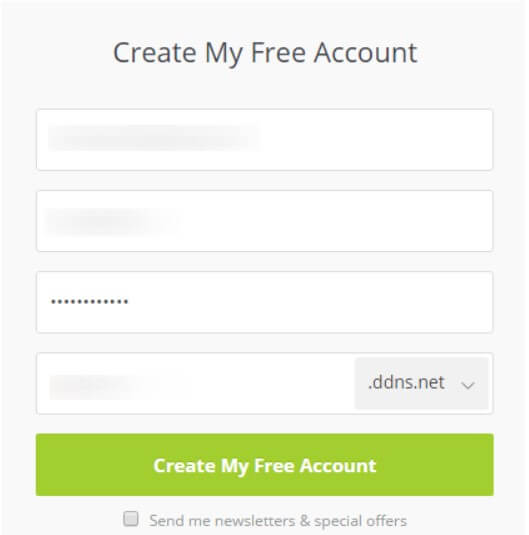
You must indicate your email address in the first field while in the following, a username and password (which is sufficiently long and complex).
4) At this point, you will need to check if your router supports DDNS services and which ones are compatible.
You will then have to type (usually http://192.168.1.1 or http://192.168.0.1 ) to access the router configuration panel, then go to the advanced settings and look for the DDNS or dynamic DNS section.
Here, you can check the No-IP support by acting on the Service Provider drop-down menu (or similar item).
If the free No-IP DDNS service’s support is not provided, we suggest that you do a check that few, generally, do.
That is, we recommend checking that a separate device, equally connected to the router in the local network, does not support No-IP on its own.
If you are using IP cameras for indoor and outdoor surveillance, they may support DDNS service. Since they are connected to the router, they can communicate the public IP assigned by the telecommunication provider filling the gap in the router. Foscam
video cameras updated to the latest firmware version, support DDNS No-IP service without problems.
No-IP summarizes at this address the routers and devices that support the service: by way of example, we mention all the most recent Netgear routers, ASUS routers, many TP-Links, AVM’s Fritz! Boxes, the most recent Ubiquity routers, the extremely versatile Draytek, the NAS branded Synology (even a NAS server can therefore take care of updating the DDNS service), in addition to the aforementioned Foscam cameras.
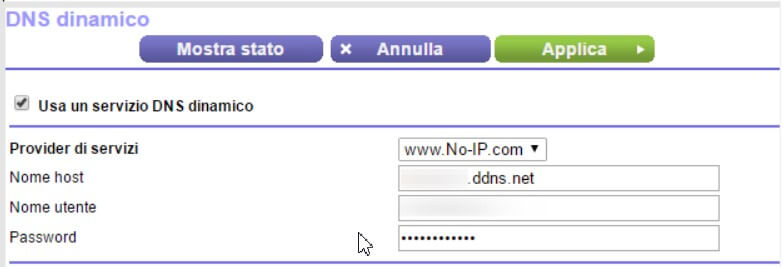
5) From the configuration panel of the router, NAS, or IP camera, simply choose No-IP as the free DDNS service provider and then enter the Host name, username, and password previously specified when registering on the No-IP site.
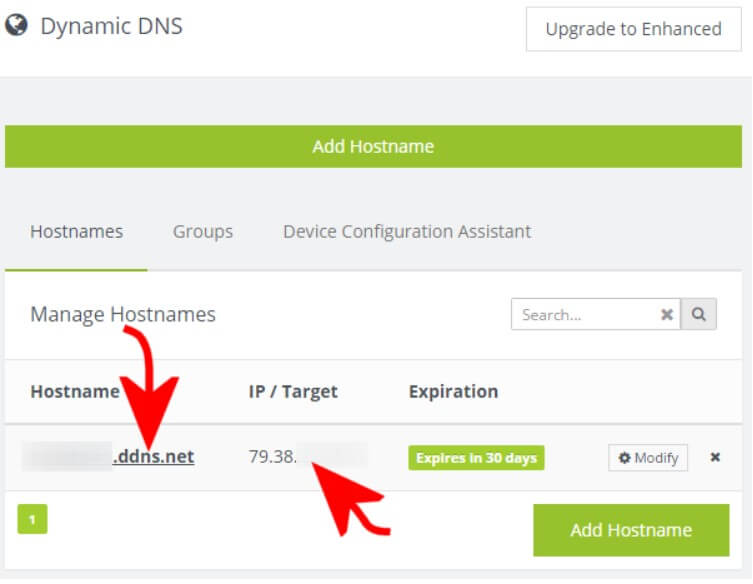
6) After saving the changes, connecting from the browser with this page, you should read the Internet provider’s public IP next to the chosen mnemonic address.
No-IP’s free DDNS service has a single relevant limitation: within the free profile, users must take care to confirm their willingness to use their mnemonic address every 30 days.
To send the confirmation, just click on the link that No-IP sends in the email sent 7 days after the deadline.
Those who decide to upgrade to a paid DDNS plan will see this limitation disappear.
The update of the public IP in the dashboard is usually slower: this is normal.
7) To verify that the correct public IP is matched to the chosen mnemonic address, just use the nslookup command at the prompt.
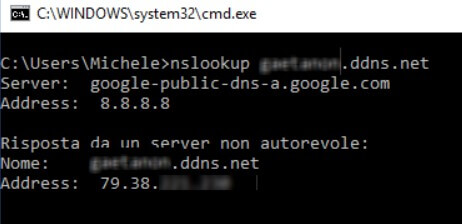
After nslookup it will be necessary to specify the mnemonic address chosen on No-IP.
8) If no hardware device connected to the local network supports No-IP, the appropriate client software can be installed, which can be downloaded from this page.
In this case, the only problem is that the system where the client will be installed must always be kept on and connected to the router. Conversely, the correct public IP address will not be automatically communicated to No-IP and associated with the mnemonic address chosen during registration.
9) Another alternative is to replace – where possible – the default router firmware (installed by the manufacturer) with a package such as DD-WRT, Tomato, or Open-WRT.

A tech-savvy writer with a knack for finding the latest technology in the market, this is what describes John Carter. With more than 8 years of experience as a journalist, John graduated as an engineer and ventured soon into the world of online journalism. His interest includes gadget reviews, decoding OS errors, hunting information on the latest technology, and so on.


")
