What to check when you are unable to access shared folders on the local network with Windows.
In the era of “everything in the cloud”, one of the key aspects is sharing folders and their contents within the local network.
Microsoft has been offering “from the mists of time” the SMB ( Server Message Block ) protocol in Windows that allows allowing access to shared resources by other devices connected to the LAN network (even remotely if the ports used by SMB were exposed on the public IP: what to always avoid! …).
SMB essential for sharing folders and resources on the network but pay attention to the version used
Microsoft has released various versions of the SMB protocol over time. Vulnerabilities discovered in the first version (SMBv1), presented in the early 90s, were exploited by well-known worm-ransomware such as WannaCry (spread from May 2017).
Most recently, a security bug found in SMBv3.1.1, the newest “incarnation” of the protocol built into Windows 10 versions 1903 and 1909 and Windows Server versions 1903 and 1909, has caused some concern.
First of all, the advice is to check that you have installed all Microsoft updates released every month in Windows. Second, you should always check that you have disabled the use of SMBv1.
Although the official Microsoft patches have allowed the resolution of the security problems exploited by WannaCry and similar threats, SMBv1 is considered not very solid and intrinsically insecure.
In newer versions of Windows, the SMBv1 protocol is disabled by default. You can still check this by typing the following from a Windows PowerShell window (in Windows 10 and Windows 8.1):
Get-WindowsOptionalFeature -online | where FeatureName -like SMB1 *
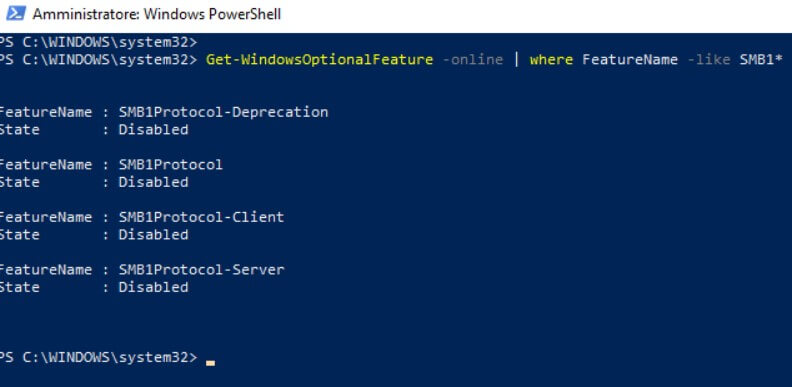
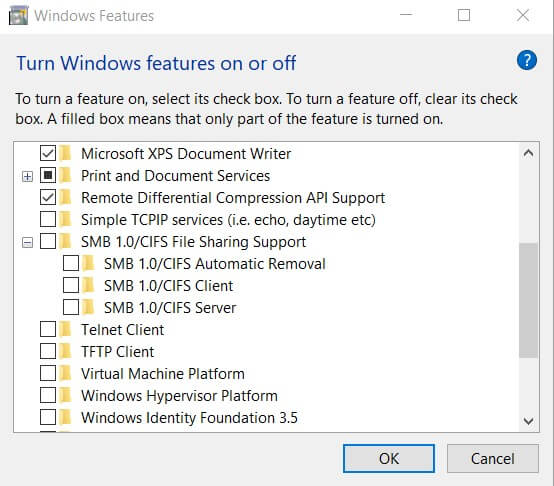
If the feature is enabled ( Enabled ), you must press the Windows + R key combination, type optional features, then disable the SMB 1.0 / CIFS file sharing support box and press OK.
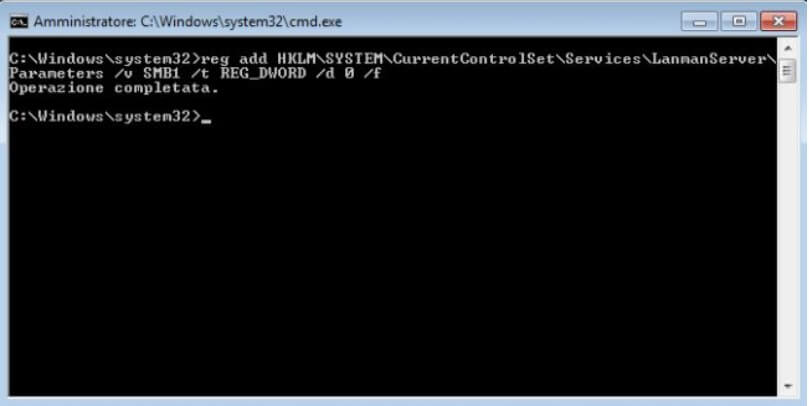
To disable SMBv1 in Windows 7, you can open the command prompt with administrator rights and type the following:
reg add HKLM \ SYSTEM \ CurrentControlSet \ Services \ LanmanServer \ Parameters / v SMB1 / t REG_DWORD / d 0 / f
Pay attention to the network profile chosen in Windows
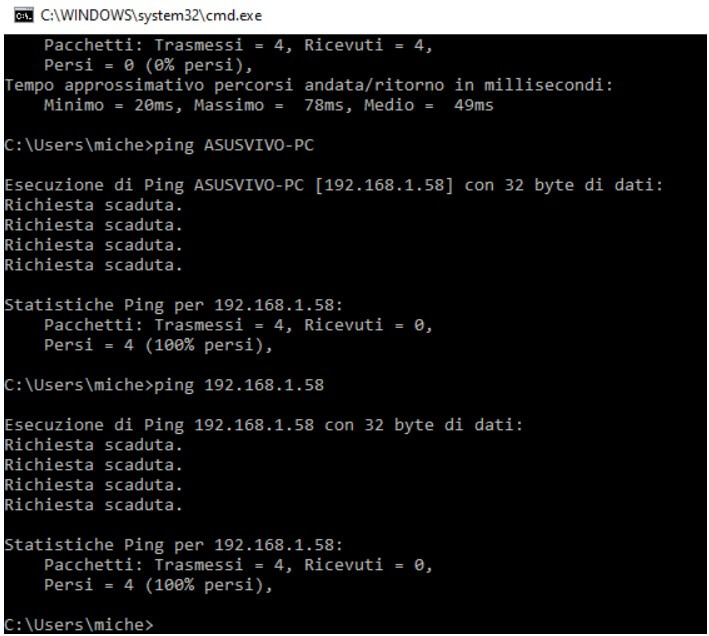
If you cannot access shared folders on the network on other Windows systems, the first thing to check is to open the command prompt then type ping, followed by the name or local IP address of the system connected to the LAN on which the folders have been shared.
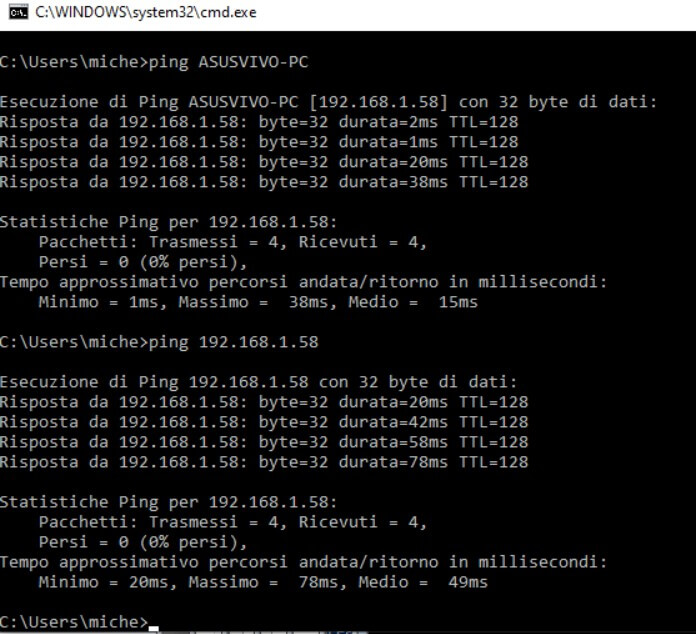
If you always get Request timed out, the other system’s chosen network profile is likely Public and not Private.
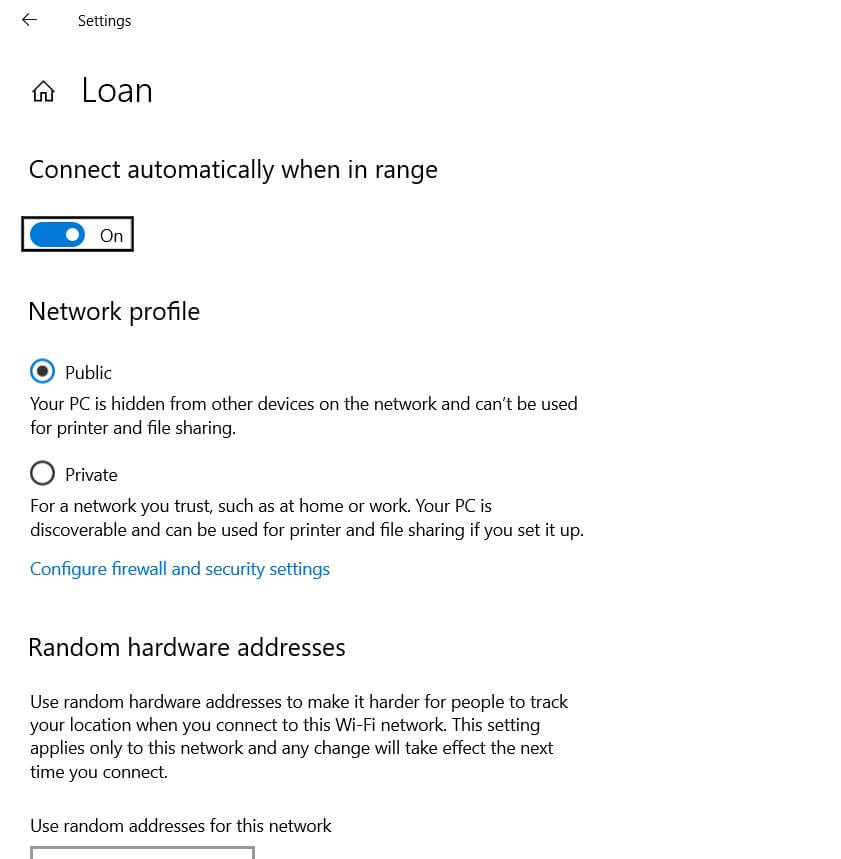
In fact, in all versions of Windows, the Public network profile is useful when connecting to a WiFi network of others to avoid exposing any shared resource on your PC to the network.
In the article Difference between public and private network in Windows 10, we have seen the changes between the two public and private network profiles.
To solve the problem, it is therefore essential to go to the other system (the one sharing the folders), type Network status in the case of Windows 10 (in the Start menu search box), select Change connection properties, and choose Private as the network.
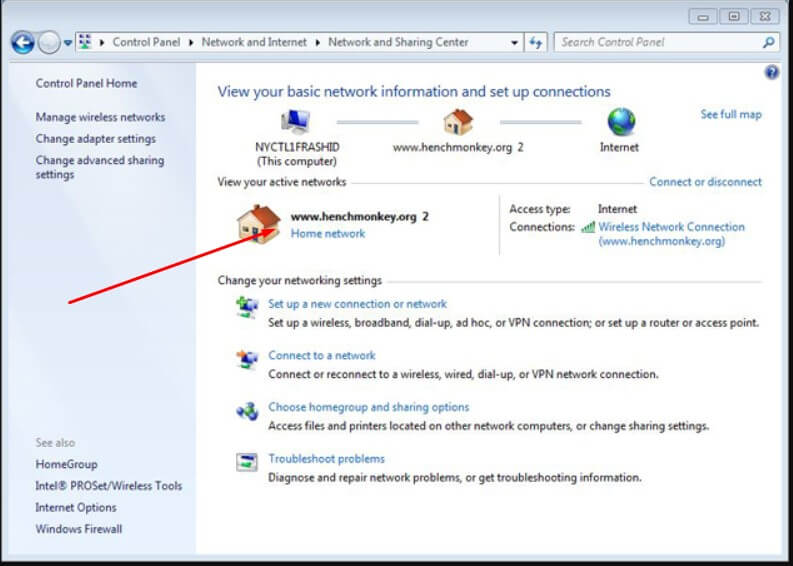
In Windows 7, you can write Network and Sharing Center in the Start menu search box and then make sure that the network name does not indicate Public Network (then choose, for example, Corporate Network ).
A PC name can always be read by typing hostname at the command prompt or press the key combination Windows + R and typing sysdm.cpl .
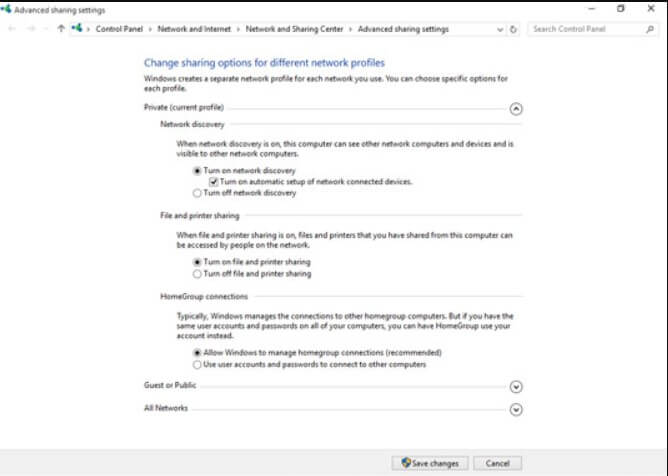
At this point, regardless of the version of Windows, by pressing Windows + R , typing control, selecting Network and Sharing Center from the Control Panel then Change sharing settings from the left column, you will have to click on the Private profile and choose Enable Network Discovery as well as Enable file and printer sharing.
The same configuration window can be reached by pressing Windows + R then pasting the following in the Open field :
control/name Microsoft.NetworkAndSharingCenter / page Advanced
At this point, the Windows system sharing the folders should be perfectly visible to other devices connected to the local network (and respond to the ping command as seen above).
Properly share folders on the network
To share a folder on the local network, you should normally right-click on its name using a File Explorer window ( Windows + E ), choose Properties, then click on the Sharing tab and finally on the Share button.
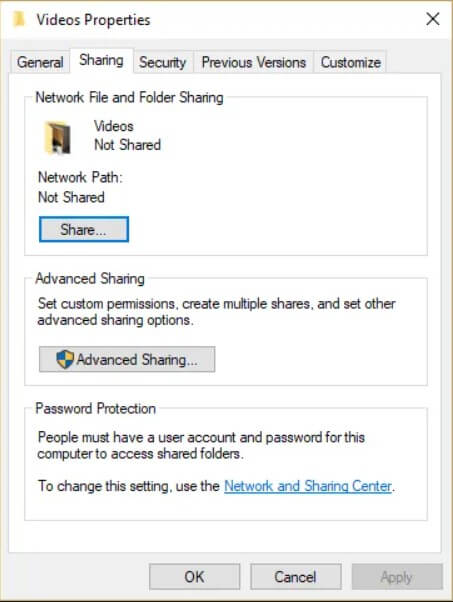
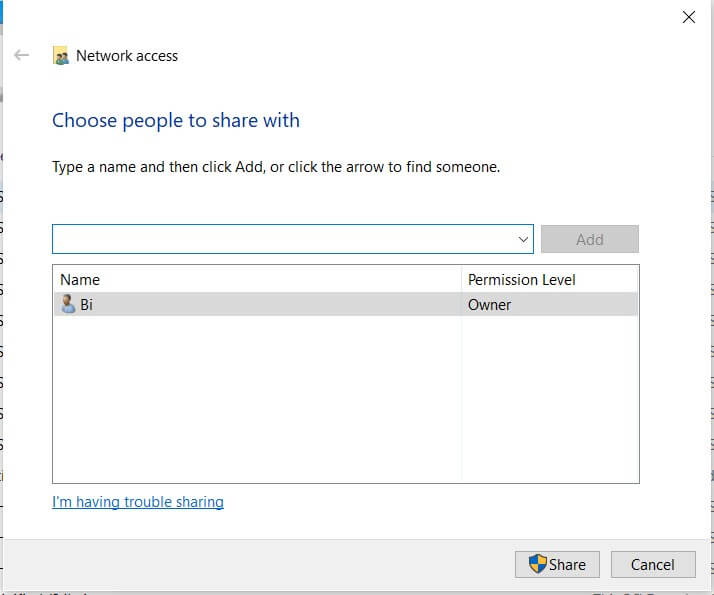
At this point, in the appropriate field, you can type the name of a user account on the Windows system in use, which must have a title to read or read/write in the selected folder.
Before clicking on Share, it is good to indicate a local account and not a Microsoft user account. In this second case, to access the shared folder’s contents, you should type the password of the Microsoft user account (which is highly discouraged).
Furthermore, it is good to check that the local account indicated is protected with a password. Otherwise, the shared resource will not be accessible.
For more information on managing permissions for access to shared folders on the network, we suggest reading the in-depth analysis of Shared folder permissions in Windows: how to manage them.
Override the permissions mechanism for username-based shared folder access
The old system that “veterans” surely know that allows you to have full access to a Windows PC’s entire file system through the local network based on administrative accounts still works today.
If you do not want to waste time creating and configuring all the shares on a Windows system connected to the local network, you can use the shares C $, D $, ADMIN $.
Which we invite you to refer to, by typing Windows + R then \\ COMPUTER-NAME \ C $ you can access the entire contents of the C: drive on the system called COMPUTER-NAMEafter entering the credentials of an administrator account present on this system.
Of course, you can use \\ COMPUTER-NAME \ D $ to access drive D: and so on.
To enable this possibility, on the PC sharing the data, open the command prompt with administrator rights and then type:
reg add HKLM \ SOFTWARE \ Microsoft \ Windows \ CurrentVersion \ Policies \ System / v LocalAccountTokenFilterPolicy / t REG_DWORD / d 1
To disable this special feature, just write the following:
reg delete HKLM \ SOFTWARE \ Microsoft \ Windows \ CurrentVersion \ Policies \ System / v LocalAccountTokenFilterPolicy

A tech-savvy writer with a knack for finding the latest technology in the market, this is what describes John Carter. With more than 8 years of experience as a journalist, John graduated as an engineer and ventured soon into the world of online journalism. His interest includes gadget reviews, decoding OS errors, hunting information on the latest technology, and so on.


. What are the news of the new format for images")


. What are the news of the new format for images")

