How to capture the screen or parts of it in Windows: we present all the ways to do this without ever using third-party applications.
Using the Stamp key is probably the best known and one of the most popular methods used to capture the Windows environment screen. In this case, the contents of the current screen are copied to the Windows clipboard. Further, they can be pasted into a graphics program (as well as any other application) using the key combination Ctrl + V.
The new intelligent clipboard area, based on the cloud which was introduced with the Windows 10 Update on October 2018 (version 1809), even allows you to store more information in memory (therefore you can consider taking multiple screenshots with the possibility of recovering and reusing them later, even from more devices).
Over time, Microsoft has introduced so many tools in Windows to capture the PC screen in the form of an image that today it is complex to identify them all and, above all, it is tricky to identify those which may stand as the most suitable for your work.
All the methodology for activating the various capture modes works perfectly in Windows 10 and Windows 8.1, while some may not work in the same way in Windows 7.
Screen capture and automatic storage as a file
As mentioned above, pressing the Stamp key is the easiest way to copy the entire screen’s contents into memory and manage it with your favorite application.
An excellent capture tool is to press the Windows + Stamp key combination: in this case, the entire screen’s contents will be automatically saved by the operating system as a file in PNG format.
By default, the file is automatically named Screenshot with a number in increasing series.
The screen captured with the Windows + Stamp key combination is saved in the % userprofile% \ Pictures \ Screenshots folder.
The “counter” is activated when Windows saves files in the % userprofile% \ Pictures \ Screenshots folder never starts from scratch, even after deleting unnecessary files.
To reset the counter, we suggest opening the command prompt with administrator rights by typing cmd in the Windows search box and then pressing CTRL + SHIFT + ENTER. At the command prompt, you will need to type the following:
reg delete HKCU \ Software \ Microsoft \ Windows \ CurrentVersion \ Explorer / v ScreenshotIndex / f
It is essential to type the command in full, paying maximum attention to the syntax so that no errors creep up.
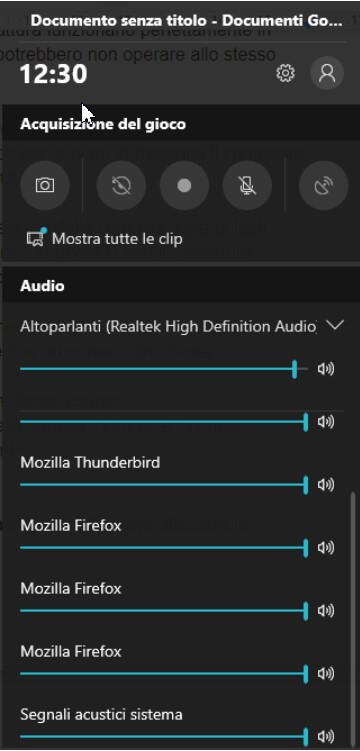
An alternative for screen capture compared to pressing Windows + Stamp consists of pressing Windows + ALT + Print: in this case, however, Windows will use the so-called Game Bar for capturing, saving the images, by default, in the folder % userprofile% \ Videos \ Captures.
To open the settings, just type Game Bar in the Windows 10 search box: it should be borne in mind that it was developed mainly to facilitate the capture of still images or video sequences from video games and multimedia programs.
How to capture only the currently open window
Windows offers a practical key combination that, instead of capturing the screen, allows you to capture only the window’s contents currently open.
By pressing the ALT + Stamp key combination, Windows will copy only the current window contents to the clipboard area (on some notebooks, you may also need to hold down the Fn key to achieve the same result ).
After acquiring the current window, you can go to any application and press CTRL + V to manage it.
Capture a portion of the screen and customize the selection
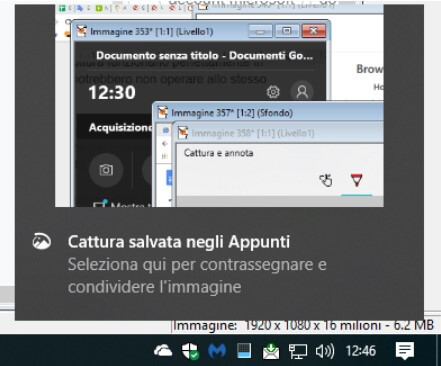
At the time when Windows 10 Creators Update (version 1703) was released, Microsoft also introduced the very useful combination of Windows + SHIFT + S keys: by pressing it, a small bar will appear at the top of the screen using which you can decide whether to capture a free area of the screen, a rectangular portion (even larger than the open window) or the entire screen.
The result is excellent because, by default, what is captured after selection will be temporarily stored in the Windows clipboard area. By clicking on the bottom right image that will open automatically, the capture and annotate app will open.
By pressing CTRL + V immediately in another application, you can directly paste what has been acquired. However, you can eventually use capture and annotate to add annotations, highlight or delete parts of the image, make basic changes.
Use the Windows 10 Capture & Annotate app.
The Capture and Annotate app can also be used by starting it when needed and using it, for example, to defer the automatic capture of screen images (menu New, Capture now / Capture in N seconds ).
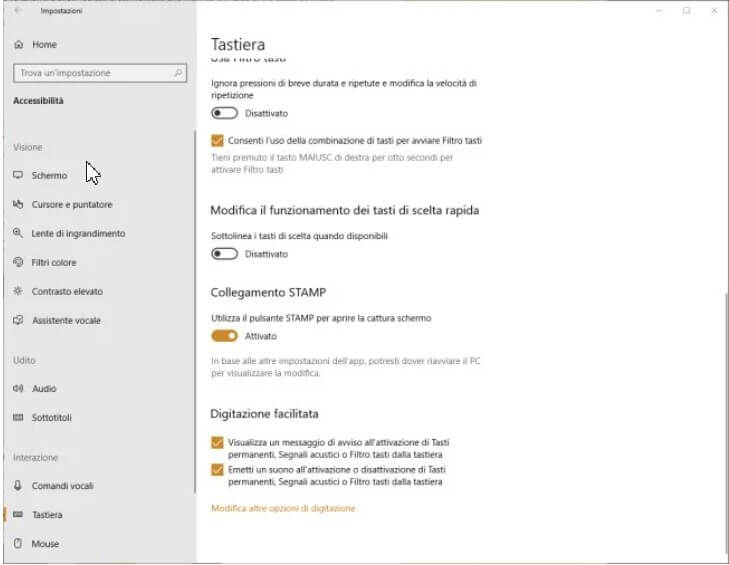
It replaces the historic Snipping Tool application, which can still be executed by typing Snipping Tool in the Windows search box. To manually launch the application from the Windows 10 Start menu, simply type Capture and Annotate in the search box and press Enter. Pressing the Windows + I key combination then choosing Accessibility and Keyboard from the left column, by activating the “switch” Activated in correspondence of the PRINT connection, you can request the upper bar’s appearance to capture screenshots by simply pressing the Print key.
Image
The effect will be the same as the Windows + SHIFT + S key combination presented earlier.
Auto-save to the cloud with OneDrive and Dropbox
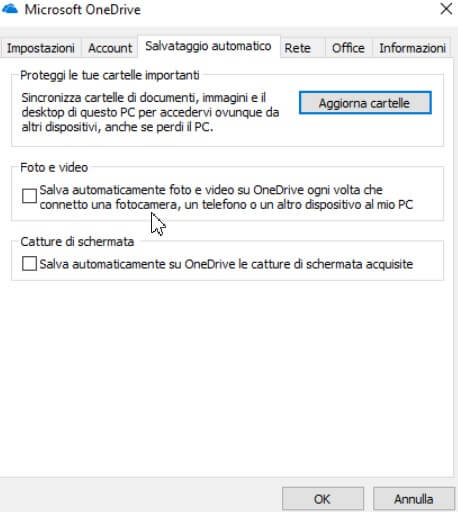
As a final note, it must be said that the apps of some well-known online storage services (such as OneDrive and Dropbox), by default, ask the user if they want to automatically backup the screenshots online as they go.
In the case of OneDrive, to activate or deactivate this feature, just click on the icon shown in the tray bar with the right mouse button, choose Settings, click on the Autosave tab and then click on the Automatically save screen captures captured on OneDrive box.
Dropbox consists of an absolutely identical setup.
A PowerShell script to automatically capture full screen or parts of it
Finally, we would also like to pen down that Microsoft also provides a PowerShell script that allows you to automatically capture the entire screen or portions of it (even on a programmatic basis if configured with Scheduler ).
In the article How to capture a web page without installing any extension, we have seen how to capture screen, without stress, an entire web page vertically by simulating a scrolling operation.

A tech-savvy writer with a knack for finding the latest technology in the market, this is what describes John Carter. With more than 8 years of experience as a journalist, John graduated as an engineer and ventured soon into the world of online journalism. His interest includes gadget reviews, decoding OS errors, hunting information on the latest technology, and so on.


. What are the news of the new format for images")


. What are the news of the new format for images")


