How to manage the Windows boot manager with EasyBCD: what is the BCD file and how to configure it to add new entries to the boot menu or modify existing ones. We also explain how to boot ISO and VHD files from the boot menu.
The boot manager is that particular program that is automatically loaded when the PC is turned on, allowing you to choose the operating system to start if more than one is installed (dual boot or multi boot configuration).
The boot manager takes care of selecting the operating system kernel that the user intends to run. Windows Boot Manager is the boot manager that uses the Microsoft operating system while in Linux environment GRUB or LILO are used.
The boot manager is a small executable (named BOOTMGR ), which is generally (except in special cases) located in the system reserved partition created during the Windows installation.
Once the boot manager is loaded, in Windows, “the ball” passes to the boot loader, which continues with the process of starting the operating system chosen by the user from the boot menu.
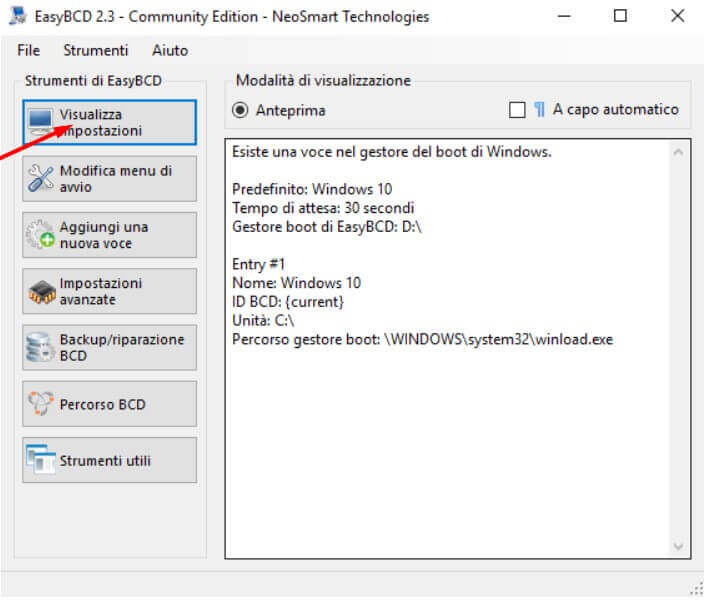
BCD: what it does and why manage it with EasyBCD
Windows Boot Manager draws on the contents of the Boot Configuration Data ( BCD ) file to obtain information on which operating systems are installed on the machine, on which partition, and which path is where the corresponding boot loader is located. BCD replaces the old Windows XP boot.ini file.
By installing the new version of Windows on a different partition than the one containing the other copy of the operating system, the contents of the BCD file will be automatically updated.
EasyBCD is excellent software, also available in a free version, which allows you to manage the Windows BCD file without grappling with the complexity of the BCDEdit command built into Windows and based only on the command line.
Make a backup copy of the BCD file and repair it when something goes wrong
When installing multiple operating systems, the BCD file may get corrupted (see the previous paragraph’s article).
To avoid any problems, the advice is to start EasyBCD and click on Backup / Repair BCD.
In the Backup and Restore Settings pane of the Startup Manager, you will need to set the folder where you want to store the backup copy of the BCD file. The backup creation can be started by clicking on Backup settings.
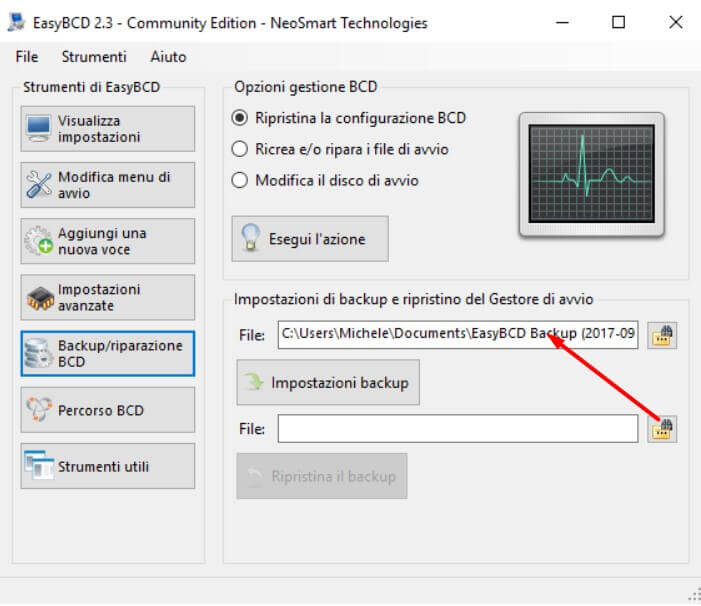
By selecting the Recreate and/or repair startup files option then clicking on Execute the action, EasyBCD will regenerate a damaged BCD file.
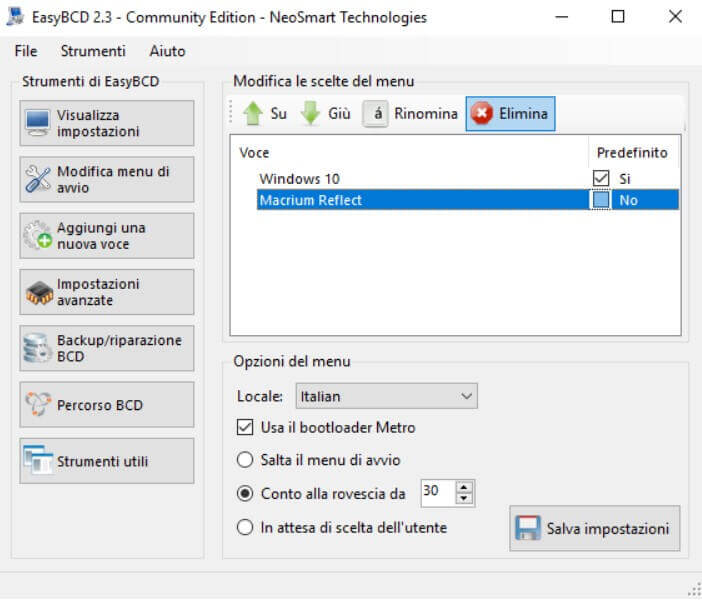
By clicking on the Change start menu, it is possible to vary (increase or decrease) the countdown, that is, the time that elapses before the default operating system’s automatic choice without different instructions from the user.
By clicking on Advanced Settings, you can, for example, change the labels (operating system names) displayed in the start menu.

Make any operating system bootable with EasyBCD
If other operating systems were installed on the system, these could be made bootable by clicking on the Add a new item button and selecting the product to start (Windows, Linux, macOS, …).
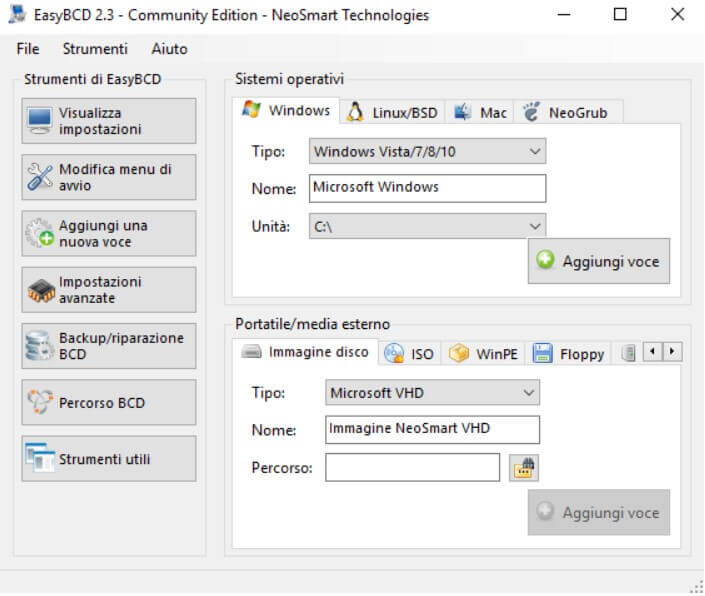
By indicating the drive or partition where the operating system has been installed, EasyBCD will add the appropriate entries in the BCD file ( Add entry ).
In this way, other operating systems, other than Windows, can also be started with Microsoft’s boot manager.
It should be noted that EasyBCD allows starting at boot even those old Windows operating systems that are no longer supported by Microsoft (for example, Windows 2000).
Boot the system from an ISO image
Few people know that the system is bootable even from an ISO or VHD image.
Suppose you often use some system maintenance tool: it might make sense to store it in an ad hoc partition on the disk, then use EasyBCD to add a command to load the utility to the boot menu.
Therefore, instead of inserting a USB key, thanks to EasyBCD, it is possible to load the contents of an ISO or VHD file from the boot menu when the system is turned on.
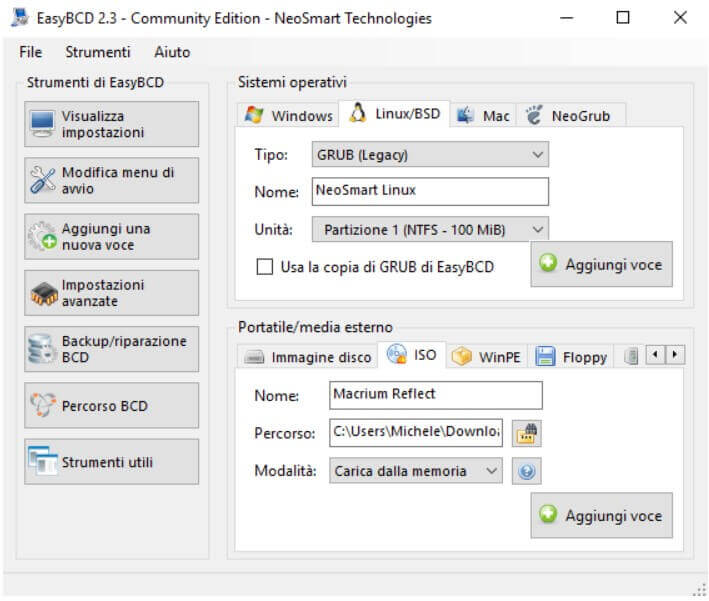
To proceed, simply click on Add an item and, in the case of bootable files in ISO format (in the article Rufus, a guide to using the program to create bootable media, you can find various information on the ISO format), select the ISO tab then set the file to start in the Path box.
The advice is to request, where possible, the loading of the operating system into memory, especially in the case of the lighter tools.
After clicking on Add entry, you will find the entry that allows loading the ISO file contents in the View settings section of EasyBCD.
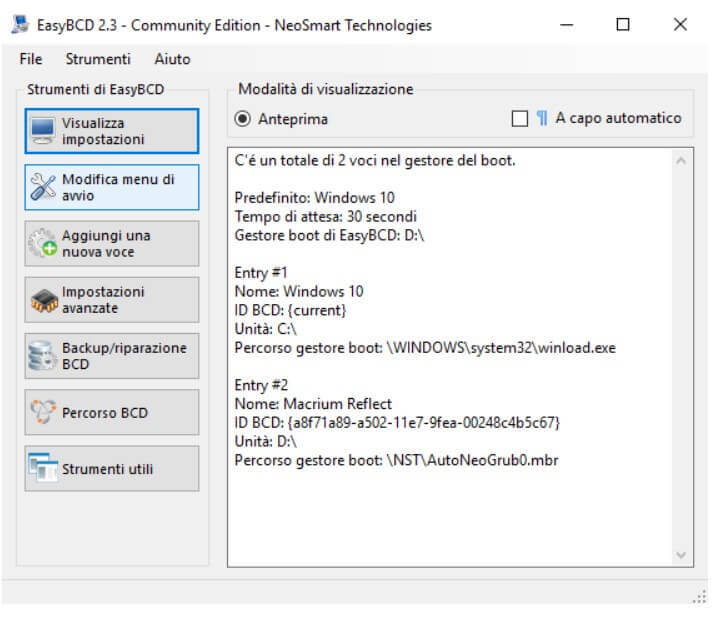
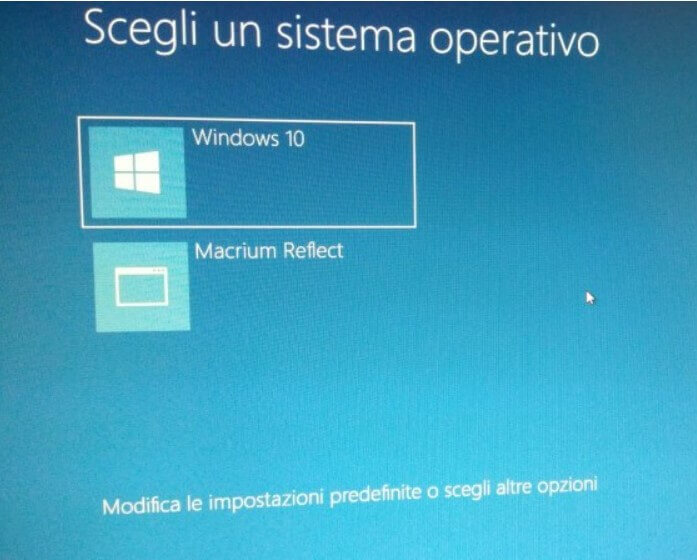
When the system restarts, it will be possible to choose – conveniently – whether to start the main operating system or, in our case, the Macrium Reflect maintenance and recovery environment.
As we have proposed above, a good idea could be to create a partition dedicated to storing ISO files with the maintenance tools that you intend to add to the Windows boot menu.
To proceed, just start Disk Management from the Windows environment ( Windows + R, diskmgmt.msc ), select the hard disk, right-click it, and choose to Shrink Volume.
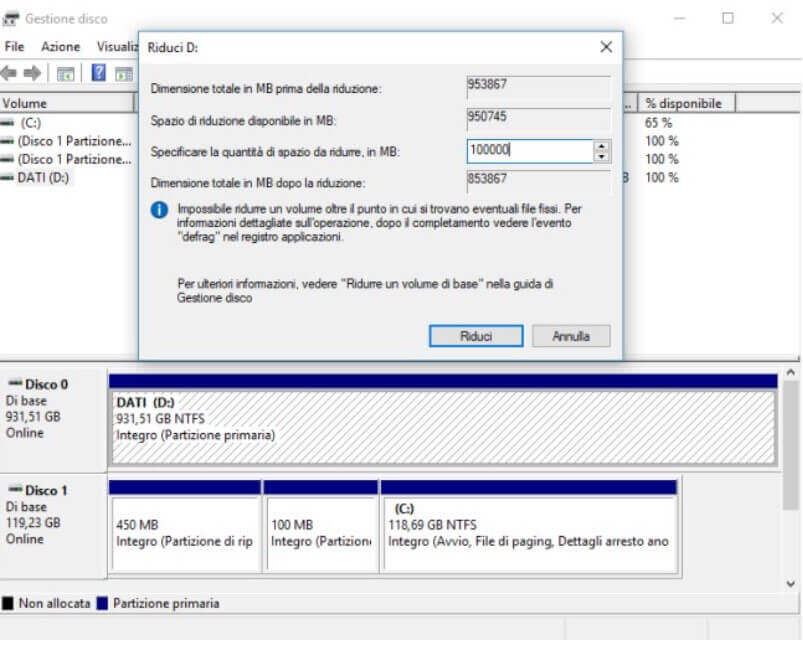
In the example, we asked to reduce the size of the main hard disk by 100 GB.
From EasyBCD, if you want to delete a boot entry, including references to the ISO and VHD files, just click on the Edit start menu button, highlight the item to remove, and then choose Delete.
EasyBCD
– License : freeware
– Download :
Download after free registration
Notes : to obtain the free version of EasyBCD, scroll the page and click on the Register button .
Compatible with : Windows XP, Windows 7, Windows 8, Windows 8.1, Windows 10

A tech-savvy writer with a knack for finding the latest technology in the market, this is what describes John Carter. With more than 8 years of experience as a journalist, John graduated as an engineer and ventured soon into the world of online journalism. His interest includes gadget reviews, decoding OS errors, hunting information on the latest technology, and so on.


. What are the news of the new format for images")


. What are the news of the new format for images")

