To share files and folders, Windows provides several tools, including the functionality Home Group.
Introduced with the launch of Windows 7, Homegroup allows you to easily share documents, images, music, and videos between different computers.

HomeGroup: is it needed?
Windows offers several ways to share files and folders within the local network.
Easy sharing in Windows: Share with… Specific users
The easiest and most immediate way to share files and folders is to use traditional Windows sharing. To use it, in its simplest form, just right-click on the folder you want to share on the local network and choose Share with, Specific users.
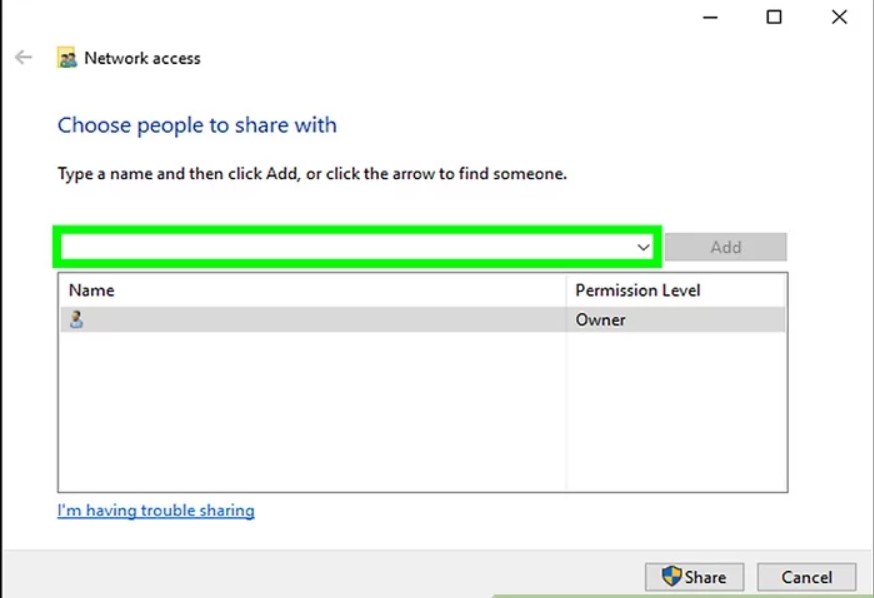
By pressing the arrow to the right of the drop-down menu (to the left of the Add button ), you can share the contents of the folder, without limitations, with the selected user or group of users.
Advanced sharing and permissions at the single-user level
If you want to use a more advanced and versatile sharing tool, alternatively, you can right-click on a folder name from File Explorer, then choose Properties, and finally select the Sharing folder.
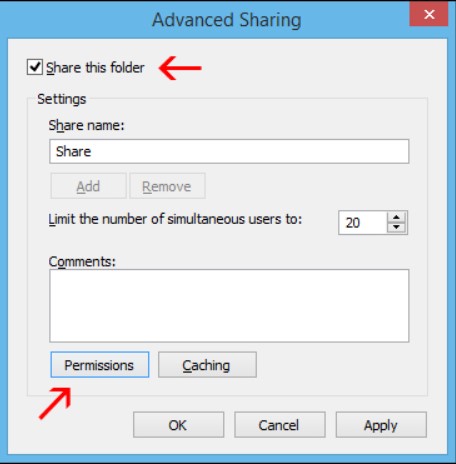
From here, by clicking on Advanced sharing, you can manually specify the name of the share and, by clicking on the Permissions button, add and remove the users authorized to access the folder.
For each of them, by acting on the box bellow, it is possible to grant or revoke complete control, reading, and writing for the shared folder.
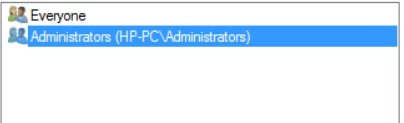
After creating a share with the simplified model (command Share with, Specific users ) seen above, by accessing Advanced Sharing then clicking on Permissions, you will notice that Windows will have assigned the widest permissions to the accounts or user groups previously chosen. These settings can then be freely “customized”.
Sharing folders with the wizard
Few people know that there is a third interesting possibility to share a folder in Windows, regardless of the version in use.
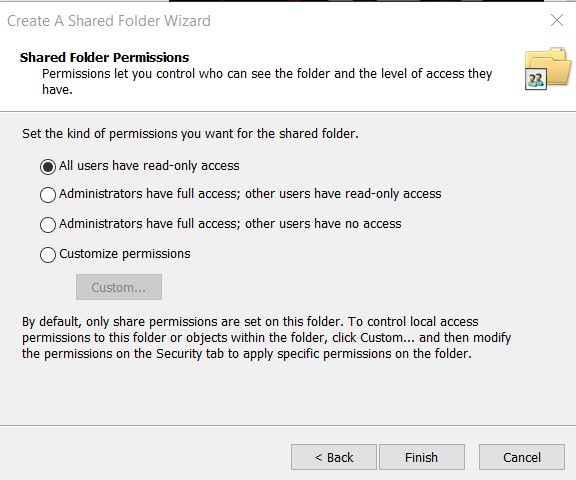
After pressing the Windows + R key combination and typing shrpubw , Windows will present astep-by-step procedure for sharing a folder that already exists or is still to be created.

The wizard allows you to set the path to share (if the folder does not exist, it will create it) and, on the third screen, choose whether to allow access to all users, administrators only and to others for reading, administrators only and deny it to others or allow access only to specific users.
All three mechanisms are based on an authorization system based on the permissions assigned to individual user accounts.
It is worth mentioning that in the case of (non-local) Microsoft user accounts, to access a shared folder, you will have to type the Microsoft account’s password.
Therefore, we suggest sharing the folders on the local network always using local “support” accounts. Conversely, you would be forced to type passwords normally used for logging into your Microsoft account online.
In the following articles, we have explored the ways to share files and folders in Windows :
-Share files and folders on the local network with Windows
Was there a need, then, to also introduce the HomeGroup in Windows?
What is the HomeGroup, and how to use it?
As mentioned earlier, the idea behind introducing features HomeGroup in Windows is the further simplification of sharing files and folders on a local network.
By joining a HomeGroup, you will be able to access any item shared by other users on the local network and, at the same time, share files, folders, and printers even more easily.
Typing HomeGroup in Windows (or selecting the search box HomeGroup from the Control Panel) will access a window for the feature configuration.
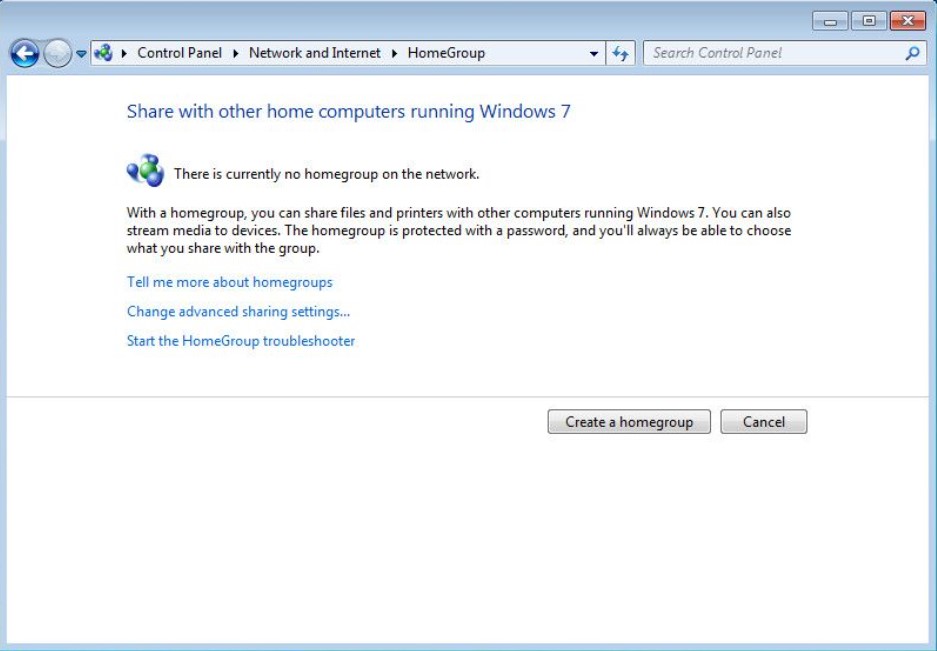
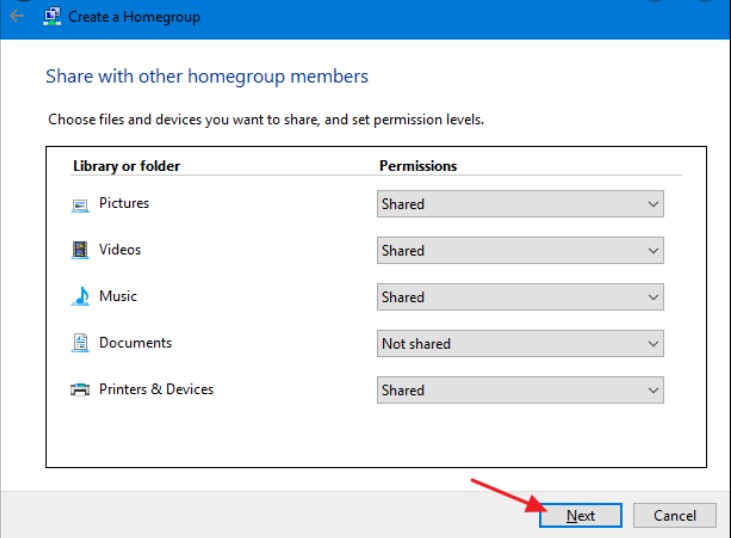
If you choose to create a Homegroup, you can select the items to share (system folders Documents, Pictures, Videos, … as well as printers and devices).
Windows will automatically generate a password that will be used to protect the Homegroup.
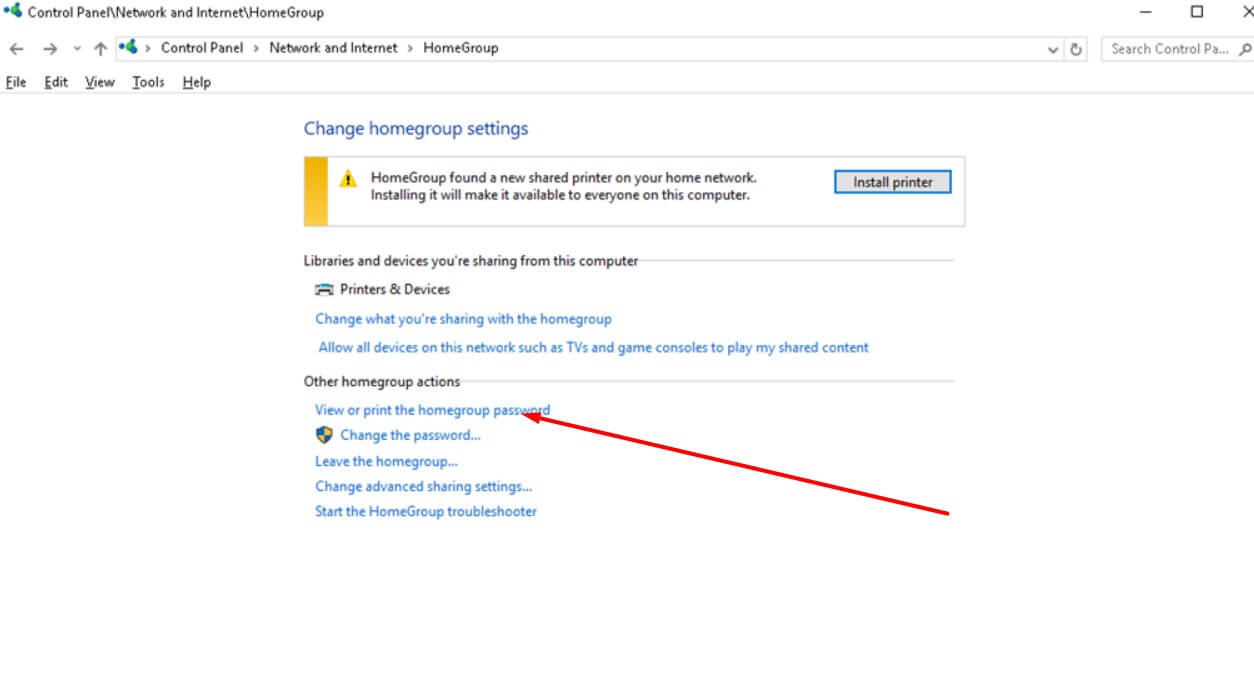
The password can be displayed by going back to the window Homegroup and then choosing View or print the HomeGroup password.
Suppose a HomeGroup is already present within the local network, by typing Home Group in the Windows search box or selecting the homonymous icon from the Control Panel. In that case, you will be informed about the group’s existence for easy sharing of files, folders, and printers.
By clicking on the Join Now button, you can choose the elements you wish to share and, after entering the password communicated by the person who created the HomeGroup, you can access it without problems.
In the main window of the HomeGroup, you can click Exit Home Group to leave or completely close the group.
Disable Homegroup if you are not interested in using it
The existence of the HomeGroup and the ability to access files shared by other users is shown in the left column of any File Explorer window.
To disable Homegroup completely and stop it from appearing in File Explorer windows, just press Windows + R and type services.msc .
In the list of Windows services, you will need to locate HomeGroup Listener and double-click it.

In the window that will appear, you will have to click on the Stop button, then choose Disabled from the Startup type drop-down menu and press OK.
The same operation must be carried out for the HomeGroup Provider service.
We suggest you refer to the article Sharing a printer on the network to share a printer on the network: here’s how.

A tech-savvy writer with a knack for finding the latest technology in the market, this is what describes John Carter. With more than 8 years of experience as a journalist, John graduated as an engineer and ventured soon into the world of online journalism. His interest includes gadget reviews, decoding OS errors, hunting information on the latest technology, and so on.


. What are the news of the new format for images")


. What are the news of the new format for images")


