If you’ve noticed your MacBook Pro acting up, maybe it is getting slower than it used to be. Maybe you’ve noticed that some applications are not launching or some junk files are occupying too much space that cannot be accounted for and much more. If this is the case with your computer, then you might consider formatting it. It should, however, be noted that Formatting doesn’t necessarily mean overhauling the Operating System (OS) altogether. Formatting could mean a simple decluttering of your system.
Sometimes merely clearing junk files may rid off unwanted activities in the background. Applications such as CleanMyMAC were solely developed for such a purpose. Apart from clearing junk files, you may want to consider installing Third-party apps that will check the computer’s registry for broken links. What do I mean by this? Occasionally system files may be missing, which results in a failure of execution of some commands. Such cases are what renders your MacBook Pro either sliding into a ‘loop’ or ‘freezing’ Such third-party apps include but are not limited to;
- DiskWarrior, which is known for its Directory error fixing.
- DataRescue and File Salvage strongly come in handy in the case of an accidental ‘crash’ of your Hard disk.
- iStumbler will scan all wireless networks around your MacBook displaying the properties of each network. It is not only limited to Wi-Fi connections but Bluetooth as well. Sometimes it can scan even the networks not being displayed on your Mac’s Airport menu.
- Mactracker can notify you how much Random-Access Memory (RAM), the kind of drives that are compatible, or the version of the OS that your MacBook Pro should be on.
You may want to attempt various solutions based on your challenge at hand. But always bear in mind that overhauling the OS should be the last option considering associated hardware risks. In some situations, it might be a bit difficult to pinpoint the specific problem. This is why problem diagnosis and resolution remain an iterative process.
Apple Hardware test
This test diagnoses the hardware components of your MacBook Pro. The procedure is as summarized below;
- Except for the keyboard, ethernet connection, display and AC power connection, disconnect all external devices.
- Ensure that your computer is on a flat, stable and well-aerated environment.
- Proceed to shut down your MacBook.
- Turn it back on and immediately hold the D key until you notice the Apple Hardware test icon.
- Select your language option and hit the enter key.
- To commence on diagnosis, select the test button, hit T or return key. Depending on the intensity of your diagnosis, settle on one option between thorough or basic test.
- Once this has been achieved successfully, you may review the test results in the lower right section of your screen.
- To exit this mode, navigate to restart or shut down.
Installing a ‘clean’ version of MacOS

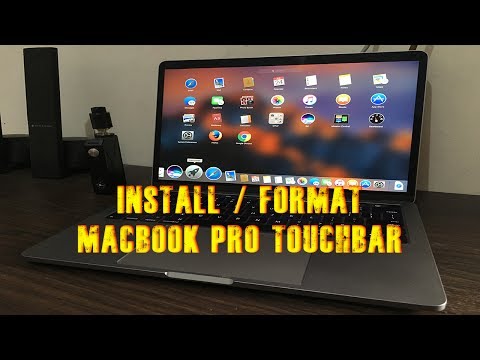
In case, you decide to bypass the suggestions, or if your problem has not been addressed and you feel confident enough, then, by all means, carry on with formatting your MacBook Pro. Re-install your OS and have your Mac up and running like its first day from the factory. Follow the laid down procedure religiously for optimum results.
But before then, make sure that you have your files backed up as security. Also, ensure that your MacBook is plugged in and charging. Here are the Steps for installation:
- Switch on your computer and watch out for a start-up sound. Once this sound is ‘given’ then hold the command key + R. This set of command reinstalls the former version of MacOS.
- Once this step is done, you are at liberty to install the latest MacOS or as suggested by your system requirements. You can achieve this by the following set of key combinations (Command + Option + R)
- Release the combination keys as soon as the Apple logo displays on your screen. You will then be prompted on our internet connection preference.
- Settle on your preferred option either via cable or via Wi-Fi. Note that upgrading your MacBook Pro’s OS requires internet. Once the connection is successful, a recovery menu will display.
- Select ‘Disk Utility’ from the menu.
- Navigate to the left panel of the launched Disk Utility. Here you will find the start-up disk where you should select the name and click on the ‘Erase’ button. Most start-up disks have the default name ‘Macintosh HD OS X.’
- Navigate to the drop-down menu then go for the ‘Mac OS Extended (journaled)’ choice.
- Name your disk and then make the ‘erase’ choice.
- Terminate the Disk Utility Window by hitting ‘Quit Disk Utility’ and then go for ‘Reinstall OS X’ from the recovery menu.
- At this point, you are almost done. Select ‘continue’ and follow the on-screen instructions. Once this is done, you will have yourself a ‘new’ MacOS installed.
In conclusion
It should be noted that Apple Inc. is not liable for any damages incurred during alteration of your OS. With this disclaimer in mind, therefore, users are advised to exercise this practice while exercising extra caution so as not to damage their machines. If executed successfully, then some of the offered solutions may actually restore your computer to the default out of the box configuration. In most cases, the computer runs smoothly thereafter.
It is also recommended that one installs a trusted security system such as Kaspersky, immediately after formatting and reinstalling the OS. This is for protection against all internal (offline) and external (online) threats that are soon to follow once the computer accesses the internet.
While going through the suggested procedures may seem seamless to some people, others might opt to consult with a professional. There is no harm in that. Just be ready to part with a few hundred dollars if you decide to consult. Otherwise, DIY fixes have been known to work almost always with minimal risks if the stipulated rules are adhered to. All the best as you format your MacBook pro!

Denis is an article/blog and content writer with over 7 years of experience in writing on content on different niches, including product reviews, buyer’s guide, health, travel, fitness, technology, tourism. I also have enough experience in SEO writing.


