When installing Windows, you get the error “I could not create a new partition or locate an existing one” and don’t know how to fix it? Here’s how to proceed.
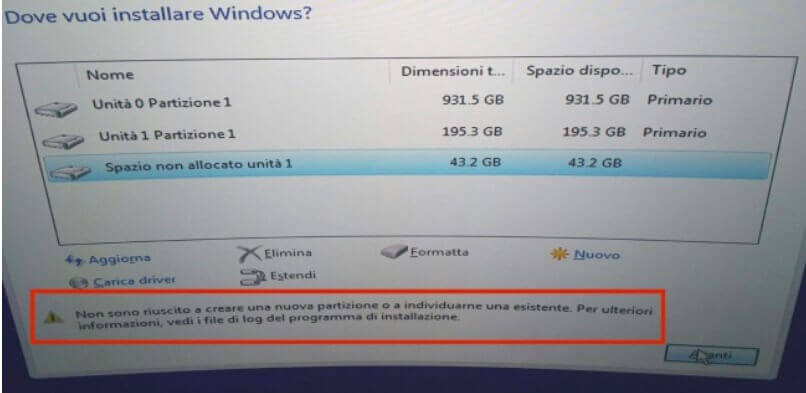
When you try to install Windows 10, Windows 8.1, or Windows 7 from a USB media or from an external disk or DVD, it may happen that the procedure installation – once the chosen drive has been selected – inexplicably returns the error I was unable to create a new partition or locate an existing one.
The problem is not common and can occur when you correctly select the custom installation of Windows and proceed with choosing the destination drive (hard disk or SSD): see Format PC to reinstall Windows from scratch.
The causes of the error I could not create a new partition or identify an existing one during the Windows installation phase are related to the hardware configuration and vary from PC to PC (they have to do with the motherboard, with the USB interface, with the USB media you are using).
During the initial phase of the installation, Windows must locate the boot drive in which to create a primary partition for booting the operating system (to configure MBR / GPT and bootloader; see Differences between MBR and GPT. manage partitions and booted the system and EasyBCD, manage the Windows boot menu and start ISO files ).
In some situations, the Windows installation procedure may not determine which drive is external USB media and which drive is a hard drive / SSD to load the operating system on.
If Windows cannot determine the drive used for installation, the error message I was unable to create a new partition or locate an existing one will appear.
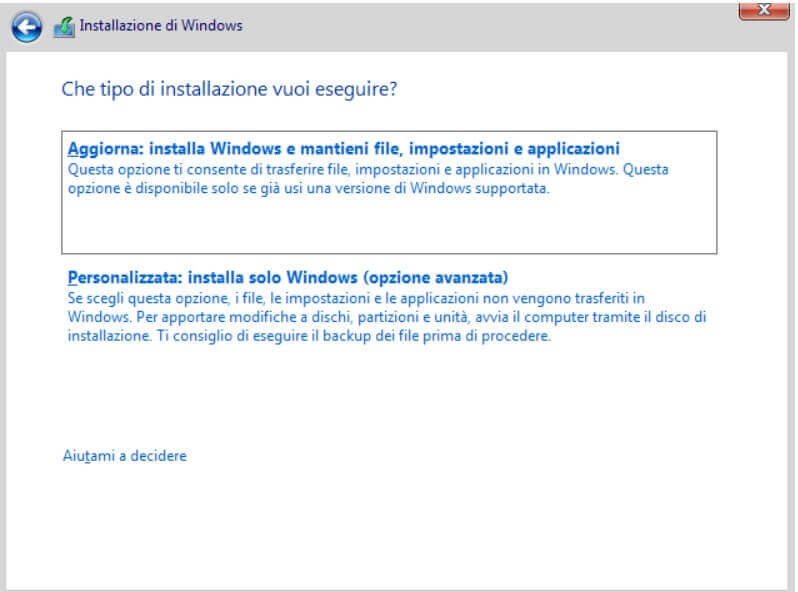
How to resolve the error “I was unable to create a new partition or locate an existing one.”
To resolve the error, I could not create a new partition or locate an existing one and install Windows; we suggest you try the following procedure.
It is a somewhat “convoluted” series of steps, but, in most cases, you should be able to overcome the impasse.
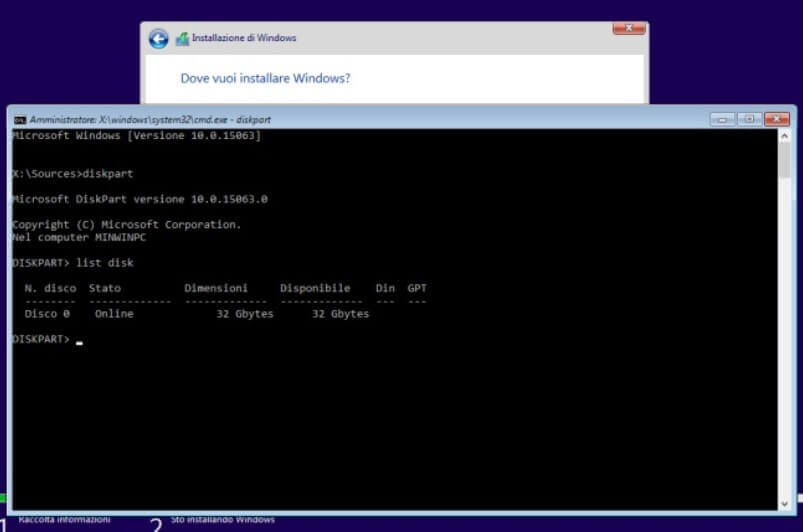
1) When the Where do you want to install the Windows screen appears? Press the SHIFT + F10 key combination to bring up the command prompt.
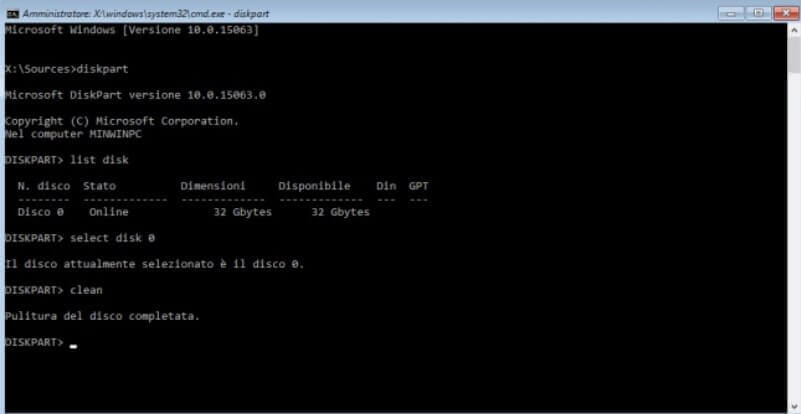
2) Type diskpart and press Enter.
3) Enter the following command in Diskpart:
list disk
Take note of the number associated with the drive where you intend to install Windows.
To identify the correct drive (SSD or hard disk), you can help yourself with its overall size indicated in the Dimensions column.
4) Type the following commands:
select disk 0 (replacing 0 with the number corresponding to the drive where you intend to install Windows)
clean (all contents of the selected disk drive will be deleted)
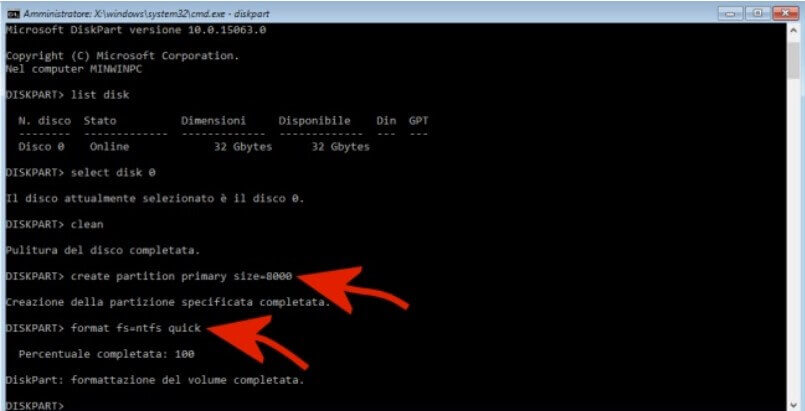
create partition primary size = 8000 This
will create an 8GB primary partition on the drive you chose earlier and will host Windows.
format fs = ntfs quick (the newly created primary partition will be quickly formatted using the NTFS file system)
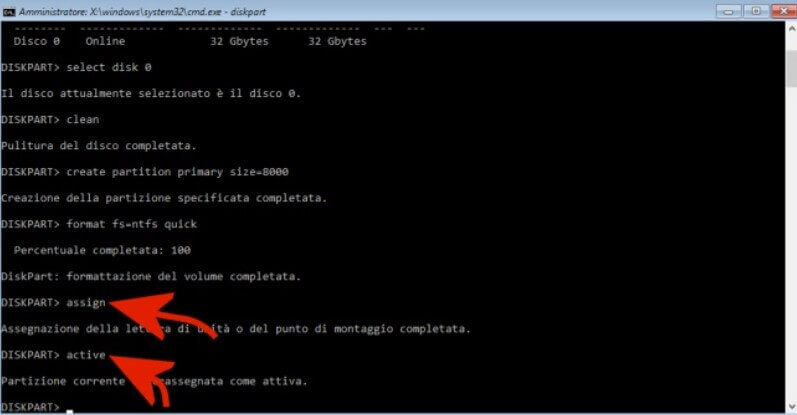
Enter the following two commands:
assign
active
The two commands will allow, respectively, to assign a drive letter to the created partition and to set it as an “active” partition.
5) Check the list of available drives by issuing the following command:
list volume
The DiskPart utility will list every partition and disk drive present and usable by the system.
In the example, the newly created 8 GB (8000 MB) partition is shown as “Volume 1,” and DiskPart has assigned the drive letter C.
6) At this point, you will have to copy the Windows installation files from the removable media to the C: drive.
To proceed, just type:
exit
cd d: (instead of d: specify the drive letter assigned to the USB media, the external disk, the DVD, …)
xcopy d: c: / e / h / k ( here too, the letter d: should be replaced with the drive identification letter assigned to the USB support, to the external disk, to the DVD, …)
7) After copying the file from the Windows installation media to drive C, you will have to type exit, remove this media, then click on the red “X” in the Where do you want to install Windows window? Then, again on the “X” in the main setup screen and confirm the installation’s cancellation: in this way, the machine will be restarted.
At the next reboot, the Windows installation procedure will automatically load.

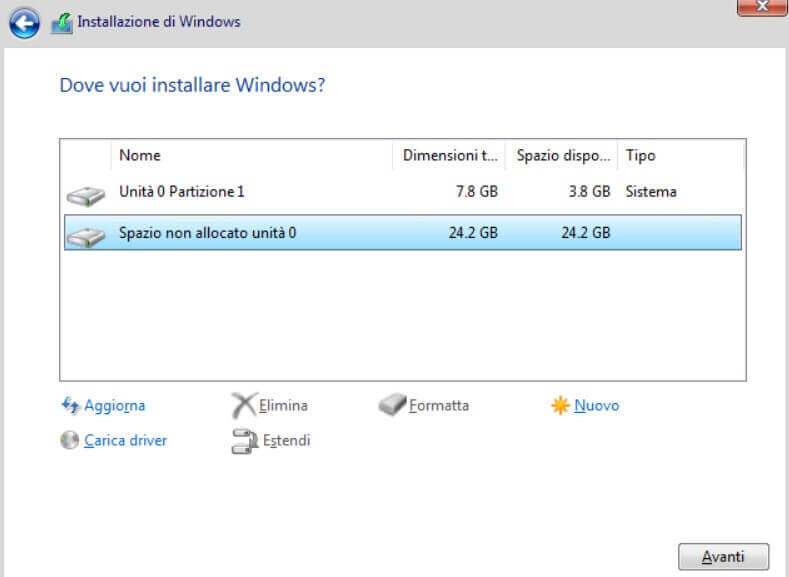
8) After having again opted for the custom installation, when choosing the partition in which you intend to load Windows, you will need to choose the one corresponding to the Unallocated space, leaving intact the first 8 GB partition created previously, and click Next.
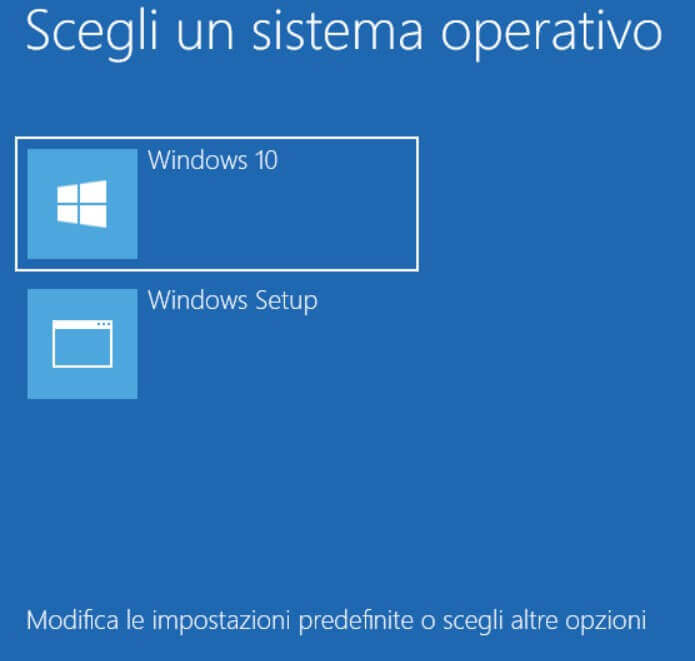
9) At the end of the Windows installation, after the last reboot, the following screen will appear at boot:
To start Windows, click on the first item (do not choose Windows Setup ).
10) Once the Windows desktop appears, it is possible to delete the Windows Setup entry during boot and start the operating system directly.
To proceed, you could use the msconfig utility (by choosing the Startup Options tab and clicking on the Delete button once you have chosen the Windows Setup (\ windows) item ).
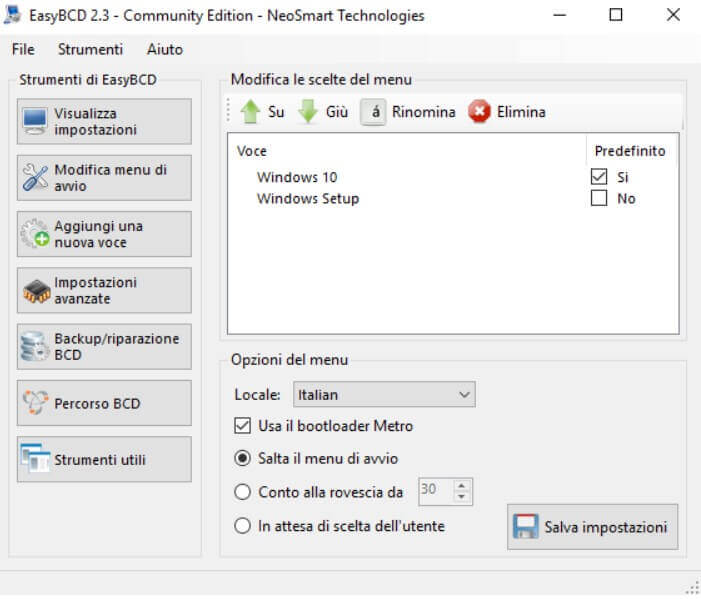
However, we suggest that you download and start EasyBCD ( EasyBCD, manage Windows boot menu and start ISO file ), click on the Change boot menu, select the option Skip boot menu and click Save Settings.
After closing EasyBCD, each time the system restarts, Windows will automatically run.
Subsequently, if you need to reinstall Windows from the previously created partition, restart EasyBCD, click again on Change Start Menu, check the Use the Metro bootloader box and choose Countdown.
Using the Windows + R key combination and then typing diskmgmt.msc, you can optionally assign an identifying drive letter to the 8 GB partition (right click, Change drive letter and path ) to see its contents in the This PC window o Computer.

A tech-savvy writer with a knack for finding the latest technology in the market, this is what describes John Carter. With more than 8 years of experience as a journalist, John graduated as an engineer and ventured soon into the world of online journalism. His interest includes gadget reviews, decoding OS errors, hunting information on the latest technology, and so on.


