What to do when the CPU is 100% in Windows 10: the Task Manager is the first tool to get an idea about the problem.
When the whole system is slow and clumsy in performing any kind of operation, the problem may be due to the abnormal occupation of the processor by Windows and the running programs.
The first tip is to press the key combination CTRL + SHIFT + ESC then click on More details to understand which processes are engaging the processor the most.
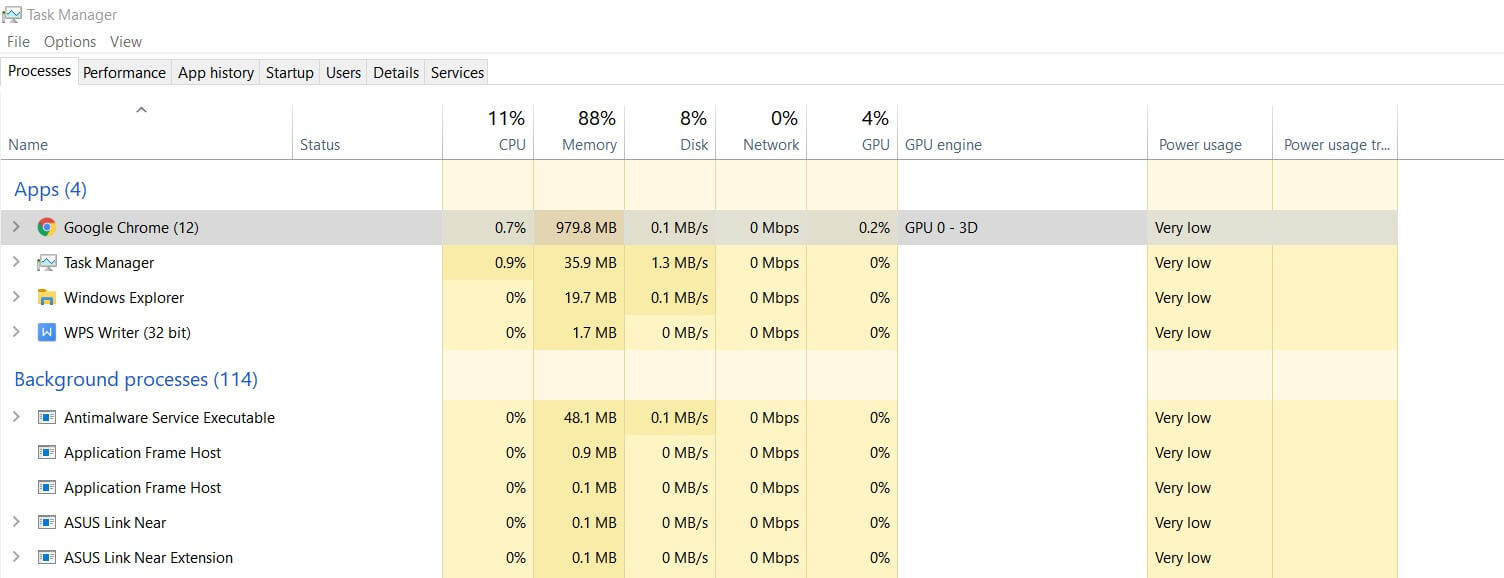
If in Windows 10 the CPU is at 100% (you can immediately verify this by looking at the icon that appears in the tray bar, at the bottom right, next to the clock) or in any case it is used permanently at 75% -100% for the most of the time there is likely a problem.
Tab Details of the Task Manager window ( Task Manager ), so we recommend clicking on the CPU column header to understand what processes are taking stricter than the processor.
The important thing is to click on the CPU column so that the processes are sorted in descending order (i.e. from the one that occupies the processor the most to the one that occupies it the least). If the processes are not sorted in this way, you can click again on the CPU column.
The System Idle Process should get as close to 100% CPU occupation as possible. In reality, it is a “virtual” process that indicates how much the CPU is “low”.
For more information on the Windows 10 Task Manager, we suggest reading the article Windows 10 Task Manager: what it allows you to do.
Windows 10, 100% CPU with Windows Defender
If it were Windows Defender, for long periods, to occupy the CPU at 100% or almost on the Windows 10 system, it would be found – among the running processes – Antimalware Service Executable to engage the processor in a significant way.
We suggest that you stop Windows Defender completely and consider installing a third-party antimalware solution in these situations.
The procedure for uninstalling Windows Defender in Windows 10 can be found in the article How to disable Windows Defender completely.
Applying the tips outlined in the article, CPU usage should drop dramatically.
CPU occupation by the BackgroundTransferHost and BackgroundTaskHost processes
Another very common problem, reported by several users, is the CPU occupation – regularly – by the Windows 10 BackgroundTransferHost and BackgroundTaskHost processes.
If, looking at the Details tab’s contents, you see appear – among the processes that occupy more the processor – BackgroundTransferHost and/or BackgroundTaskHost.
Windows Update can take the CPU seriously
If the processes related to Windows Update occupy the processor in such a way as to hinder normal activities, you can try the following interventions:
1) Type Advanced Windows Update options in the Windows 10 search box, click on Choose how to deliver updates.
Set the Updates from multiple locations option to Disabled.
2) In the Windows Update Settings screen, click on Change activity time and enter a time window corresponding to the one during which you usually use the Windows 10 device for productive purposes.
3) You can temporarily stop the Windows Update service by typing cmd in the Windows 10 search box and then pressing the key combination CTRL + SHIFT + ENTER.
At this point, Windows Update can be stopped simply by typing:
sc stop wuauserv
In this way, you can continue working without “slowdowns” until the next restart of the machine (or you can start Windows Update again by typing sc start wuauserv ).
Check other processes that take up 100% CPU in Windows 10
If there are other processes in the Details tab of the Task Manager, which occupy the CPU at 100%, we suggest you write down their name then use, for example, the Should I block it? To understand if they are legitimate objects or dangerous or potentially dangerous elements.
To search, just type the file name in the box at the top right and press the Search button.
From the Details tab of the Task Manager, however, we recommend that you right-click on the file that is occupying the CPU significantly and then choose the Open file path.
In this way, Windows 10 will open a File Explorer window that will allow, based on the path where the file is stored, to recognize its identity.
Clicking the right mouse button and choosing Properties (you can do it also by the Task Manager), by clicking on the card details and Digital Signatures, you can draw an identikit of files (even suggest using the service VirusTotal).
Having established that the application causes problems, you can evaluate its uninstallation or, in the case of active background processes, deactivation from the Startup tab of the Task Manager.
Very long HOSTS file and 100% CPU
Not everyone knows that a very long Windows HOSTS file could be responsible for the CPU splashing at 100%.
The HOSTS file, we remind you, is a simple text file using which you can force the assignment of a specific mnemonic address to an IP address.
The HOSTS file – not only available in Windows but, in different paths, also on other operating systems – allows you to “override” any DNS server and make sure that by typing the mnemonic address entered, the browser and any other application installed on the machine, send a request to the set IP.
As we explained in the article Editing the Windows HOSTS file and blocking apps that “call home”, you can write in the HOSTS file, for example, 0.0.0.0 www.facebook.com and 0.0.0.0 facebook.com to block any attempt to visit Facebook from a single PC.
As we explained in the article Editing the Windows HOSTS file and blocking apps that “call home” block any attempt to visit Facebook from a single PC.
The Windows DNS Client service goes into crisis when the HOSTS file (whose content can be modified by opening the % windir% \ system32 \ drivers \ etc \ HOSTS file in a text editor run with administrator rights) is very long and therefore contains many lines.
To solve the 100% CPU problem in Windows 10 and previous versions of Windows with a very long HOSTS file, we suggest you download this file, then double click on the Disable caching DNS.reg file and agree to enter the information in the registry Windows system.
Windows will often query the DNS server to resolve domain names not indicated in the HOSTS file, but the additional latency thus introduced should be almost irrelevant.
In case you want to cancel the change just applied, just double click on the file Activate caching DNS.reg.
If the intervention is not conclusive, it may be worth trying to completely disable the Windows DNS Client service by going to the command prompt opened with administrator rights and typing the following:
sc stop dnscache
sc config dnscache start = disabled
However, the intervention has significant implications because the network analysis services looking for other devices connected to the LAN will not work. It will no longer be possible to connect with the Active Directory controller if the Windows system in use belongs to a domain.
To restore the previous configuration, you can type the following commands:
sc config dnscache start = auto
sc start dnscache

A tech-savvy writer with a knack for finding the latest technology in the market, this is what describes John Carter. With more than 8 years of experience as a journalist, John graduated as an engineer and ventured soon into the world of online journalism. His interest includes gadget reviews, decoding OS errors, hunting information on the latest technology, and so on.


. What are the news of the new format for images")


. What are the news of the new format for images")


