Macintosh Operating System (OS) is loaded with a set of shortcuts and gestures that are geared towards increasing efficiency at the workplace. While working with multiple open applications or even screens, navigating through them becomes essential. From the option of a magic mouse or a multi-touch trackpad, you can be able to pinch swipe, tap or spread a single or a couple of fingers to perform useful tasks.
Common gestures in MacOS are usually passed down from the previous versions of Macintosh to the next. For instance, functionalities in High Sierra are almost the same as those from its predecessors. The following are some of the common multi-touch gestures on your MacOS X.
Trackpad gestures
Trackpad gestures require a built-in multi-touch trackpad or a magic trackpad as it has already been hinted. If in case your trackpad is in support for a Force Touch, you can force use it to obtain touch feedback. For more on these gestures, Select Apple menu > Preferences and then open Trackpad by clicking on it. Gestures are usually flexible to be turned off. Their type can also be altered. The following is a list of possible trackpad gestures in macOS X and later versions of Macintosh;
- Swiping up with four fingers to opens up mission control. In some version of OS, three fingers still perform the same function.
- Tap with one finger to perform the click command
- Swiping down with three / four fingers enables you to see all windows of the app you’re using. This is what is referred to as App expose
- Tapping with three / four fingers allows you to look up a word or perform actions with phone numbers, dates, etc.
- Swiping right or left using three / four fingers allows you to navigate between full-screen apps and desktops.
- To scroll, slide up or down using two fingers.
- To rotate a photo, move two fingers around each other.
- The Notification Center is revealed after swiping left from the right edge with two fingers.
- Tap with two fingers to perform a secondary click or right clicking.
- For zooming in and out, simply pinch using two fingers.
- To navigate between the next and the previous pages, swipe to the left or right using two fingers.
- To reveal the desktop spread three fingers against your thumb.
- The Launchpad is displayed by pinching your thumb against three fingers.
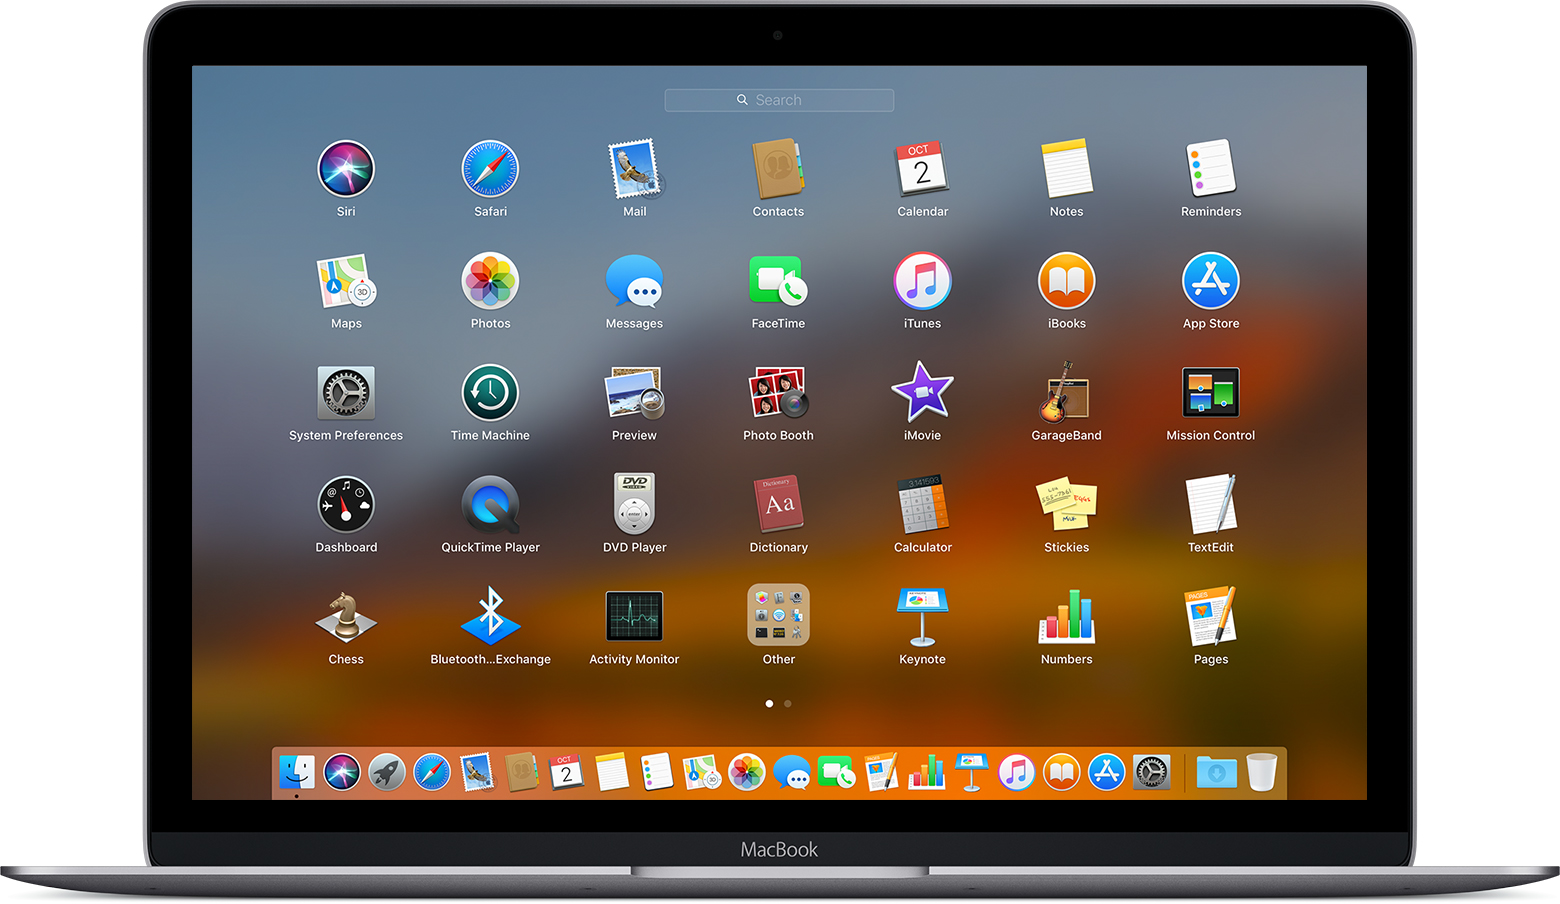
What is Launchpad?
Launchpad was one of Apple’s “Back to the Mac” initiative. It was aimed at making the desktop have the same outlook as an iPad. Launchpad is meant for everyone who intends to have a home screen-like Launcher on macOS X. Launchpad comes in handy in viewing, launching, deleting, searching and generally managing applications on Macintosh OS X.
Launching Launchpad
So which gesture can be used to launch Launchpad?’ Well, there are a couple of options on how to go about this;
- Click on the launchpad in the dock. It is difficult to miss it as it resembles a rocket, or use control strip
- Alternatively, pinch your thumb against three other fingers. This is commonly referred to as the ‘four finger pinch gesture.’
- Use the Launchpad button on the keyboard. It looks like a 3×2 grid of icons and is labeled F4.
In closing Launchpad without opening an application, click anywhere outside from the application icon(s), or simply hit the ESC button.
Launching applications on Launchpad
To Open apps in Launchpad you may select one of the following options;
- Click on the application icon.
- If the symbol is not visible, look for the application on another page of Launchpad. To navigate through the pages, swipe to the right or left on the trackpad or press command-right arrow, or Command-left arrow. If the application icon is still missing, then the last option is to key in the name in the search field at the top of launchpad. MacOS X is ‘smart’ with suggestive autofill as you begin typing the name of the applications you intend to launch.
Adding applications to Launchpad
Applications downloaded from Apple store automatically appear in Launchpad. Other applications that are not sourced from Apple store (3rd party applications) may have to be added manually to Launchpad. The first option is to refresh Launchpad manually. To do this, follow the general steps below;
- Navigate to your desktop
- At the top of your screen, click on the Go menu
- Hold the Option key
- Click on Library
- Double click to open the Application Support folder
- Double click to open the Dock folder
- Drag all files having the extension .db into the trash
- At the top left corner of your screen, click on the Apple icon
- Proceed to the restart button
After your computer has restarted, you should find all your applications in the Launchpad.
To remove applications from Launchpad, click and hold the icon until all the non-selected icons begin to jiggle. Then you can proceed to click on the application’s delete button. Note that this will uninstall your app and you might have to re-install it if in case you need it soon.
However, a delete button does not accompany system default applications, and therefore they can’t be uninstalled. You may drag an item from launchpad to add it to the dock if you need the app in both the launchpad and the dock.
Organizing applications in Launchpad
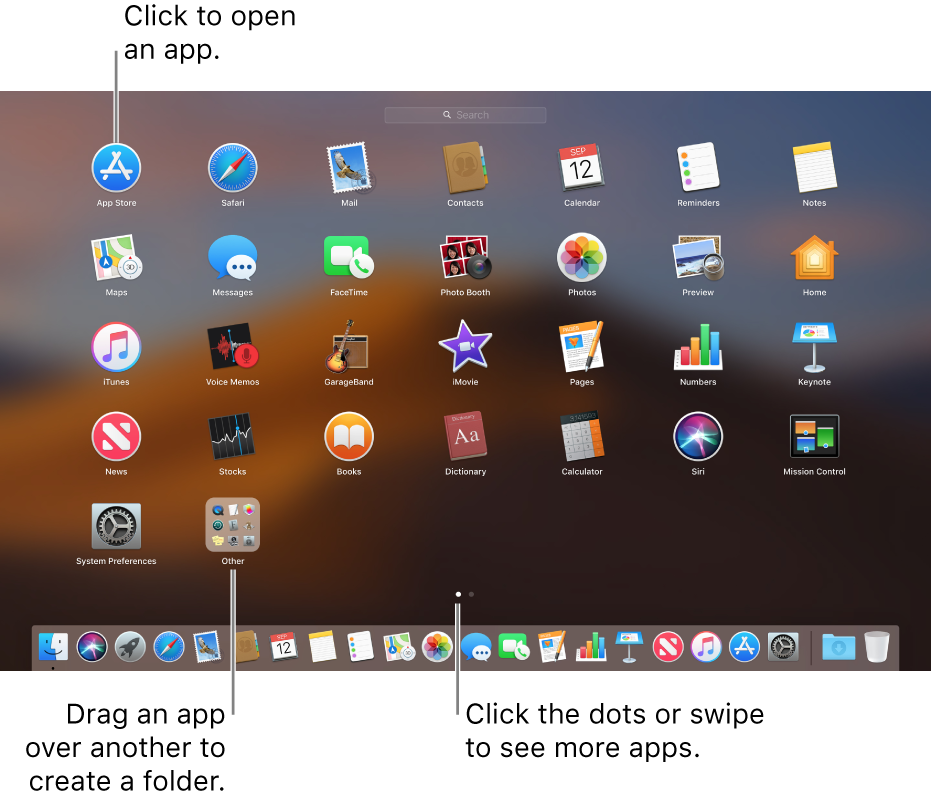
Dragging an application icon gives you the freedom to navigate through the desired page before releasing the icon. To get to a different page from the one you are currently on, drag the icon to the edge of the screen. It is recommended to group applications concerning their similarity in functionality, or favorite (frequently used)
Dragging an application icon over another icon creates a folder that will ‘house’ the two icons. To ‘top up’ the number of icons in this newly created folder, repeat the same procedure. After successful addition of other icons, the name of the folder is editable by clicking on the title after opening it.

Denis is an article/blog and content writer with over 7 years of experience in writing on content on different niches, including product reviews, buyer’s guide, health, travel, fitness, technology, tourism. I also have enough experience in SEO writing.


